NPC’s are the characters who have pivotal roles in the game, but who do not themselves participate in the game.
An example of a NPC would be an avatar who teaches the playing avatars, but one who himself does not play the game.
Below are the steps involved in the creation of NPC’s.
Creating a NPC: -
1) The first step is to create an avatar.
To do so, refer to the tutorial titled “Creating an avatar in Esoteric Editor”.
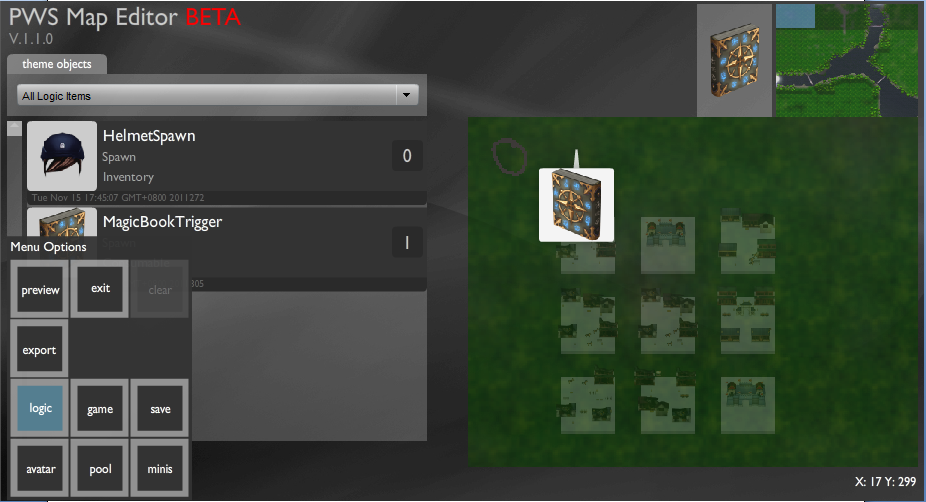
2) In the main window of the editor: Move the mouse over “menu options” placed on the left bottom of the screen and click on “logic”.
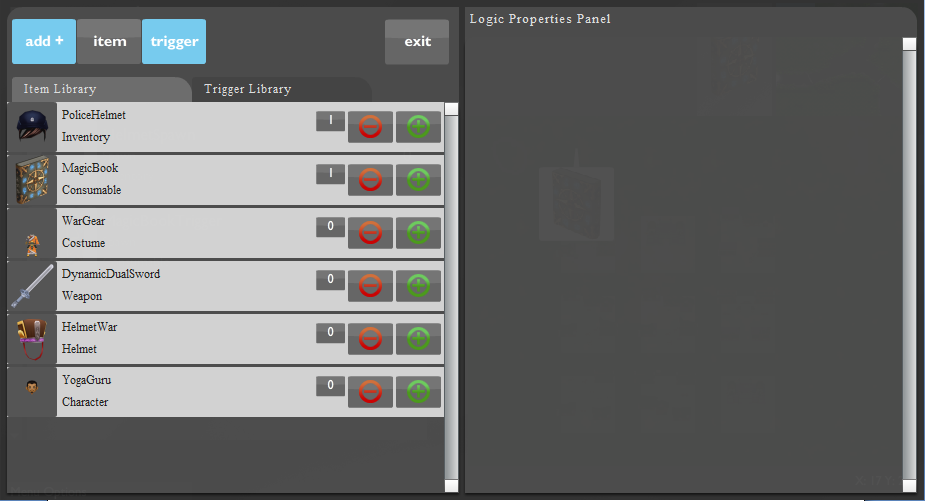
3) The logic editor opens up, on the left hand side are the “item library” and the “trigger library” buttons, above these is the “add+” button, click on the “add+” button.
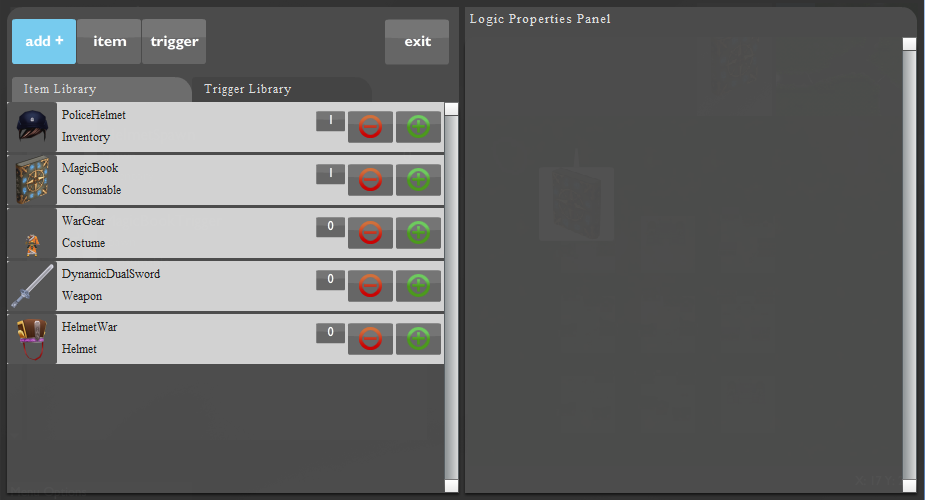
4) On clicking the “add+” button, two buttons named “item” and “trigger” open up.
To start the item creation, click on the “item” button.
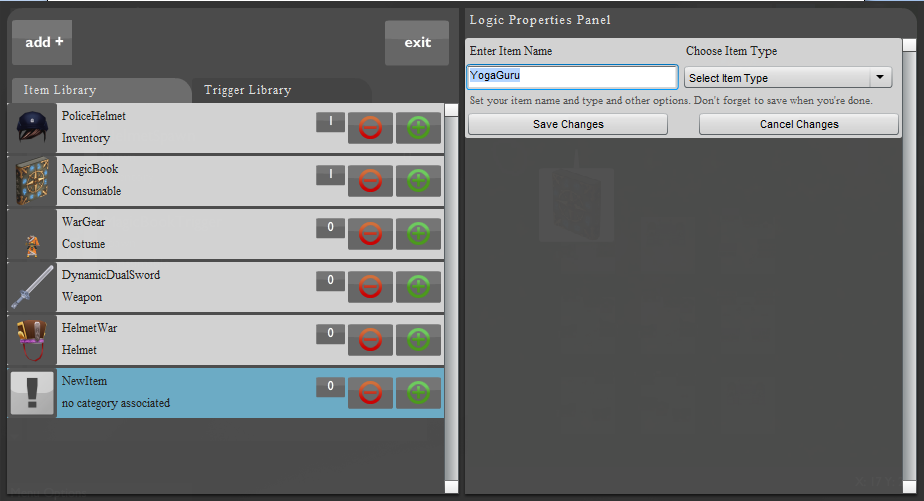
5) On clicking on the item button, a new item is added onto the item library, click on the “NewItem”.
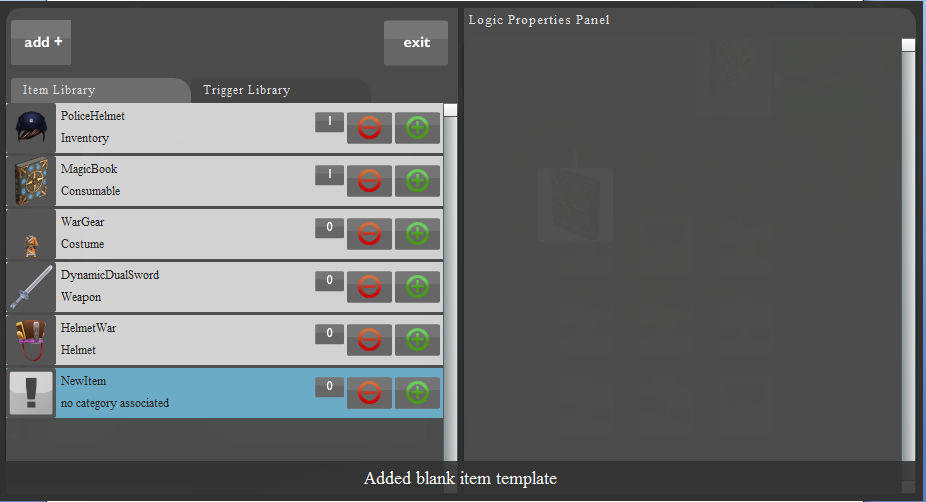
6) After clicking on the “NewItem”, a new window opens up in the Logic Properties Panel.

7) Enter the item name and move the mouse over the drop down menu below “Choose Item Type” and select the item type as “Character”.
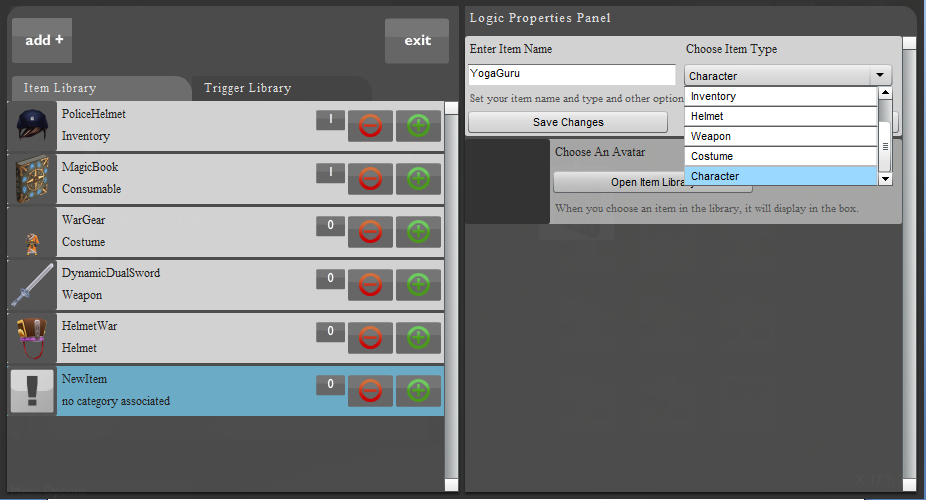
8) On selecting the item type as character, the logic properties panel fills up.
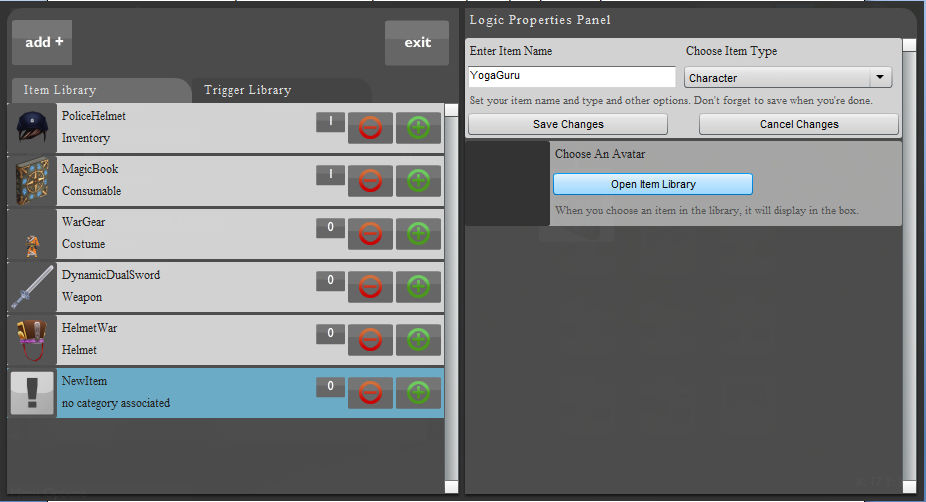
Now we must choose one amongst the avatars we have already created. Esoteric presents a library of the avatars that you have already created.
Press “Open Item Library”.
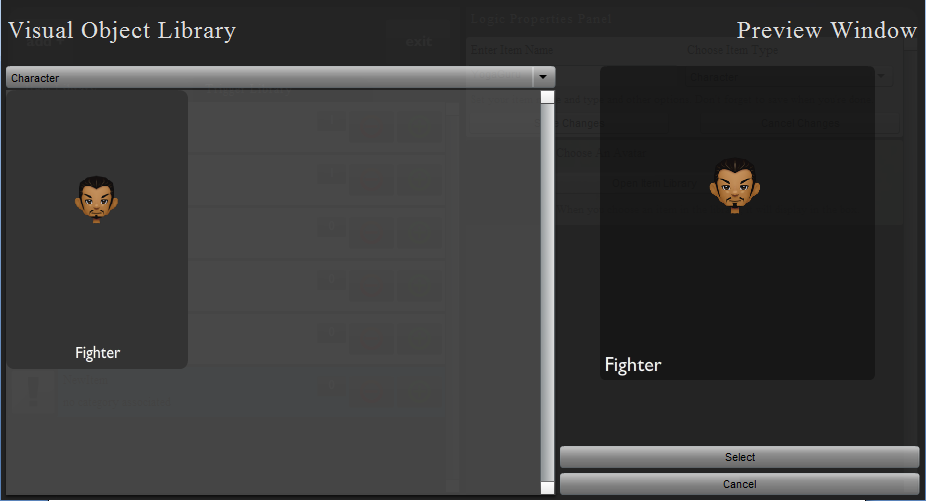
9) A library containing the avatars that you have already created opens up.
As you move your mouse over the avatars, the avatar lights up in blue.
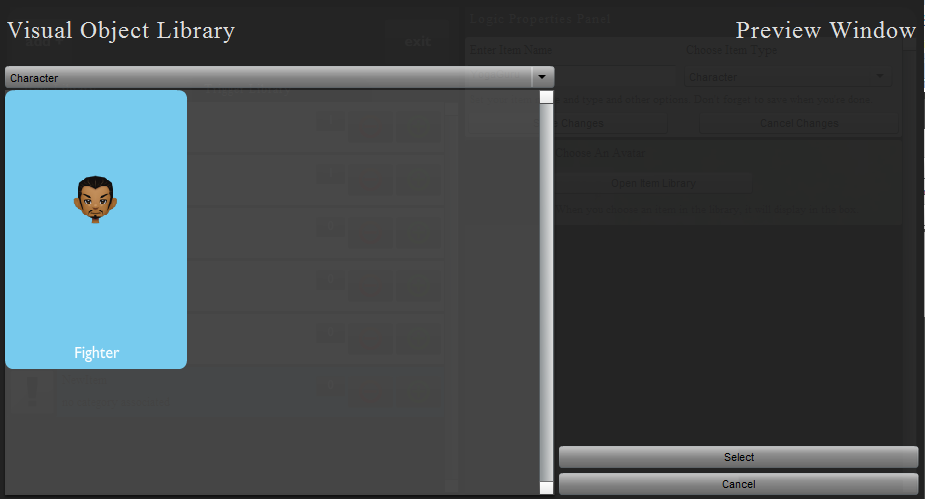
10) Left-click on the avatar to select it.
The selected avatar will appear on the right of the visual library.
11) Click on the “Select” button situated at the bottom of the screen to confirm the selection.
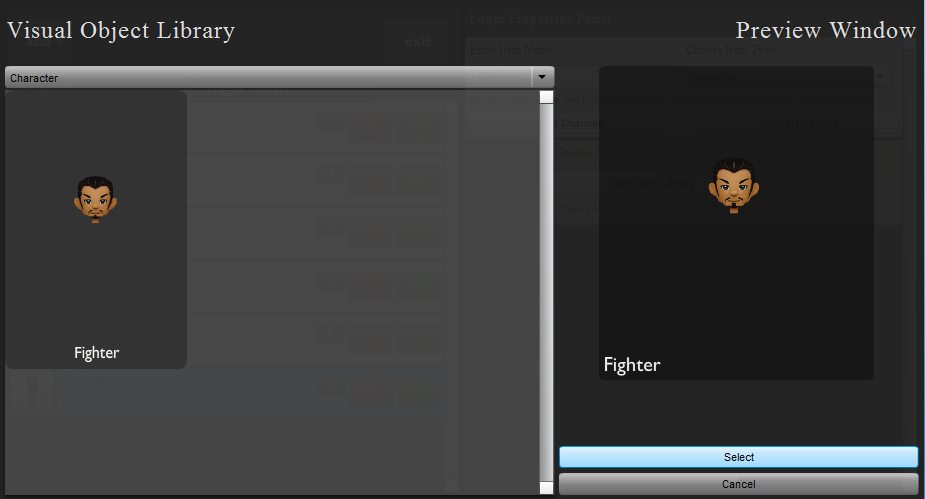
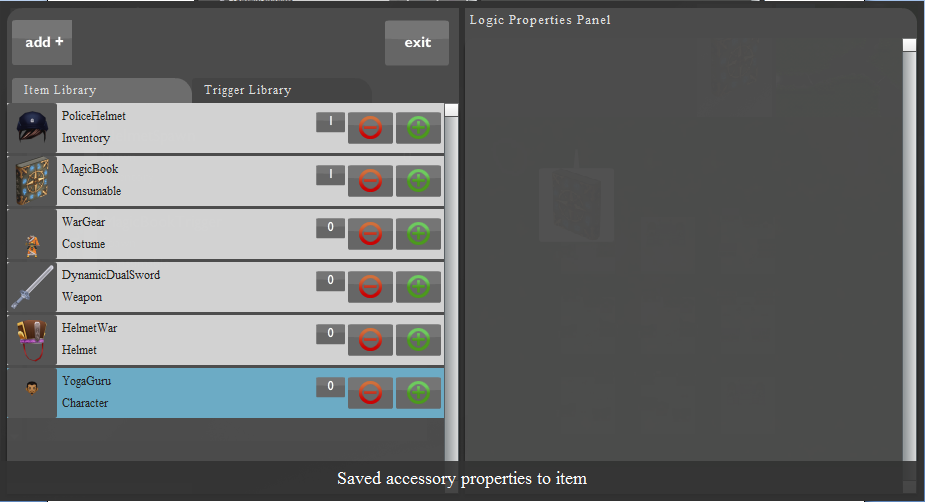
12) Once you have selected your avatar, now you should go to the top of the Logic Properties Panel and click on “Save Changes” to save your avatar.
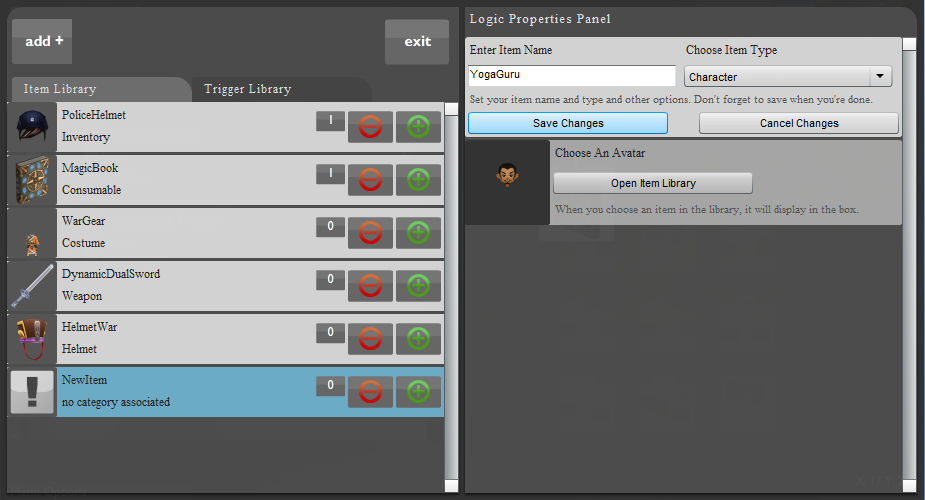
13) Thus we have created a NPC, I have named my NPC “YogaGuru”.
Now we must create a trigger which lets us place the item into the 3D world.
Creating a trigger for a NPC and placing it on the map: -
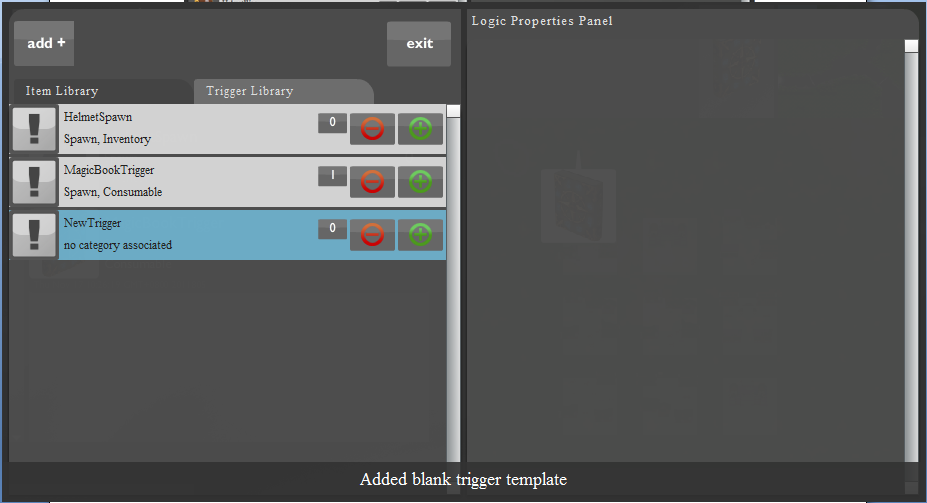
1) Click on the “add +” button located on the top left of your screen, and click on “trigger”.
2) You can now see a trigger called “NewTrigger” in the trigger library. Click on the “NewTrigger”.
3) After clicking on the NewTrigger , a new window opens up in the Logic Properties Panel.
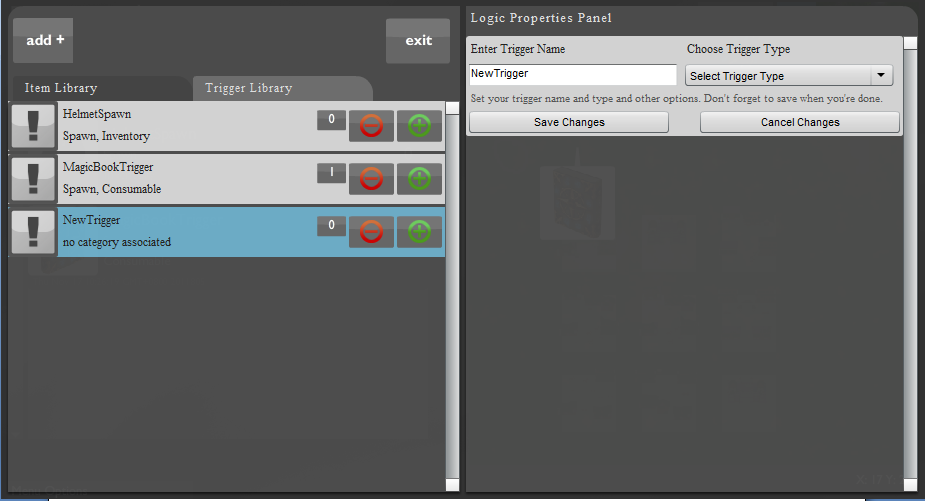
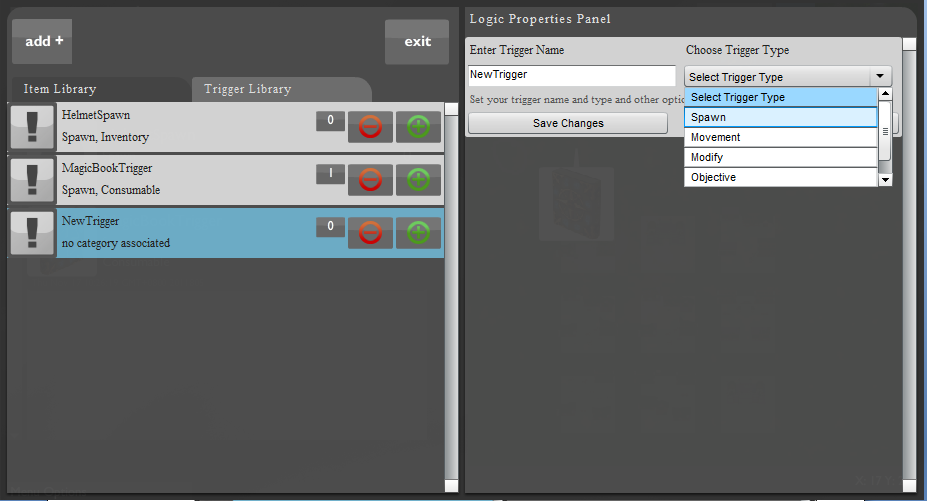
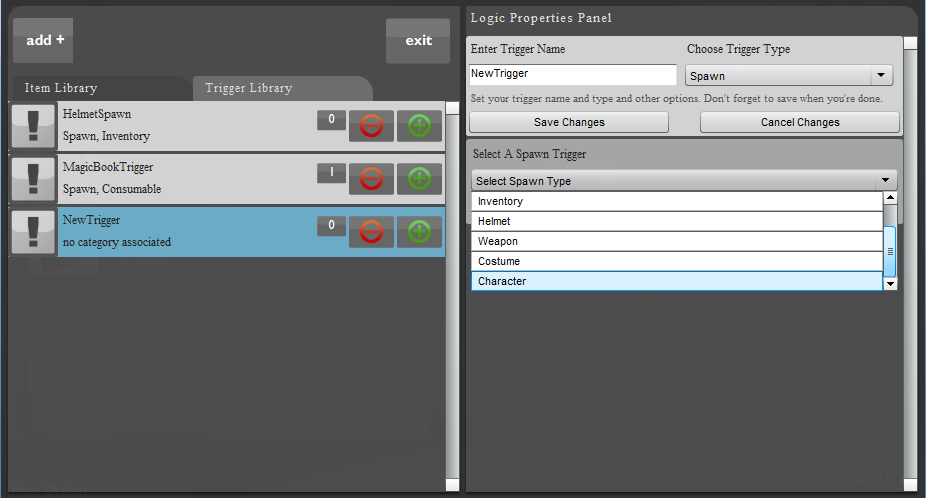
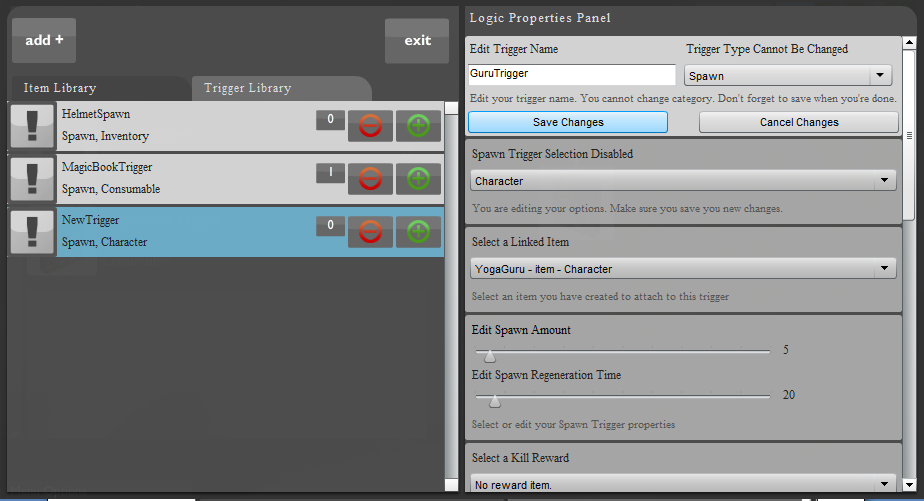
4) Enter the trigger name and choose the trigger type as spawn.
5) On specifying the trigger type as spawn, another drop down menu titled “Select Spawn Type” appears in the logic properties panel.
As you have just created a character item, select the spawn type as “Character”.
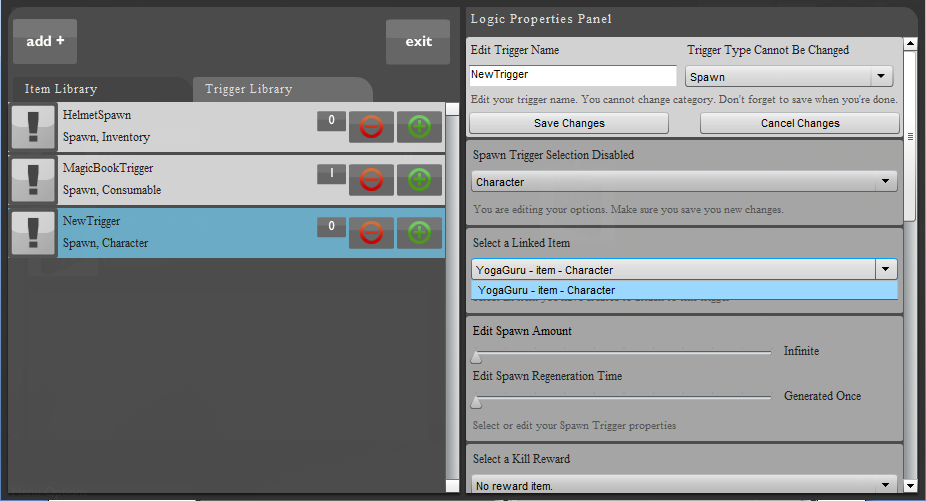
6) On selecting the spawn type as character, another sub-panel titled “Select Linked Item” appears below it.
The drop down menu below it contains all the characters that you have created.
From the drop down menu, select the NPC that you have just created. We will select the NPC YogaGuru that we had created in the last section of this tutorial.
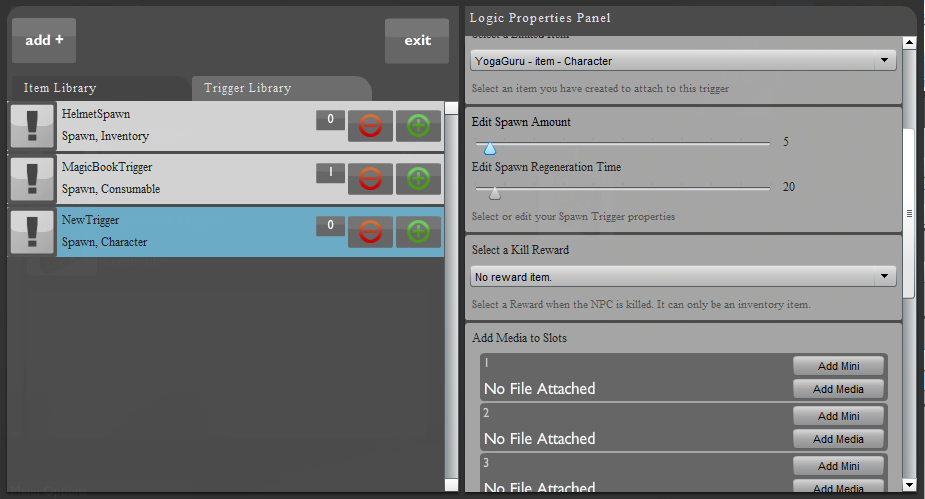
7) Move the scroll bar down and you come across another sub panel with two sliders, titled, “Edit Spawn Amount” and “Edit Spawn Regeneration Time”.
Edit Spawn Amount: -
This indicates the total no. of times the character is generated.
This decides the no. of times your character can be generated, or the no. of lives that the character has.
The default value of the spawn amount is set to infinite.
Moving the slider once to the right sets the spawn amount to 1, and each movement of the slider to the right increases the spawn amount till it reaches a maximum of 100.
Edit Spawn Regeneration Time: -
This decides how fast your character is regenerated on dying.
By default, the character is regenerated as soon as it dies, but each movement of the slider to the right increases the time interval between the dying of the character and its regeneration by 10 seconds.
In our example, we will choose the spawn amount as 5 and spawn regeneration time as 20.
8) Once you have specified the Spawn Amount and the Spawn Regeneration Time, you should now name your trigger and save it.
To do so, you need to go to the top of the Logic Properties Panel , enter a trigger name and click on “Save Changes”.
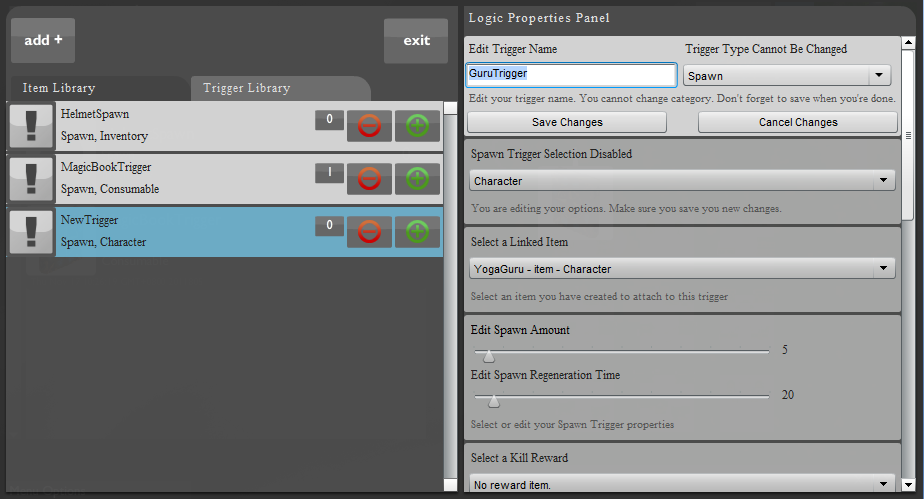
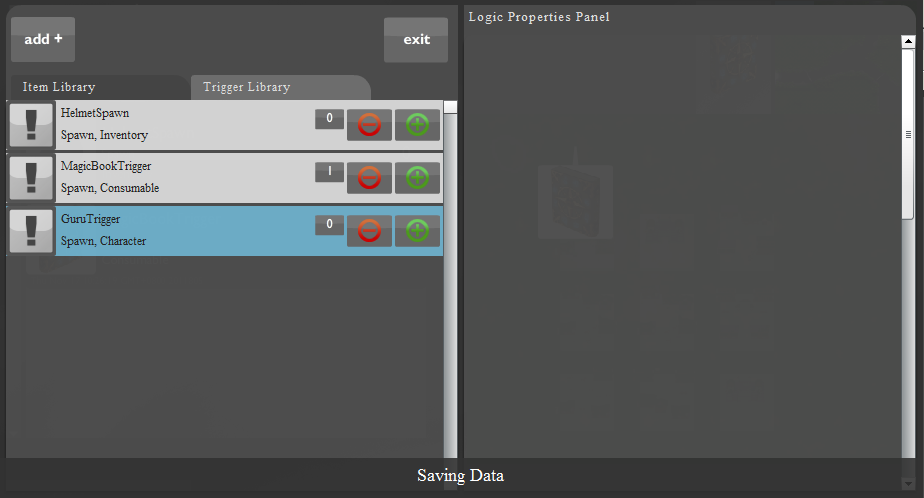
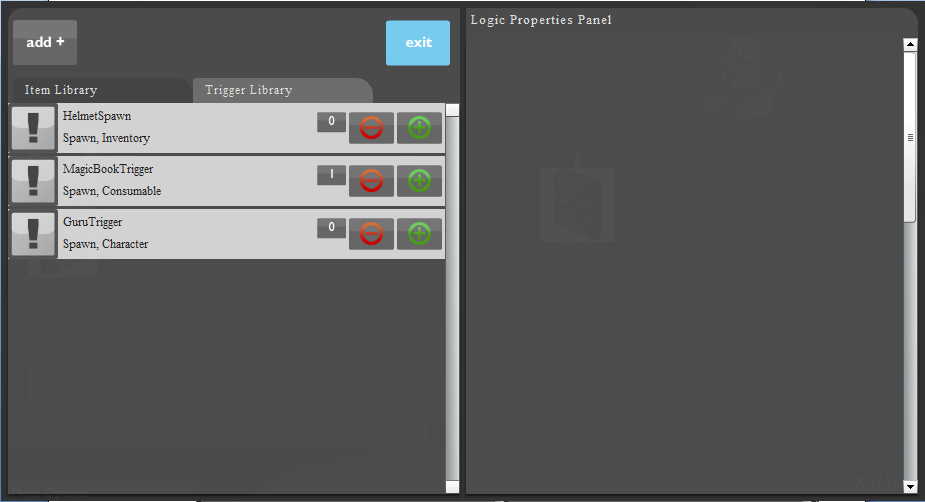
9) The trigger now appears in the Trigger Library with its new name.
10) Now your trigger is ready to be placed on the map.
Click on exit to return to the map creation screen.
11) You return back to the map creation screen.
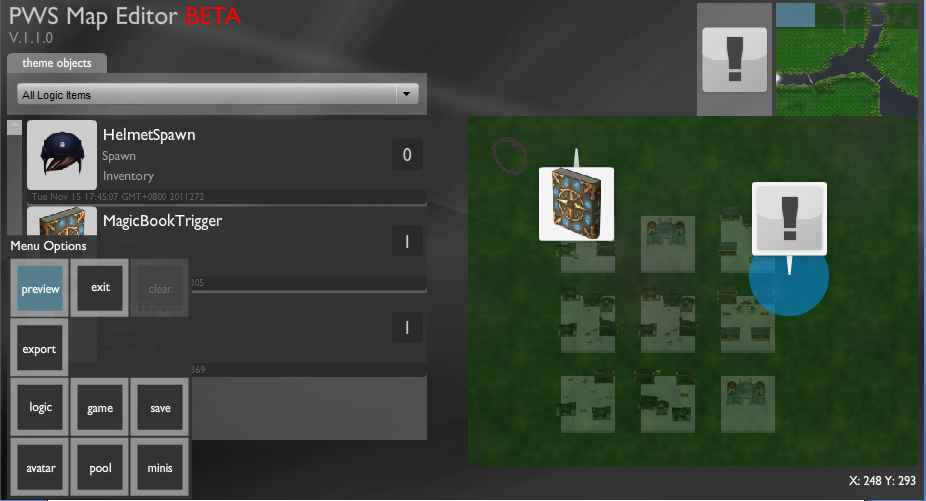
12) In order to create the NPC on the map, you will have to place the trigger on the map.
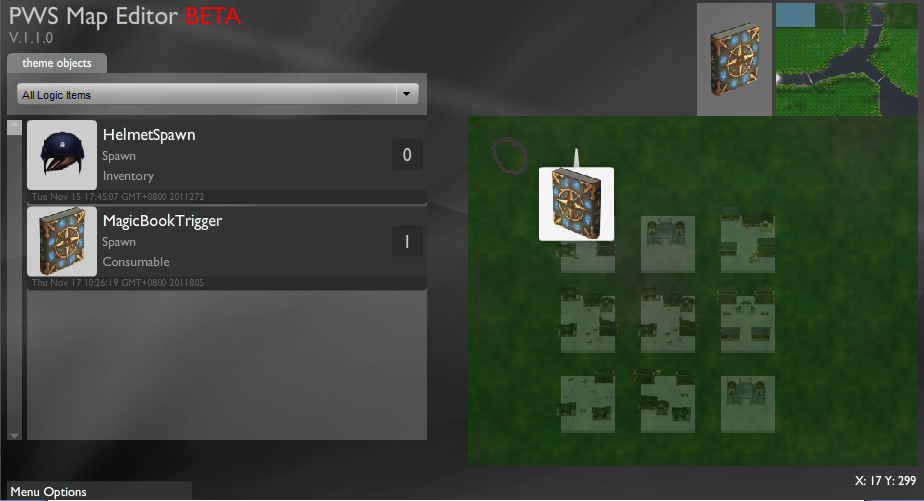
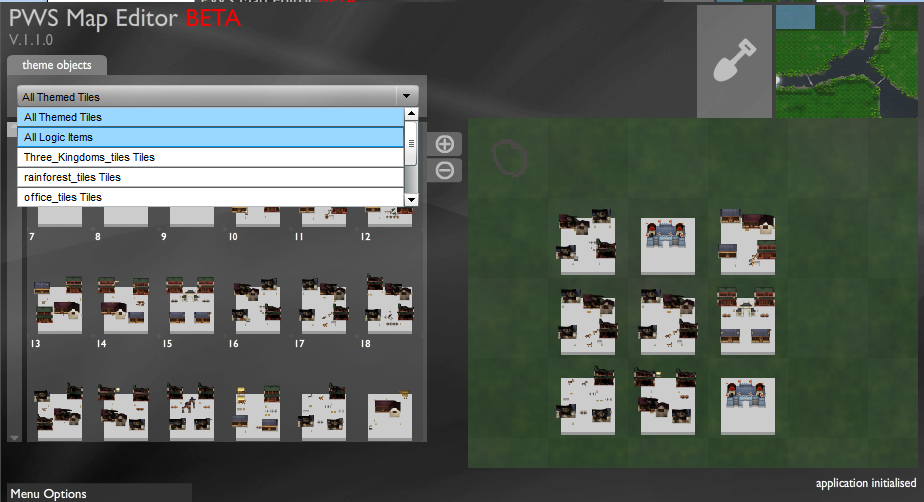
To view the trigger in the palette, first select “All Themed Tiles” and then “all logic items” from the drop down menu located on the palette.
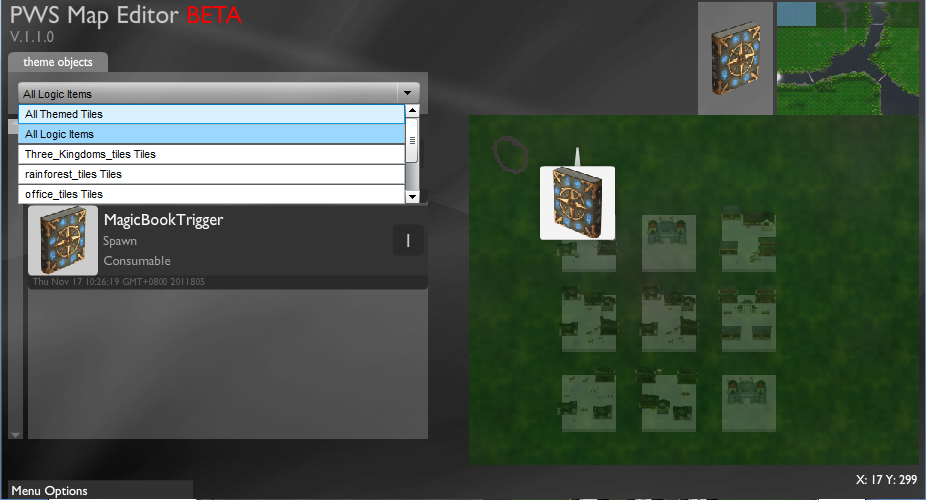
13) Your trigger now appears in the palette.
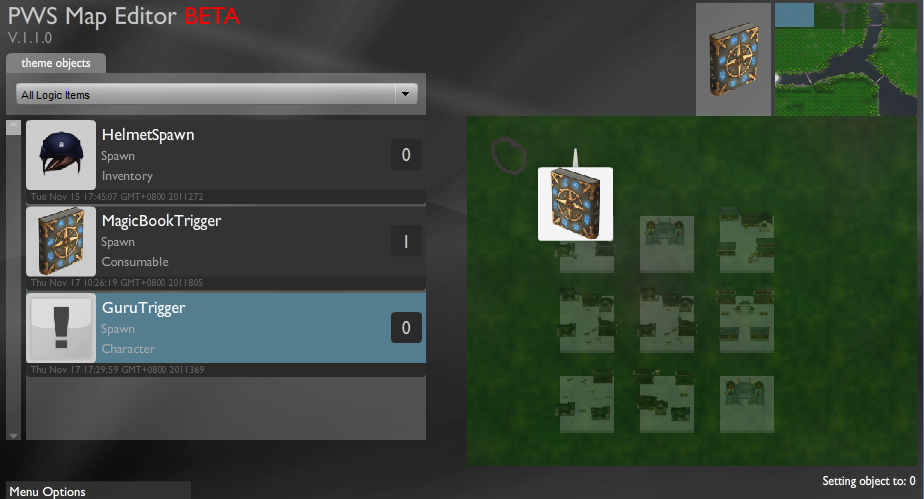
14) Left click on the trigger. Next to the minimap, you should be able to see your trigger in the selection pane.
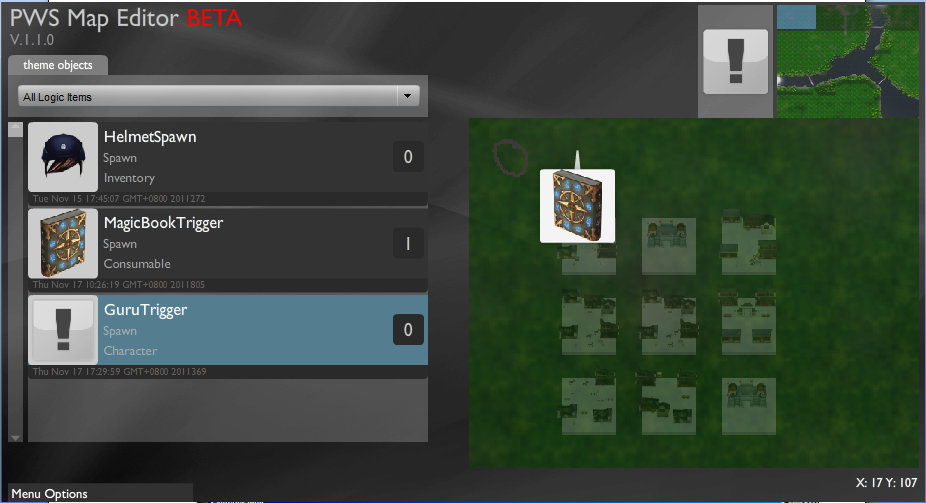
15) With the trigger selected, left click on the main map to place your trigger.

16) Your NPC will be created in the 3-d world, exactly where you placed your trigger on the map.
Go to “Menu Options” at the left bottom of your screen, and click on “preview” to view you’re your game in the 3D world with the NPC on the map.
An example of a NPC would be an avatar who teaches the playing avatars, but one who himself does not play the game.
Below are the steps involved in the creation of NPC’s.
Creating a NPC: -
1) The first step is to create an avatar.
To do so, refer to the tutorial titled “Creating an avatar in Esoteric Editor”.
2) In the main window of the editor: Move the mouse over “menu options” placed on the left bottom of the screen and click on “logic”.
3) The logic editor opens up, on the left hand side are the “item library” and the “trigger library” buttons, above these is the “add+” button, click on the “add+” button.
4) On clicking the “add+” button, two buttons named “item” and “trigger” open up.
To start the item creation, click on the “item” button.
5) On clicking on the item button, a new item is added onto the item library, click on the “NewItem”.
6) After clicking on the “NewItem”, a new window opens up in the Logic Properties Panel.
7) Enter the item name and move the mouse over the drop down menu below “Choose Item Type” and select the item type as “Character”.
8) On selecting the item type as character, the logic properties panel fills up.
Now we must choose one amongst the avatars we have already created. Esoteric presents a library of the avatars that you have already created.
Press “Open Item Library”.
9) A library containing the avatars that you have already created opens up.
As you move your mouse over the avatars, the avatar lights up in blue.
10) Left-click on the avatar to select it.
The selected avatar will appear on the right of the visual library.
11) Click on the “Select” button situated at the bottom of the screen to confirm the selection.
12) Once you have selected your avatar, now you should go to the top of the Logic Properties Panel and click on “Save Changes” to save your avatar.
13) Thus we have created a NPC, I have named my NPC “YogaGuru”.
Now we must create a trigger which lets us place the item into the 3D world.
Creating a trigger for a NPC and placing it on the map: -
1) Click on the “add +” button located on the top left of your screen, and click on “trigger”.
2) You can now see a trigger called “NewTrigger” in the trigger library. Click on the “NewTrigger”.
3) After clicking on the NewTrigger , a new window opens up in the Logic Properties Panel.
4) Enter the trigger name and choose the trigger type as spawn.
5) On specifying the trigger type as spawn, another drop down menu titled “Select Spawn Type” appears in the logic properties panel.
As you have just created a character item, select the spawn type as “Character”.
6) On selecting the spawn type as character, another sub-panel titled “Select Linked Item” appears below it.
The drop down menu below it contains all the characters that you have created.
From the drop down menu, select the NPC that you have just created. We will select the NPC YogaGuru that we had created in the last section of this tutorial.
7) Move the scroll bar down and you come across another sub panel with two sliders, titled, “Edit Spawn Amount” and “Edit Spawn Regeneration Time”.
Edit Spawn Amount: -
This indicates the total no. of times the character is generated.
This decides the no. of times your character can be generated, or the no. of lives that the character has.
The default value of the spawn amount is set to infinite.
Moving the slider once to the right sets the spawn amount to 1, and each movement of the slider to the right increases the spawn amount till it reaches a maximum of 100.
Edit Spawn Regeneration Time: -
This decides how fast your character is regenerated on dying.
By default, the character is regenerated as soon as it dies, but each movement of the slider to the right increases the time interval between the dying of the character and its regeneration by 10 seconds.
In our example, we will choose the spawn amount as 5 and spawn regeneration time as 20.
8) Once you have specified the Spawn Amount and the Spawn Regeneration Time, you should now name your trigger and save it.
To do so, you need to go to the top of the Logic Properties Panel , enter a trigger name and click on “Save Changes”.
9) The trigger now appears in the Trigger Library with its new name.
10) Now your trigger is ready to be placed on the map.
Click on exit to return to the map creation screen.
11) You return back to the map creation screen.
12) In order to create the NPC on the map, you will have to place the trigger on the map.
To view the trigger in the palette, first select “All Themed Tiles” and then “all logic items” from the drop down menu located on the palette.
13) Your trigger now appears in the palette.
14) Left click on the trigger. Next to the minimap, you should be able to see your trigger in the selection pane.
15) With the trigger selected, left click on the main map to place your trigger.
16) Your NPC will be created in the 3-d world, exactly where you placed your trigger on the map.
Go to “Menu Options” at the left bottom of your screen, and click on “preview” to view you’re your game in the 3D world with the NPC on the map.
No comments:
Post a Comment