Creating costumes, weapons and helmets for the avatar
In this tutorial, we will illustrate how to create a costume. Weapons and helmets can be created in the same way as the costumes.
Creating a costume: -
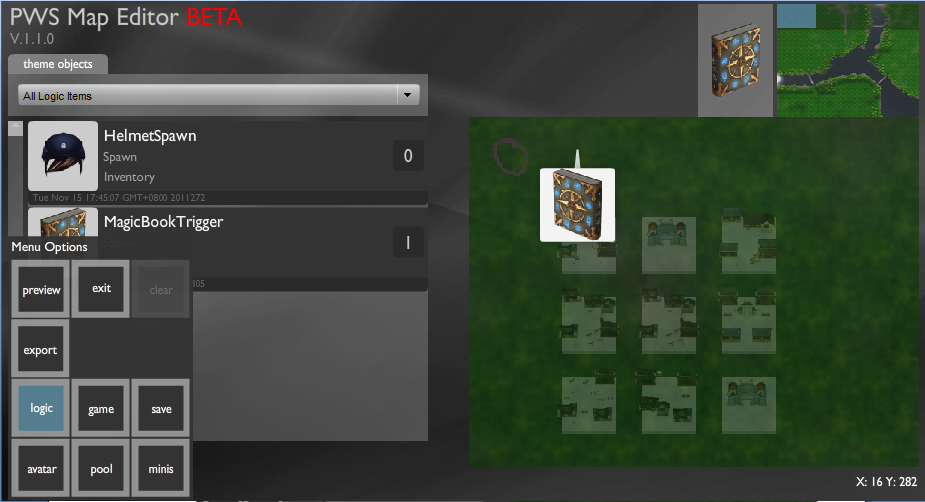
1) In the main window of the editor: Move the mouse over “menu options” placed on the left bottom of the screen and click on “logic”.
2) The logic editor opens up, on the left hand side is the “item library” and the “trigger library”, above these is the “add+” button, click on the “add+” button.
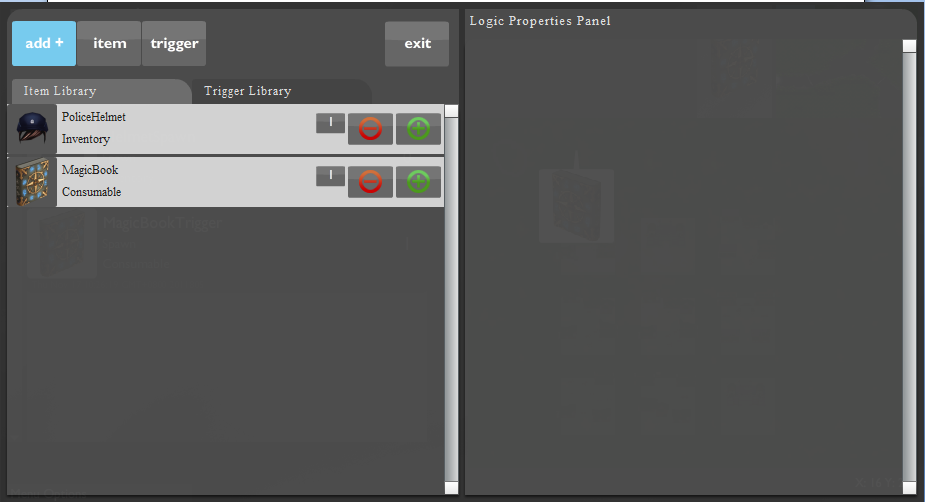
3) On clicking the “add+” button, two buttons named “item” and “trigger” open up.
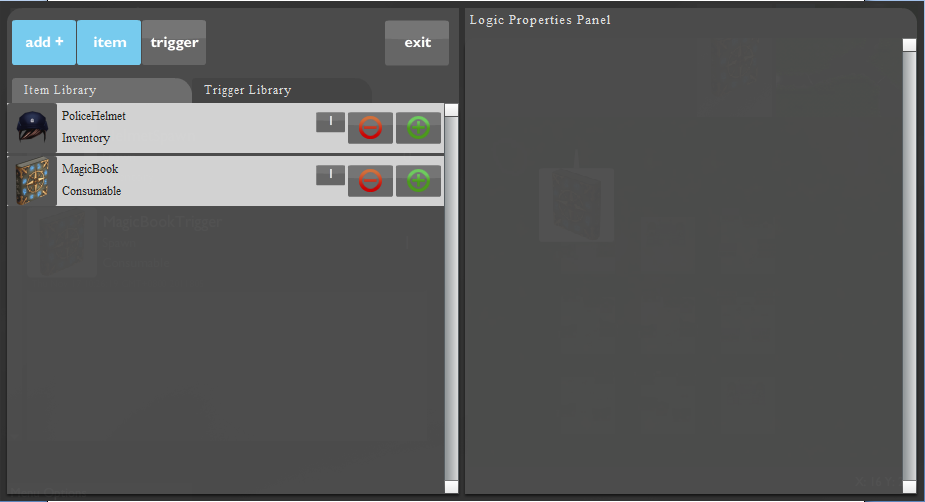
To start the item creation, click on the “item” button.
4) On clicking on the item button, a new item is added onto the item library, click on the “NewItem”.
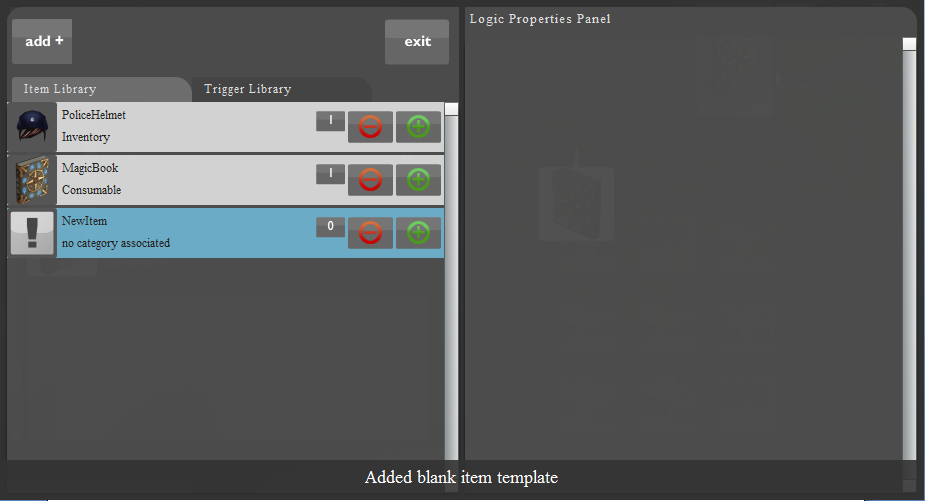
5) After clicking on the “NewItem”, a new window opens up in the Logic Properties Panel.
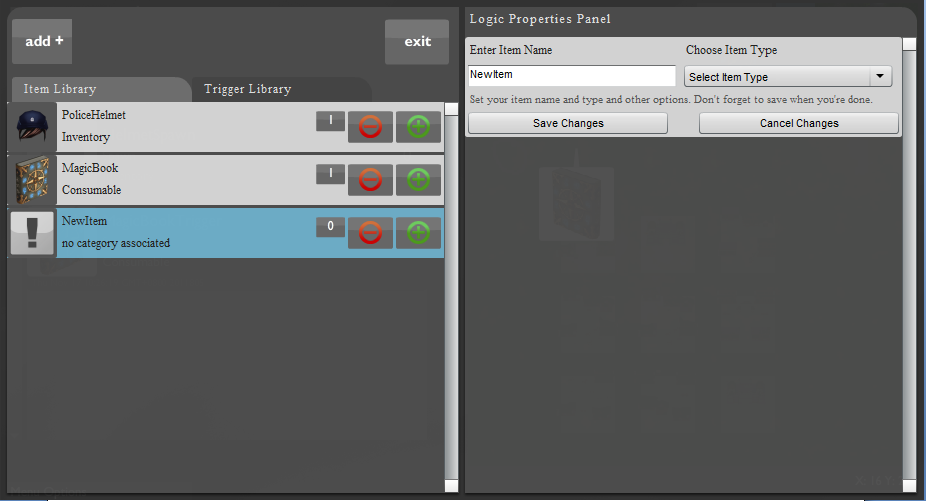
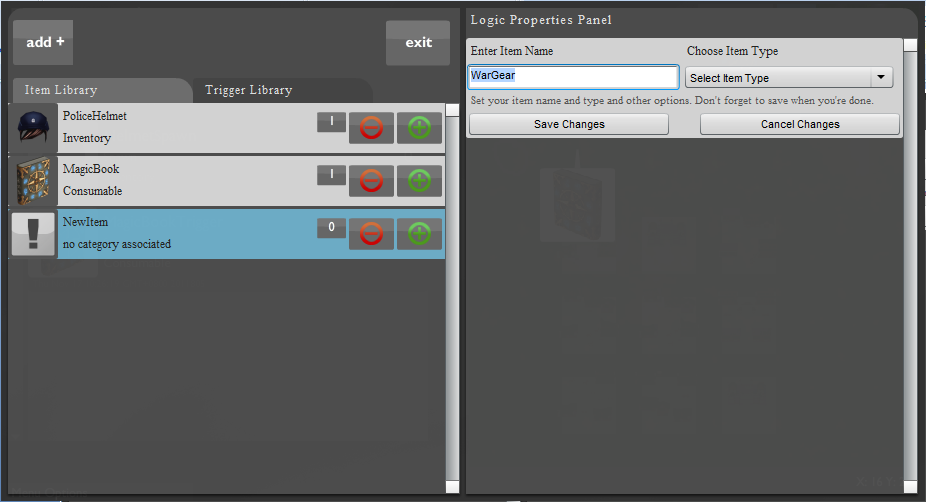
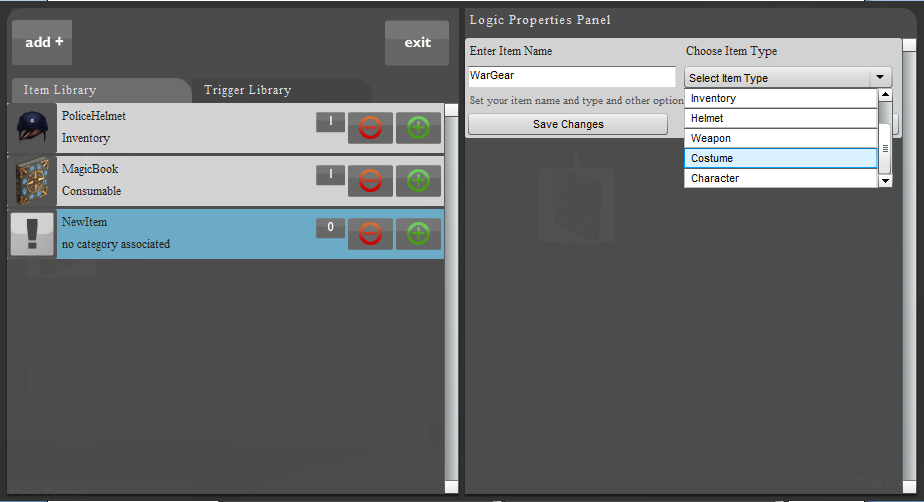
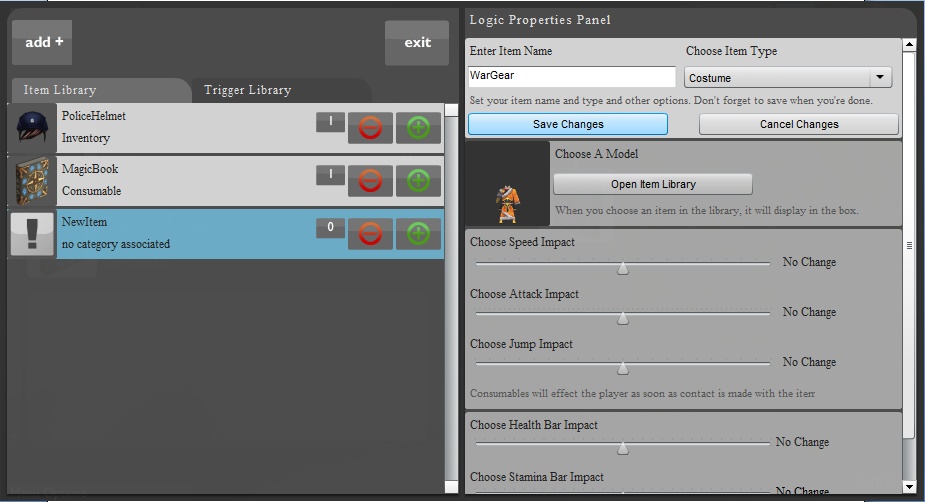
6) Enter the item name and move the mouse over the drop down menu below “Choose Item Type” and select the item type as “Costume”.
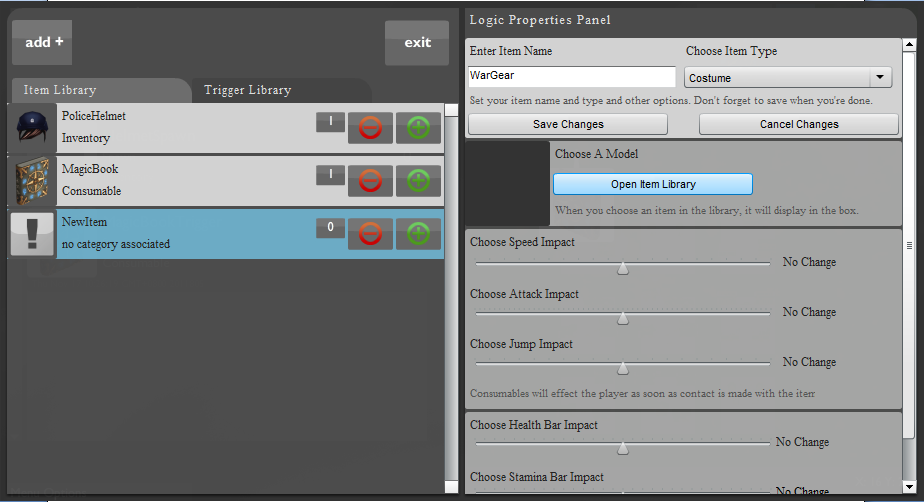
7) On selecting the item type as costume, the logic properties panel fills up. Now we must decide what our costumes should look like.
Esoteric has a library of 3D costumes for you to choose from. Press “Open Item Library”.
8) A library containing various costumes opens; you can move the mouse over the costumes to view them.
As you move the cursor over the costumes, a light blue box follows the cursor. This box can be used to select the costume you wish to use.
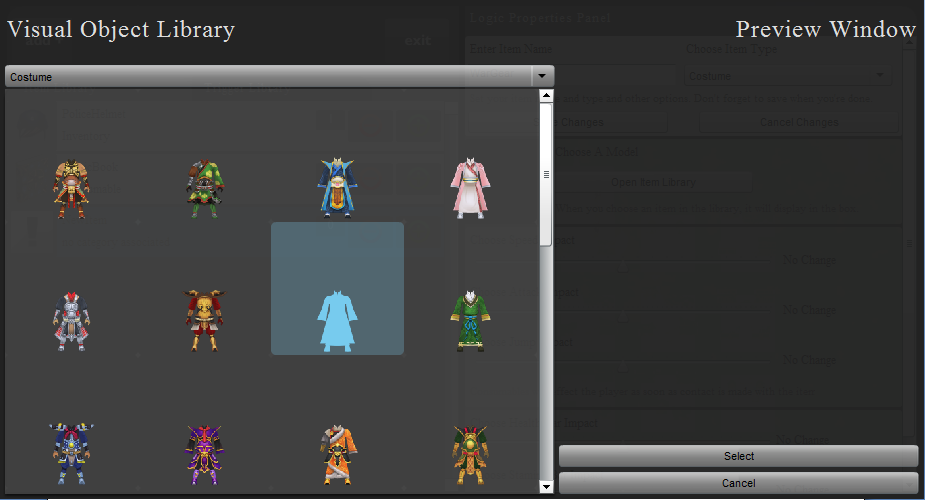
9) Move the scroll bar located on the right of the library to view more 3-d models.
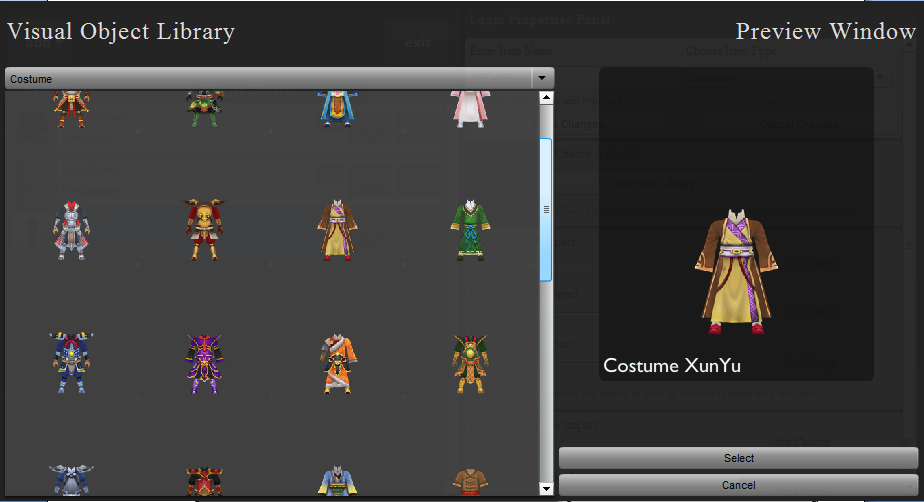
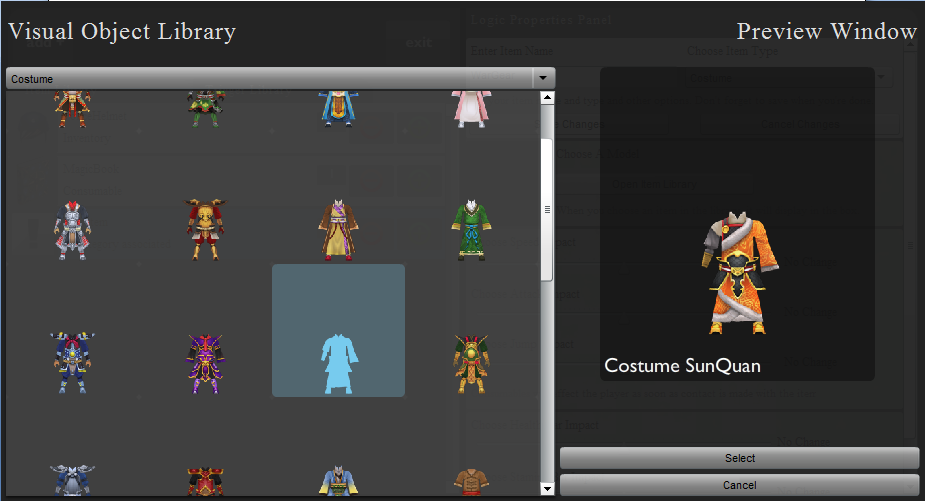
10) Left-click on the model to select it. The selected model will appear on the right of the visual library.
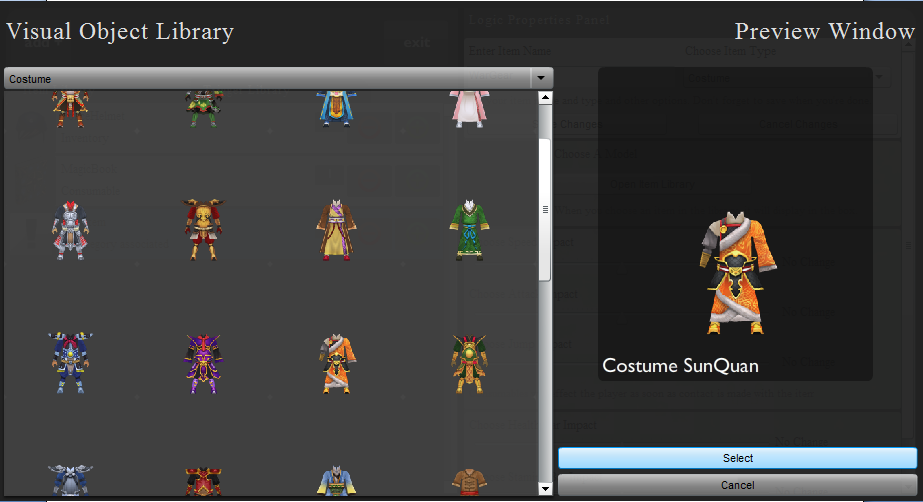
I have selected the costume SunQuan.
11) Click on the “Select” button situated at the bottom of the screen to confirm the selection.
12) The logic properties panel reappears. Move the scrollbar located on the right in the down to completely view the options you have for creating your costume.
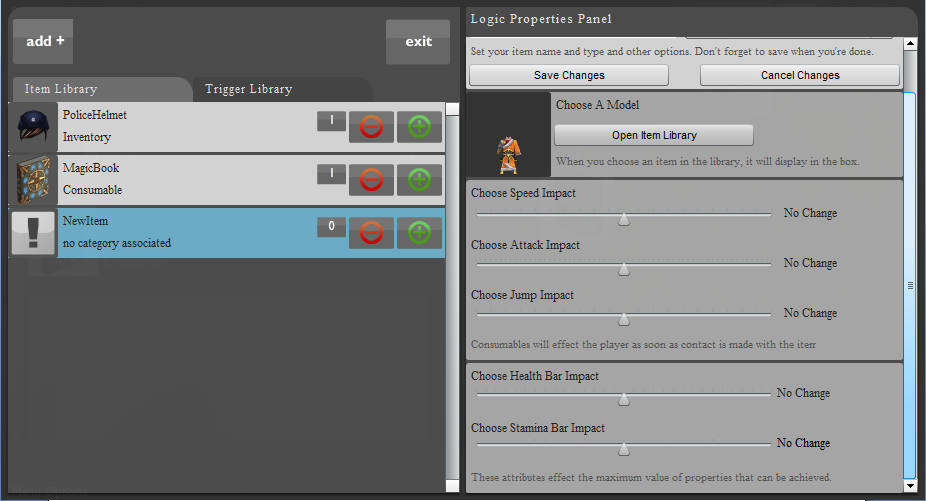
13) Below the 3-d library, lies a section with 3 sliders to choose speed impact, jump impact and attack impact. These affect the avatar in the desired manner on wearing the costume.
Their functions are listed below:-
1) Choose speed impact: -
The slider below the “Choose speed impact” panel, chooses the impact that the costume has on the avatar’s speed.
For instance, if the avatar wears a heavy costume, his speed may decrease, and hence you may move this slider to the left.
2) Choose attack impact: -
The slider below the “Choose attack impact” panel, chooses the impact, the costume has on the avatar’s attacking ability.
For instance, if the avatar wears an armored costume, he causes greater damage on attacking another avatar, and hence you may move this slider to the right.
3) Choose jump impact: -
The slider below the “Choose jump impact” panel, chooses the impact, the costume has on the avatar’s jumping ability.
For instance, if the avatar wears a heavy costume, his jumping ability might decrease, and hence you may move this slider to the left.
Move the three sliders, depending on how much you want your avatar’s speed, attacking ability, and jumping ability to change on wearing the costume.
14) The last section on the logic properties panel has two sliders, one to alter the health of the avatar, and the second one to alter the stamina of the avatar, on wearing the costume.
Their functions are listed below: -
1) Choose Health Bar Impact: -
The slider below the “Choose Health Bar impact” panel chooses the impact that the costume has on the avatar’s health, or the avatar’s ability to withstand attacks before dying.
For instance, if the avatar wears an armored costume, his health bar should increase, and hence you may move this slider to the right.
2) Choose Stamina Bar impact: -
The slider below the “Choose Stamina Bar impact” panel chooses the impact that the costume has on avatar’s stamina or on avatar’s fatigue levels.
For instance, if the avatar wears a heavy costume, his stamina should decrease, and hence you may move this slider to the left.
15) Once you have updated the “Health Bar Impact” and the “Stamina Bar Impact”, all the settings of your costume have been updated, now you should go to the top of the Logic Properties Panel and click on “Save Changes” to save your costume.
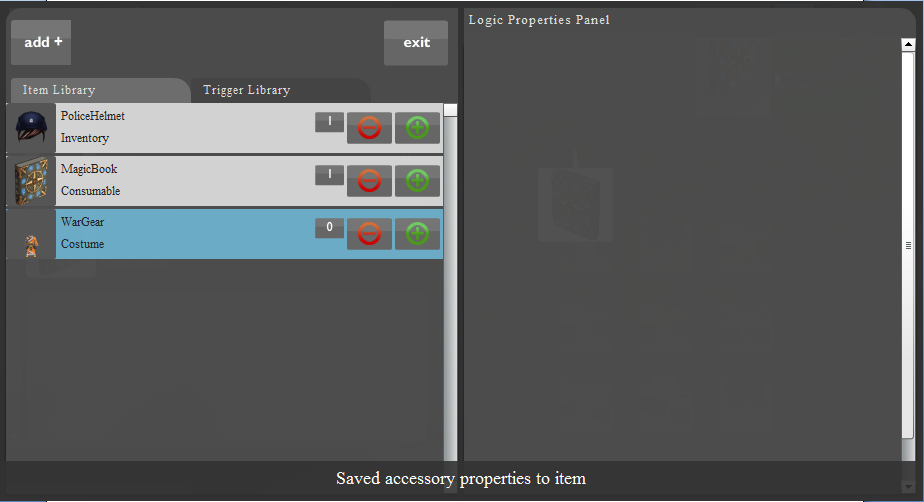
16) Thus I have created the costume “NewItem”. Weapons and helmets can be created by using the same steps.
In this tutorial, we will illustrate how to create a costume. Weapons and helmets can be created in the same way as the costumes.
Creating a costume: -
1) In the main window of the editor: Move the mouse over “menu options” placed on the left bottom of the screen and click on “logic”.
2) The logic editor opens up, on the left hand side is the “item library” and the “trigger library”, above these is the “add+” button, click on the “add+” button.
3) On clicking the “add+” button, two buttons named “item” and “trigger” open up.
To start the item creation, click on the “item” button.
4) On clicking on the item button, a new item is added onto the item library, click on the “NewItem”.
5) After clicking on the “NewItem”, a new window opens up in the Logic Properties Panel.
6) Enter the item name and move the mouse over the drop down menu below “Choose Item Type” and select the item type as “Costume”.
7) On selecting the item type as costume, the logic properties panel fills up. Now we must decide what our costumes should look like.
Esoteric has a library of 3D costumes for you to choose from. Press “Open Item Library”.
8) A library containing various costumes opens; you can move the mouse over the costumes to view them.
As you move the cursor over the costumes, a light blue box follows the cursor. This box can be used to select the costume you wish to use.
9) Move the scroll bar located on the right of the library to view more 3-d models.
10) Left-click on the model to select it. The selected model will appear on the right of the visual library.
I have selected the costume SunQuan.
11) Click on the “Select” button situated at the bottom of the screen to confirm the selection.
12) The logic properties panel reappears. Move the scrollbar located on the right in the down to completely view the options you have for creating your costume.
13) Below the 3-d library, lies a section with 3 sliders to choose speed impact, jump impact and attack impact. These affect the avatar in the desired manner on wearing the costume.
Their functions are listed below:-
1) Choose speed impact: -
The slider below the “Choose speed impact” panel, chooses the impact that the costume has on the avatar’s speed.
For instance, if the avatar wears a heavy costume, his speed may decrease, and hence you may move this slider to the left.
2) Choose attack impact: -
The slider below the “Choose attack impact” panel, chooses the impact, the costume has on the avatar’s attacking ability.
For instance, if the avatar wears an armored costume, he causes greater damage on attacking another avatar, and hence you may move this slider to the right.
3) Choose jump impact: -
The slider below the “Choose jump impact” panel, chooses the impact, the costume has on the avatar’s jumping ability.
For instance, if the avatar wears a heavy costume, his jumping ability might decrease, and hence you may move this slider to the left.
Move the three sliders, depending on how much you want your avatar’s speed, attacking ability, and jumping ability to change on wearing the costume.
14) The last section on the logic properties panel has two sliders, one to alter the health of the avatar, and the second one to alter the stamina of the avatar, on wearing the costume.
Their functions are listed below: -
1) Choose Health Bar Impact: -
The slider below the “Choose Health Bar impact” panel chooses the impact that the costume has on the avatar’s health, or the avatar’s ability to withstand attacks before dying.
For instance, if the avatar wears an armored costume, his health bar should increase, and hence you may move this slider to the right.
2) Choose Stamina Bar impact: -
The slider below the “Choose Stamina Bar impact” panel chooses the impact that the costume has on avatar’s stamina or on avatar’s fatigue levels.
For instance, if the avatar wears a heavy costume, his stamina should decrease, and hence you may move this slider to the left.
15) Once you have updated the “Health Bar Impact” and the “Stamina Bar Impact”, all the settings of your costume have been updated, now you should go to the top of the Logic Properties Panel and click on “Save Changes” to save your costume.
16) Thus I have created the costume “NewItem”. Weapons and helmets can be created by using the same steps.
No comments:
Post a Comment