Creating a mini game and attaching it to a NPC: -
Mini games are a group of question answer sets that an avatar has to answer to obtain an inventory item.
The mini games are attached to NPC’s. As the avatar approaches the NPC, the NPC asks the avatar a set of questions, and depending on the number of questions that the avatar answers correctly, the avatar may be given the inventory item.
The following tutorial illustrates the process of creating a mini game, attaching it to an NPC, and placing the NPC on the map.
Creating a mini game: -
1) In the main window of the editor: Move the mouse over “menu options” placed on the left bottom of the screen and click on “minis”.

2) The “Mini Games Setup” screen opens up, on the left side is a panel titled “Create New Mini Game” and on the right side is a panel named “Edit Existing Mini Game”.
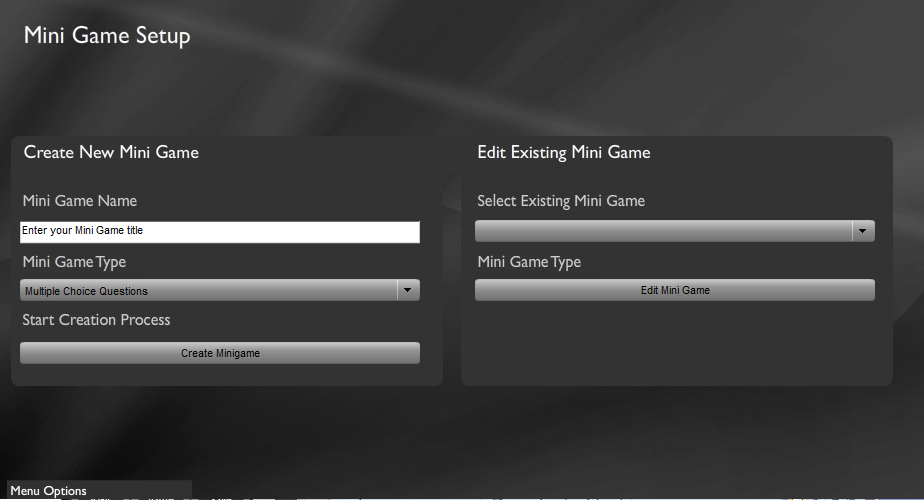
3) In order to create a new mini game, we start with the “Create New Mini Game” panel. Enter the name that you want to give your mini name in the text-box below “Mini Game Name”.
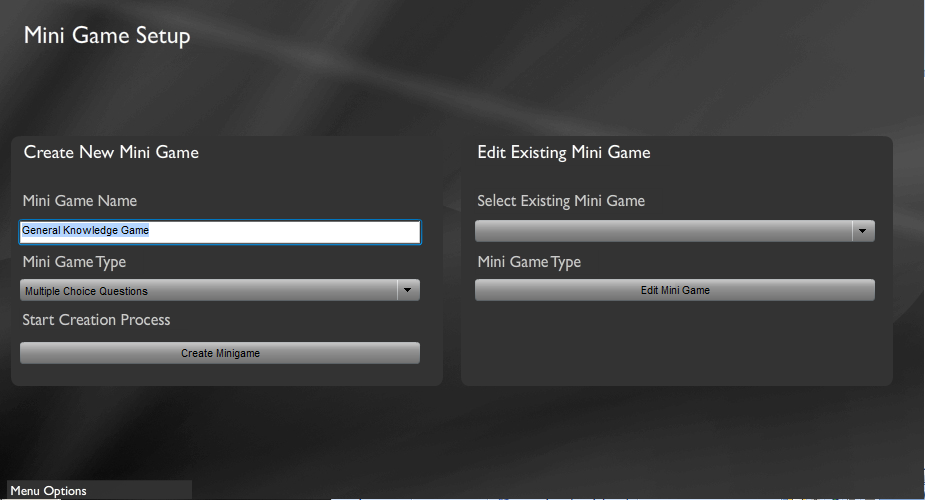
I have named my game as “General Knowledge Game”.
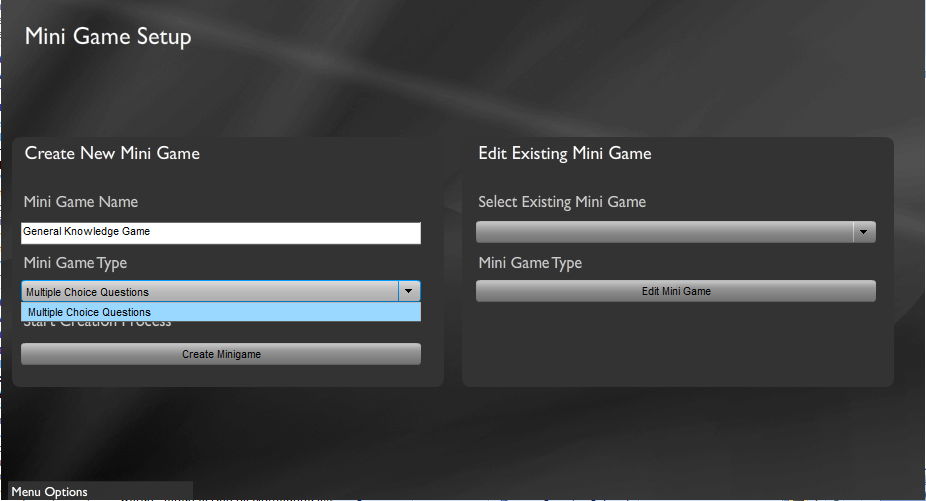
4) Move the drop down menu below “Mini Game Type” and select “Multiple Choice Questions.
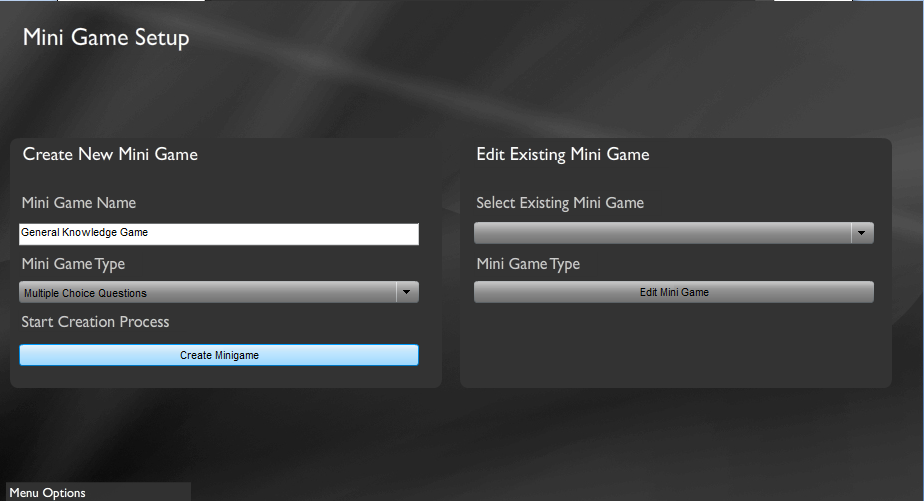
5) Click on “Create Mini game” to start the mini game creation.
6) The following screen opens up.
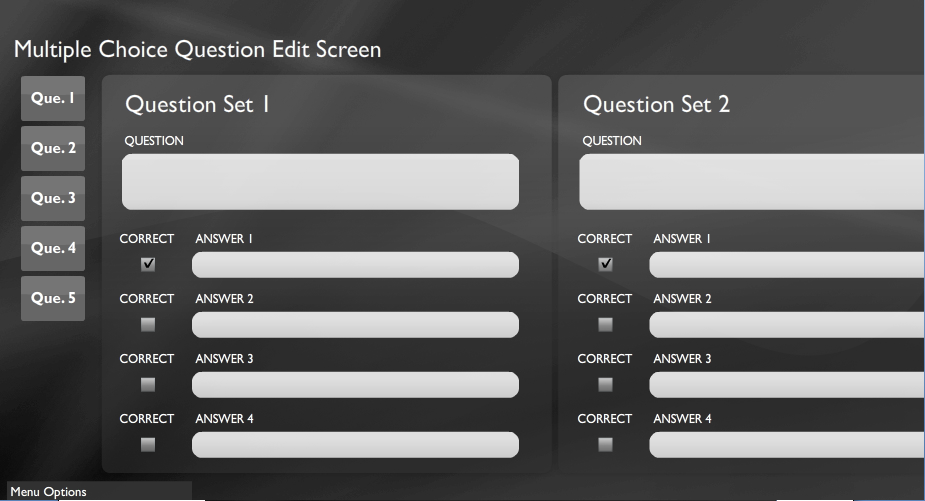
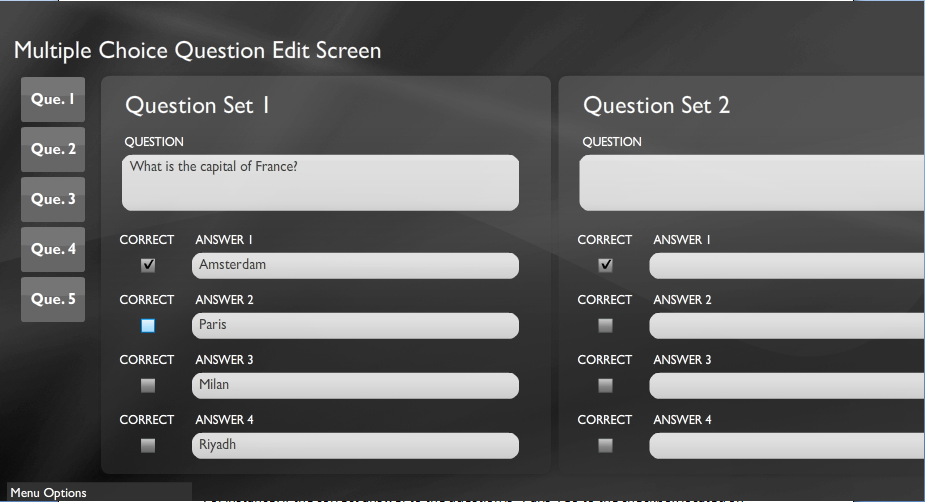
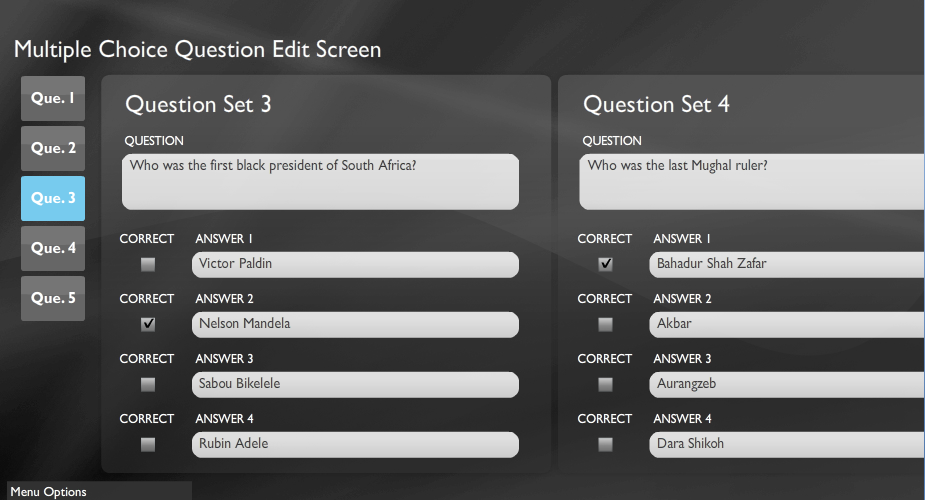
7) The “Multiple Choice Question Edit Screen” has a choice of five question answer sets. You need to completely fill in at least one question answer set to create the mini game.
Start by filling in “Question Set 1”. Go to the textbox below “QUESTION” and fill in the first question that you want to ask your avatar.
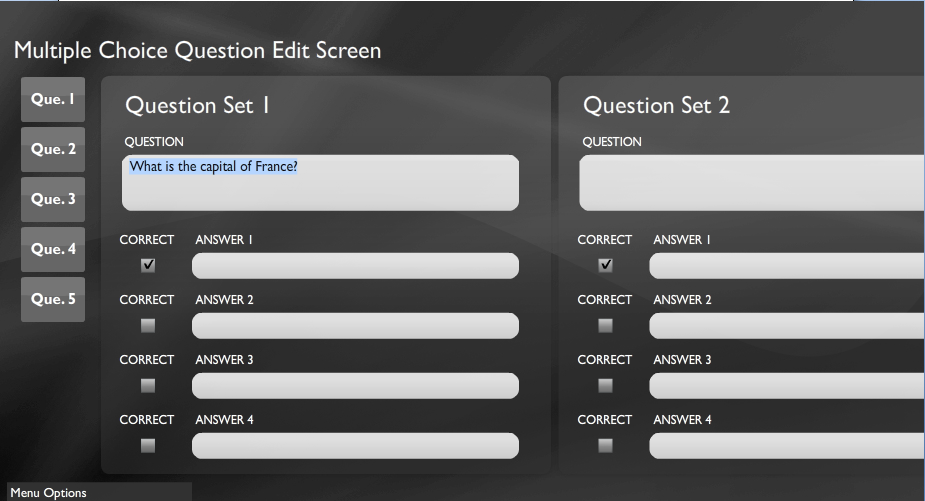
I have asked the question “What is the capital of France?”
8) Once you have filled the questions, you need to fill in the options from which the avatar can choose the answer.
Go to the textbox below “ANSWER 1” and fill in the first option.
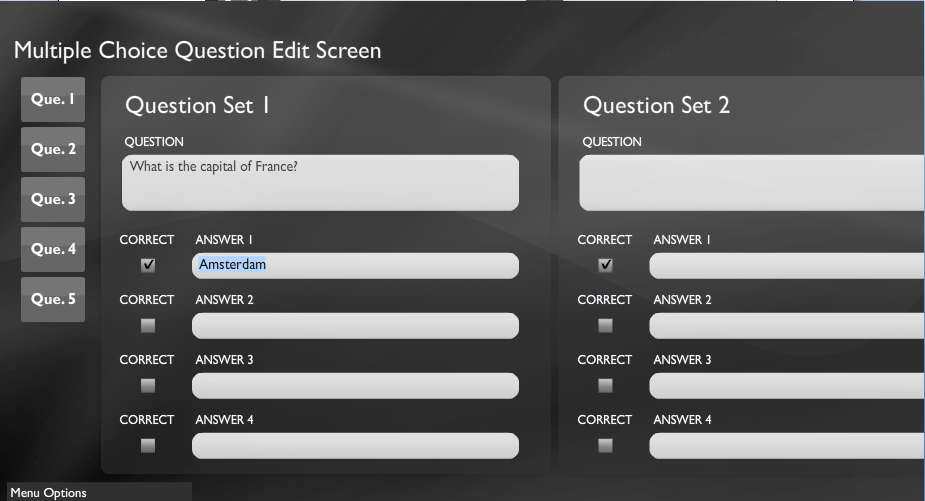
9) Similarly fill in all the options you want to give the avatar to choose an answer from.
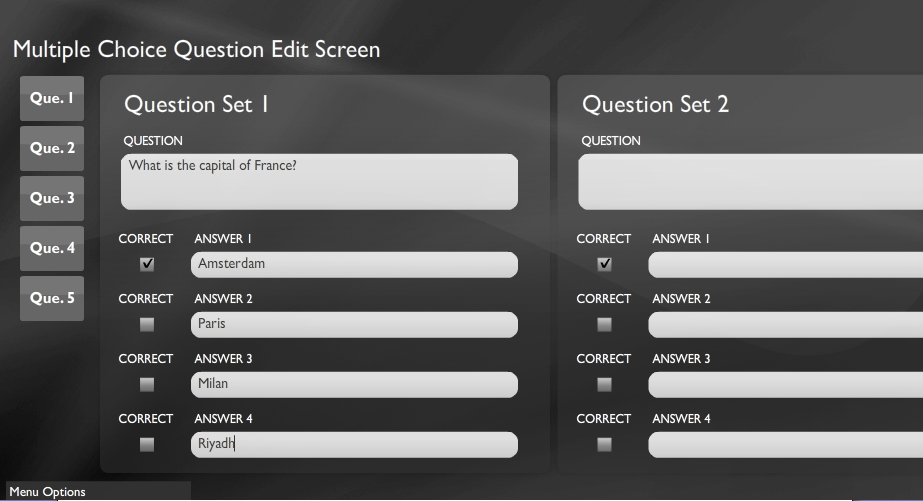
10) Once you have filled in all the options, you now need to choose the correct answer.
Go the checkbox located on the immediate left of the correct answer, and below “CORRECT” and click on it.
For instance, if the correct answer to the question is “Paris”, go to the checkbox located on the left of “Paris” and click on it.
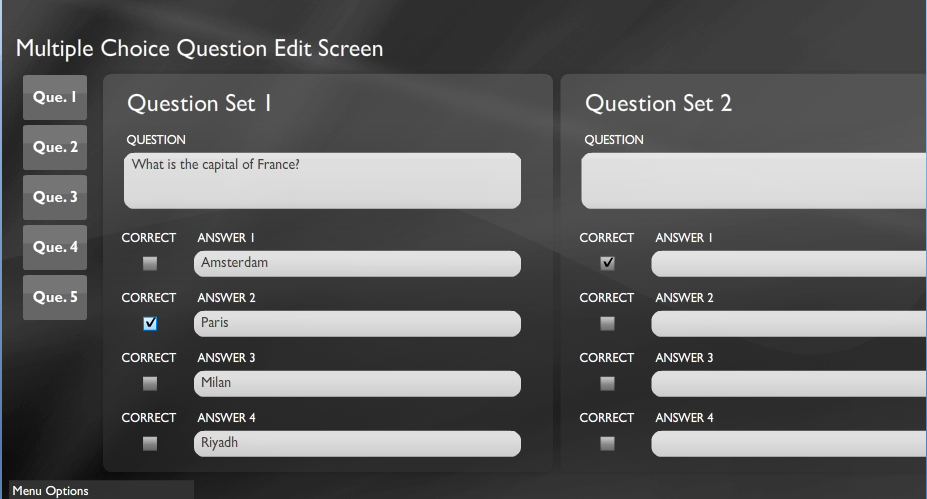
11) The option you chose will be considered as the correct answer for this question, and the checkbox next to it will be highlighted.
In our case, the textbox next to Paris will be highlighted.
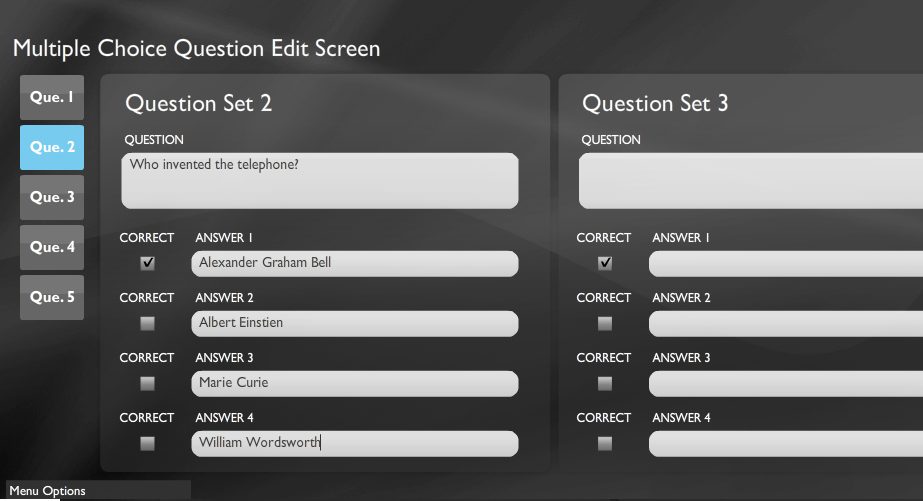
12) Now you need to fill in the other question answer sets in your mini game.
To select another question set go to the left corner of the screen and move your mouse over the question set buttons located there.
As you move your mouse over the buttons, they get highlighted.

I have moved my mouse over “Que. 2”.
13) Click on the question set button to choose the corresponding question set.
The chosen question set moves to the left half of the screen.

14) Fill up the question set as described in the steps above.
15) You may either fill up the question sets sequentially or you may fill them up in random order.
For eg. You may choose to fill up question set 4 before filling up question set 3.
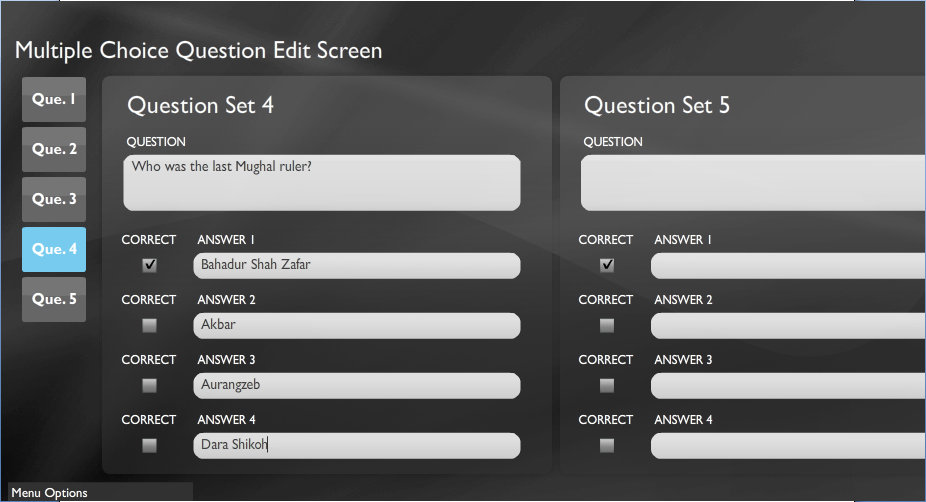
16) You may fill up to 5 question sets.
Once you have filled up the question sets for all the questions that you want to ask the avatar, go to “Menu Options” located on the bottom of the left hand corner of the screen and click on “exit”.

Using the steps described above, we have created the “General Knowledge Game” mini game. We will now attach it to a NPC and place it on the map.
Attaching a mini game to a NPC and placing it on the map: -
1) Follow the steps described in the “Creating a NPC” section of the “Creating a NPC in Esoteric Editor and placing them on the map” tutorial to create a NPC.
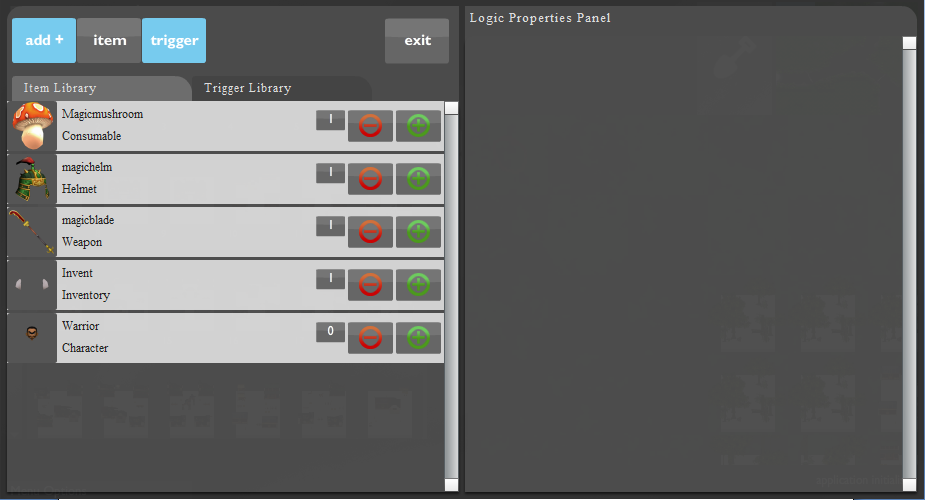
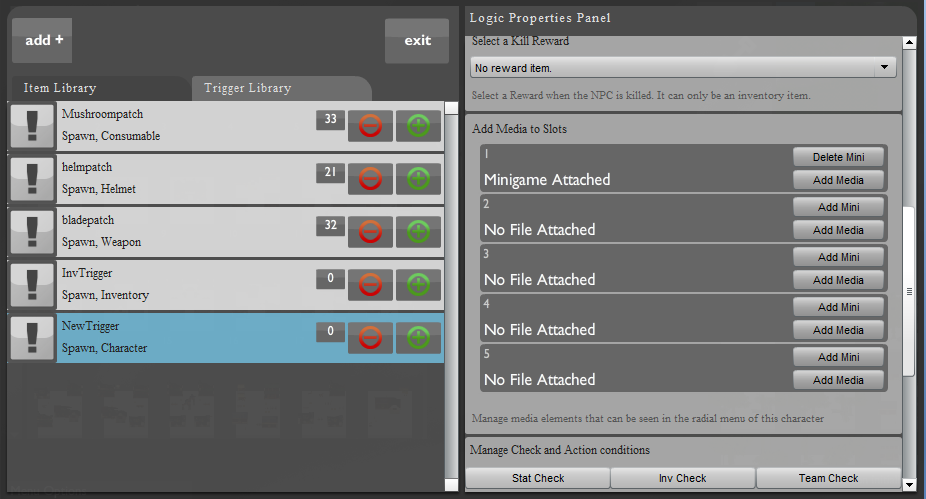
2) Click on the “add +” button located on the top left of your screen, and click on “trigger”.
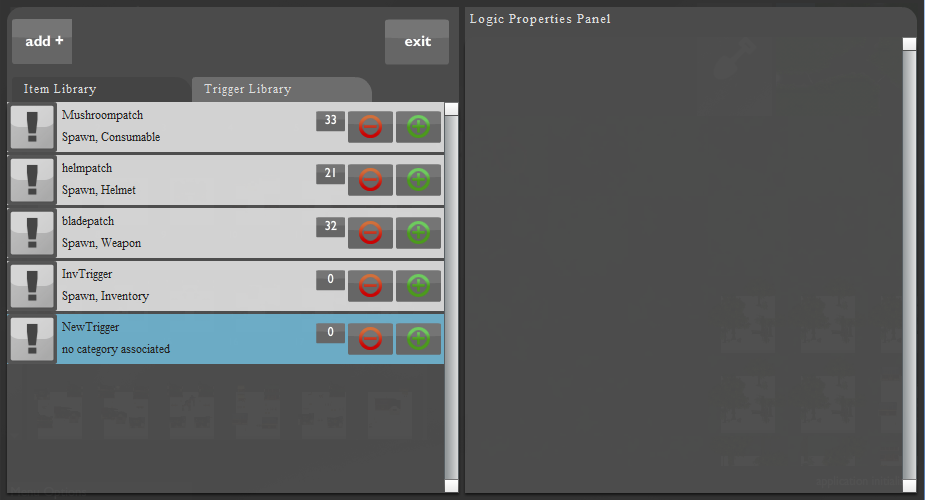
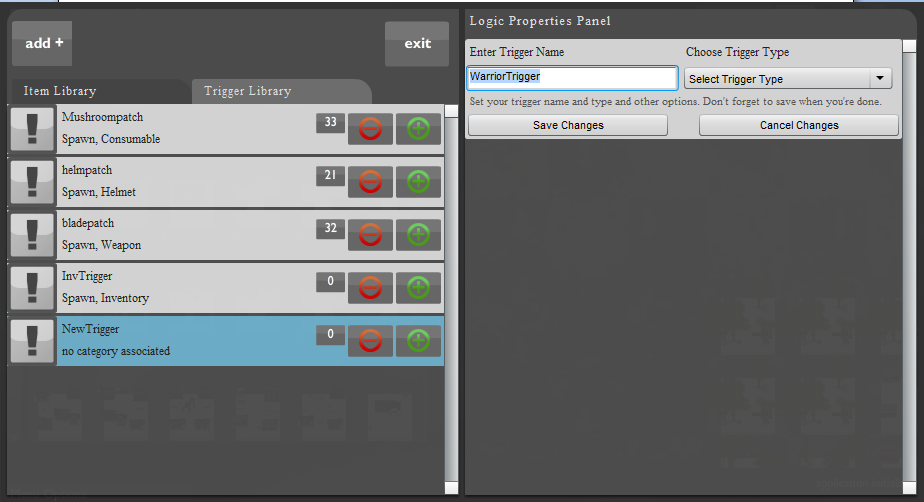
3) You can now see a trigger called “NewTrigger” in the trigger library. Click on the “NewTrigger”.
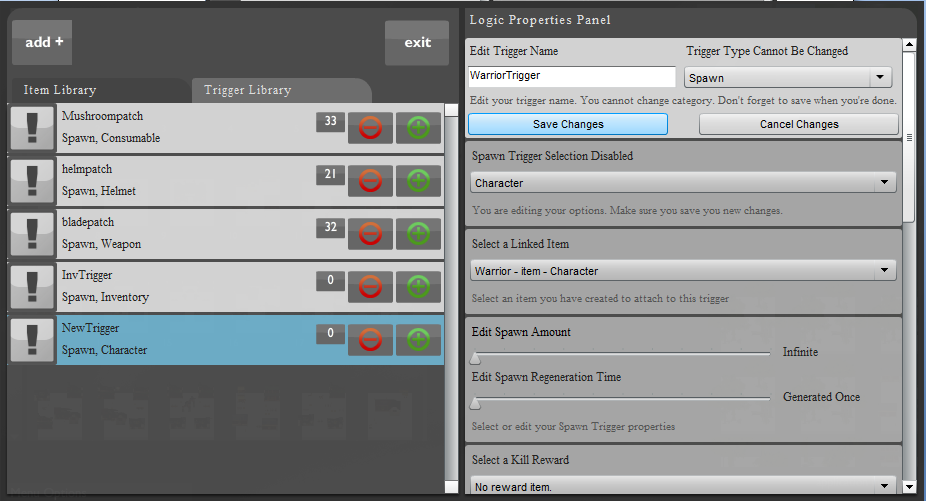
4) After clicking on the NewTrigger , a new window opens up in the Logic Properties Panel.

5) Enter the trigger name and choose the trigger type as spawn.
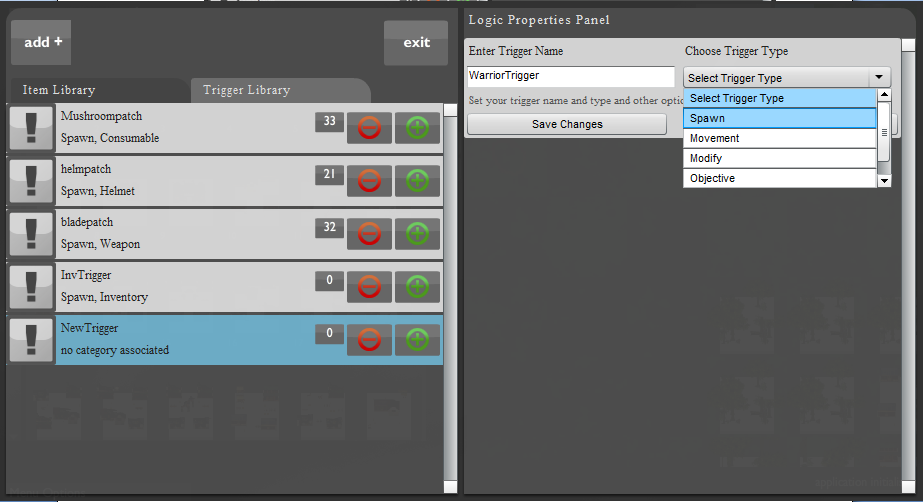
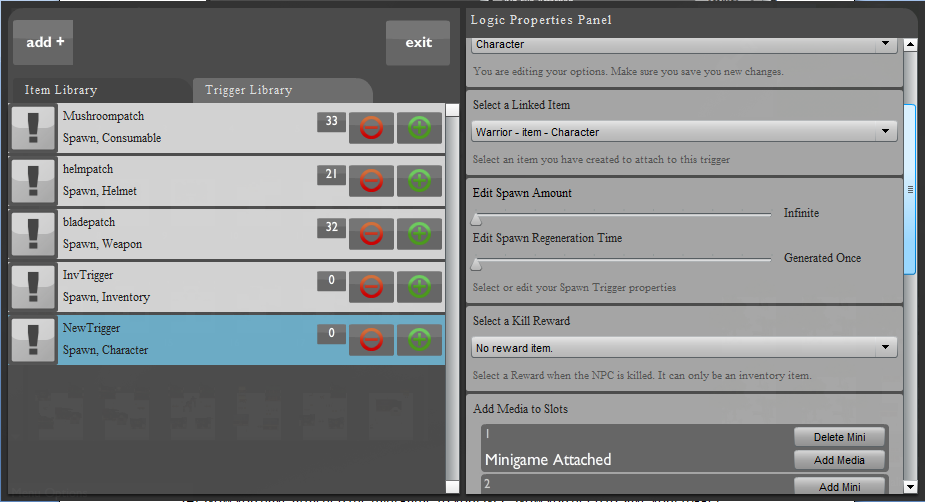
6) On specifying the trigger type as spawn, another drop down menu titled “Select Spawn Type” appears in the logic properties panel.
As you have just created a character item, select the spawn type as “Character”.
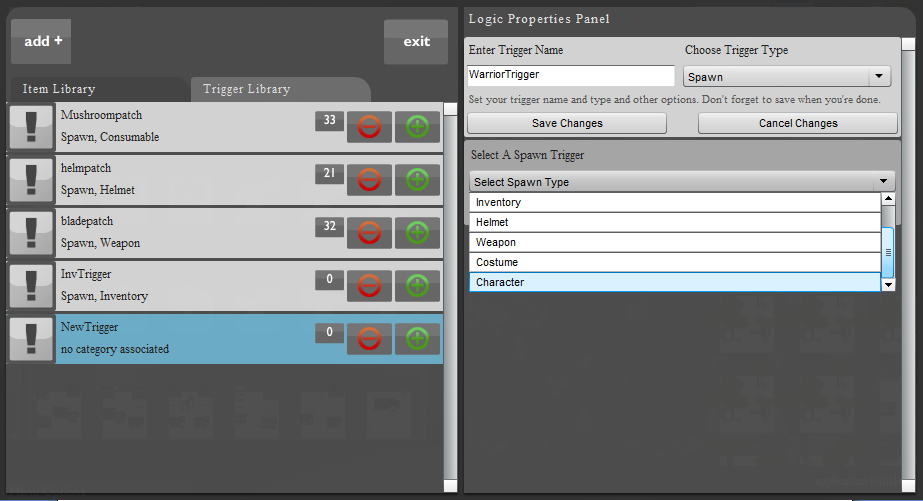
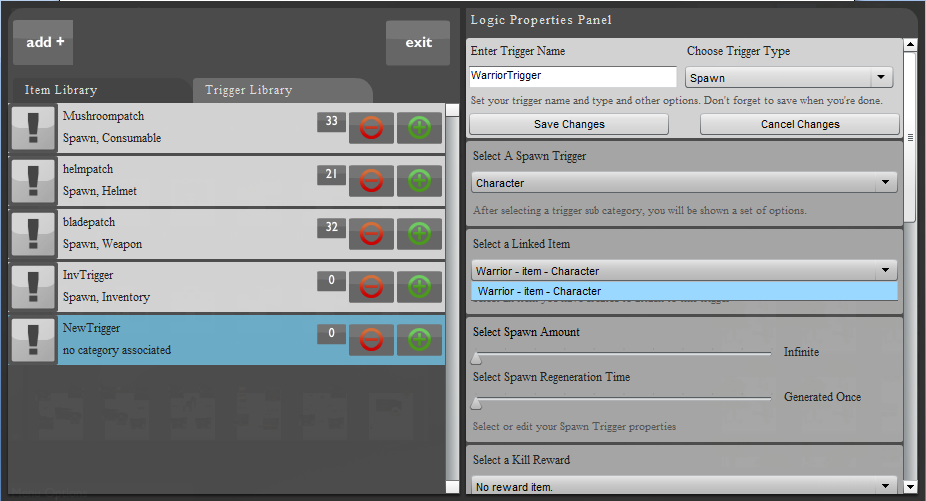
7) On selecting the spawn type as character, another sub-panel titled “Select Linked Item” appears below it. The drop down menu below it contains all the characters that you have created.
From the drop down menu, select the NPC that you have just created. We will select the NPC Warrior that we had created in the last section of this tutorial.
8) Move the scrollbar on the right hand corner of the screen in the downward direction until you come across the “Add Media to Slots” section.

9) Click on the “Add Mini” button in the first media slot.
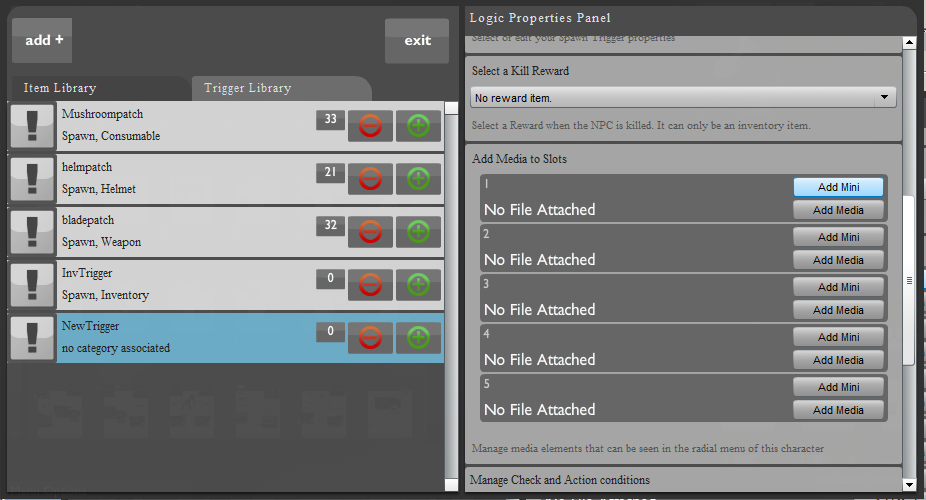
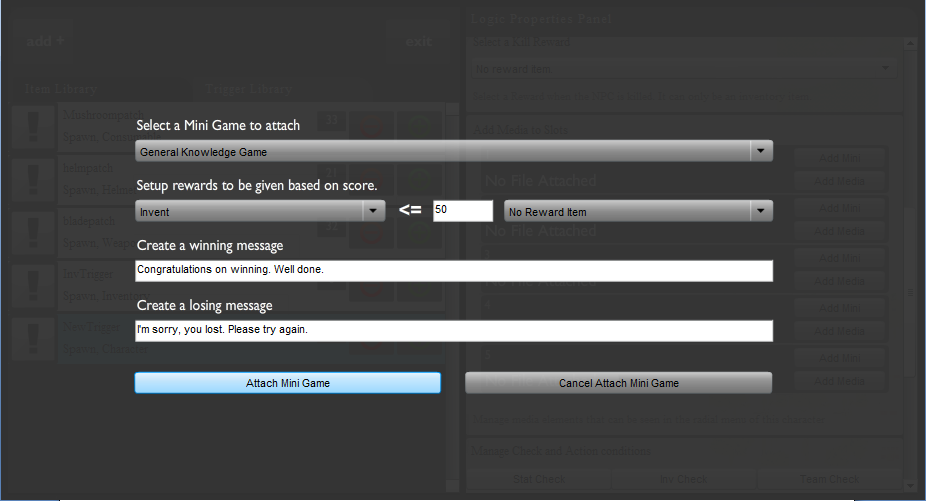
10) The following screen opens up.
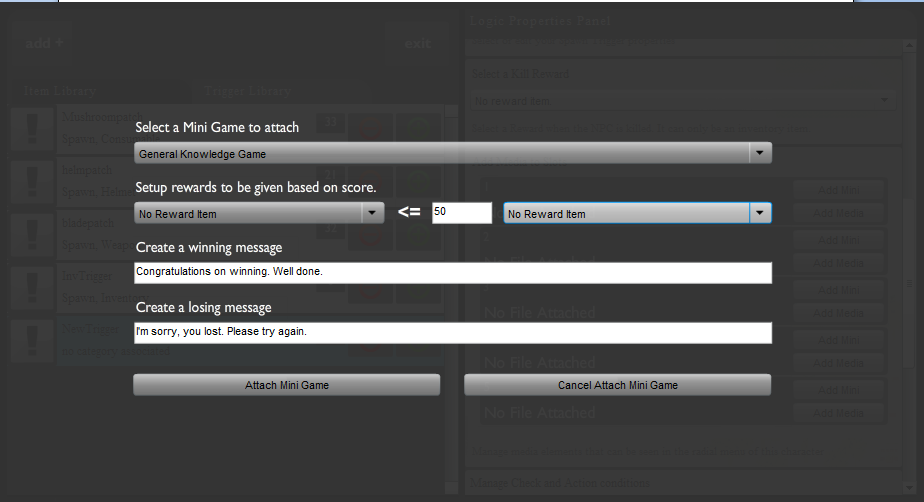
11) This screen has the following entries: -
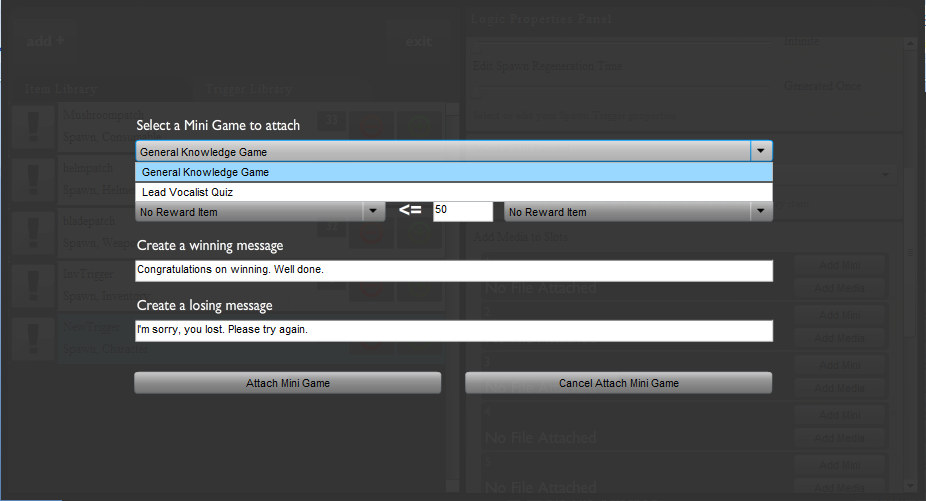
Select a Mini Game to attach: - This selection allows you to choose and attach one mini game among the multiple mini games that you have created.
Go to the drop down menu below this entry and choose the mini game that you want to attach to your NPC.
Setup rewards to be given based on score: - This entry is used to reward an avatar if it has answered either less than or more than a fixed percentage of questions.
This entry has two drop down menus and a numbered textbox.
The numbered textbox denotes the percentage of questions in the mini game that have to be answered correctly.
The left hand side menu shows the inventory item rewarded to the avatar if it answers less than the percentage written in the numbered textbox, and the right hand side menu shows the inventory item rewarded to the avatar if it answers more than the percentage written in the numbered textbox.

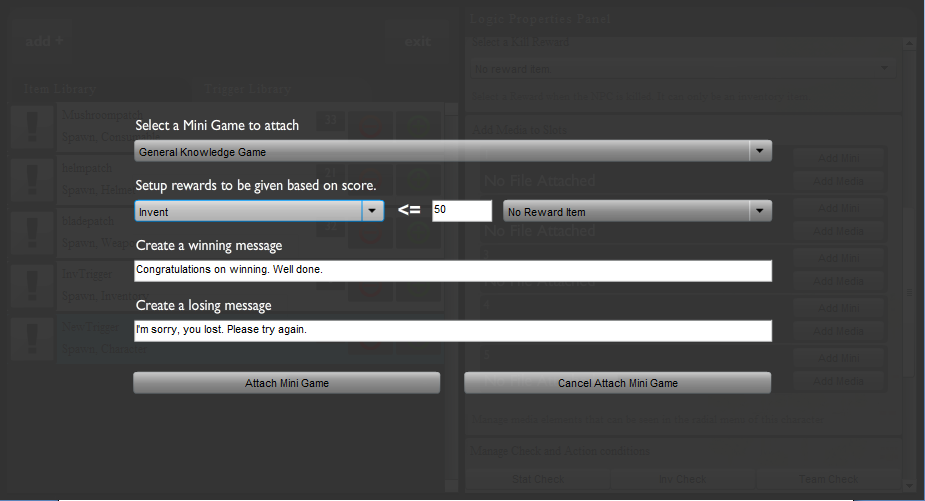
For instance, in the figures above, the inventory item “Invent” is awarded to the avatar if it answers less than 50% of the questions in the “General Knowledge Game” correctly.
Use the menus to decide the condition for rewarding the avatar.
Create a winning message: - This entry allows you to type a message which is displayed when the avatar is able to satisfy the conditions provided in the “Setup rewards to be given based on score” entry.
In other words, this is the message displayed if the avatar wins the mini game.
The default message provided in the editor is “Congratulations on winning. Well done.”
You may either use the default message or type a message of your choice.
We will keep the default message.
Create a losing message: - This entry allows you to type a message which is displayed when the avatar is not able to satisfy the conditions provided in the “Setup rewards to be given based on score” entry.
In other words, this is the message displayed if the avatar loses the mini game.
The default message provided in the editor is “I'm sorry, you lost. Please try again.”
You may either use the default message or type a message of your choice.
We will keep the default message.
12) Now that you have completed all the entries, you should attach your mini game. To do so, click on the “Attach Mini Game” button located on the left bottom of the screen.
13) Now you return back to the trigger creation screen.
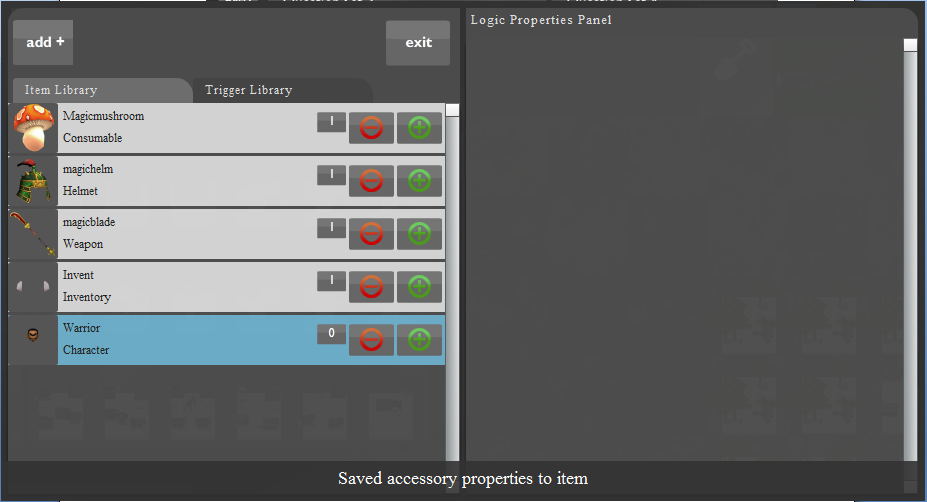
14) Now you have attached the mini game to your NPC. Now you need to save your trigger.
In order to do so, you need to go to the top of the Logic Properties Panel , enter a trigger name and click on “Save Changes”.
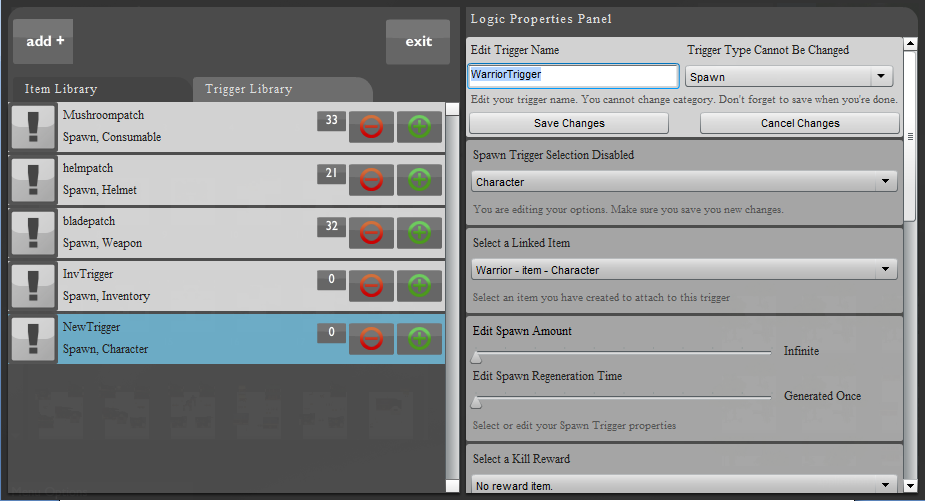
15) The trigger now appears in the Trigger Library with its new name.
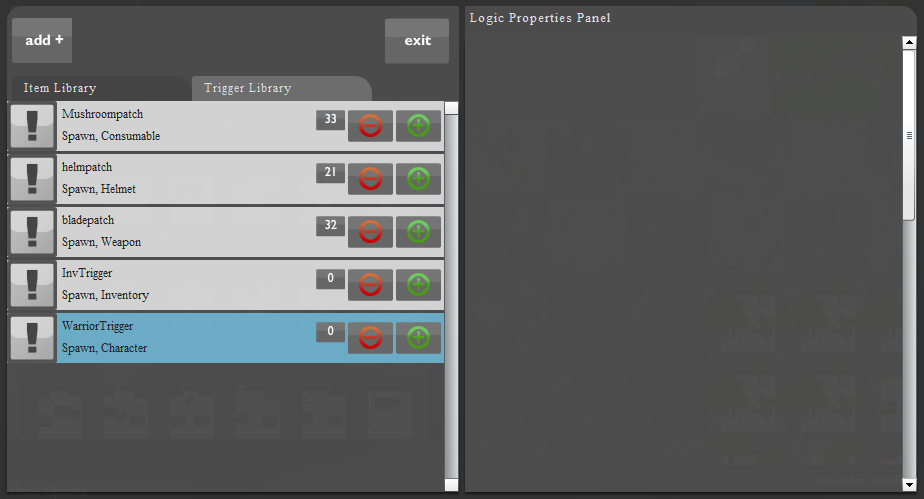
16) Now your trigger is ready to be placed on the map. Click on exit to return to the map creation screen.

17) You return back to the map creation screen.
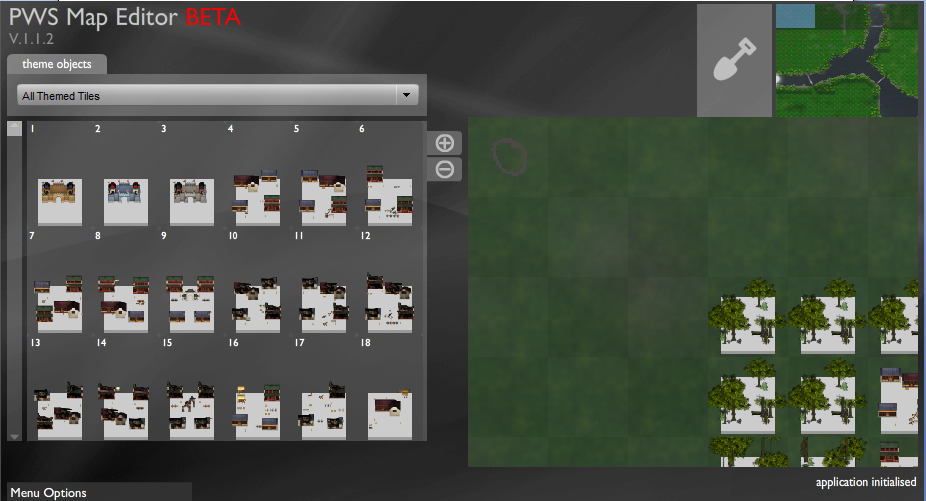
18) In order to create the NPC on the map, you will have to place the trigger on the map.
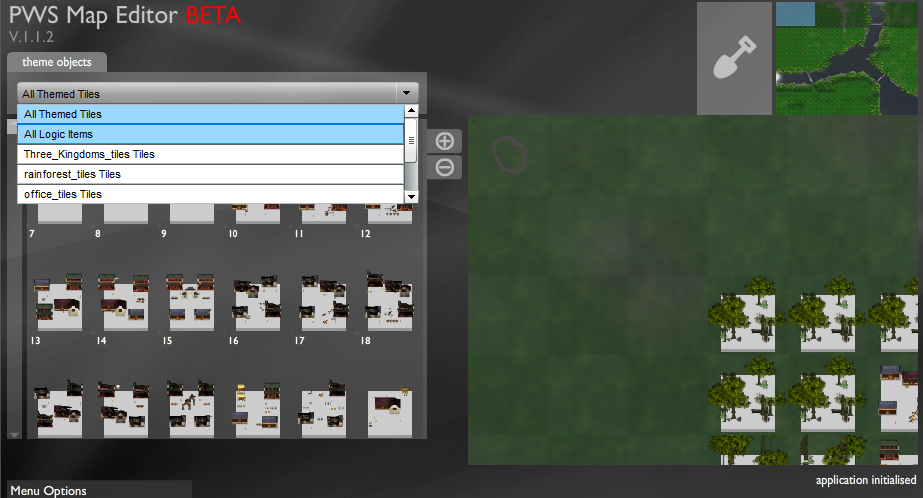
To view the trigger in the palette, first select “All Themed Tiles” and then “all logic items” from the drop down menu located on the palette.
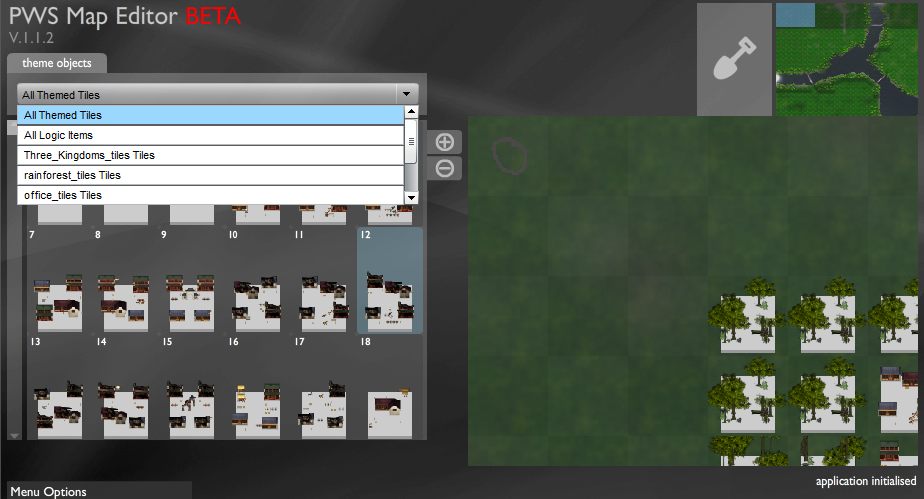
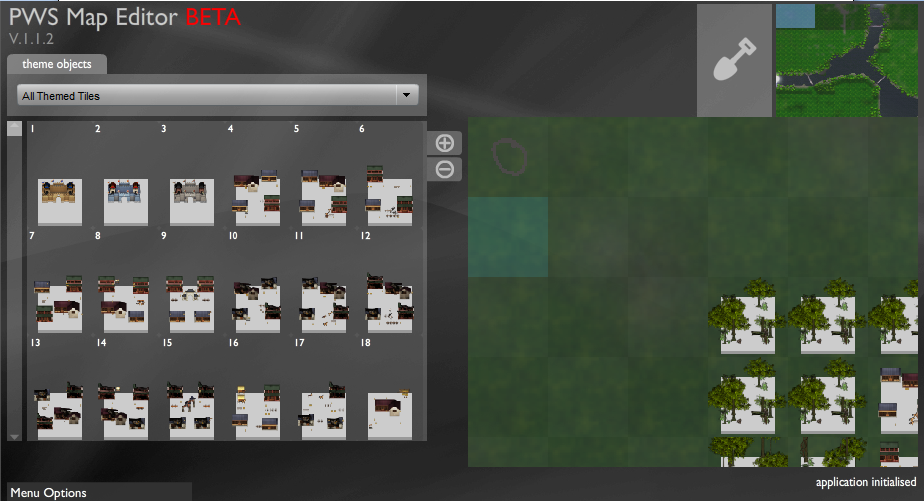
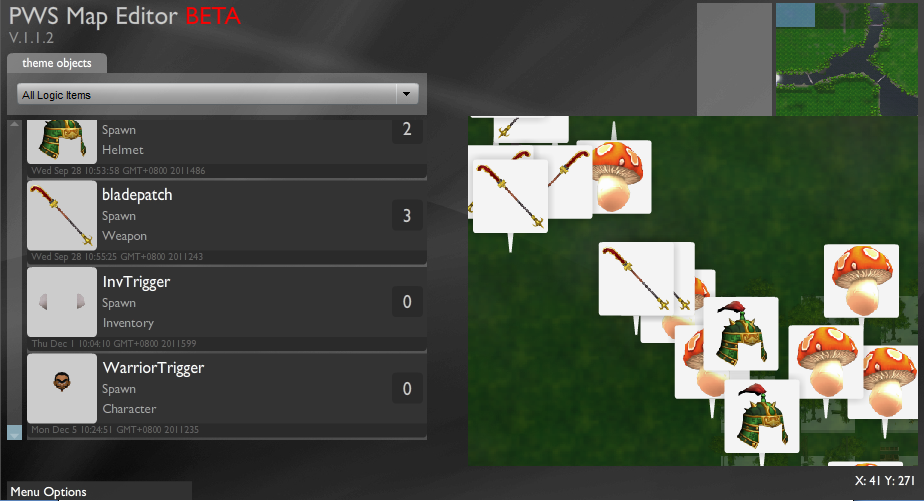
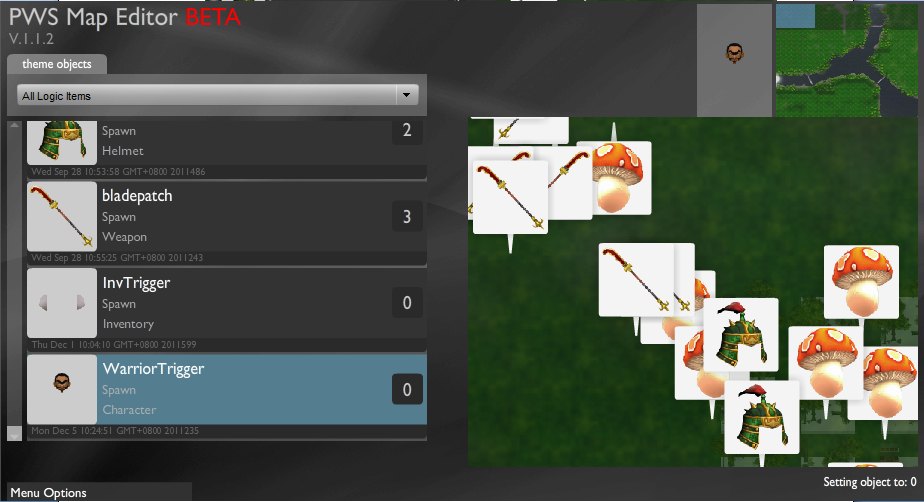
19) You will now see the triggers listed in the palette.
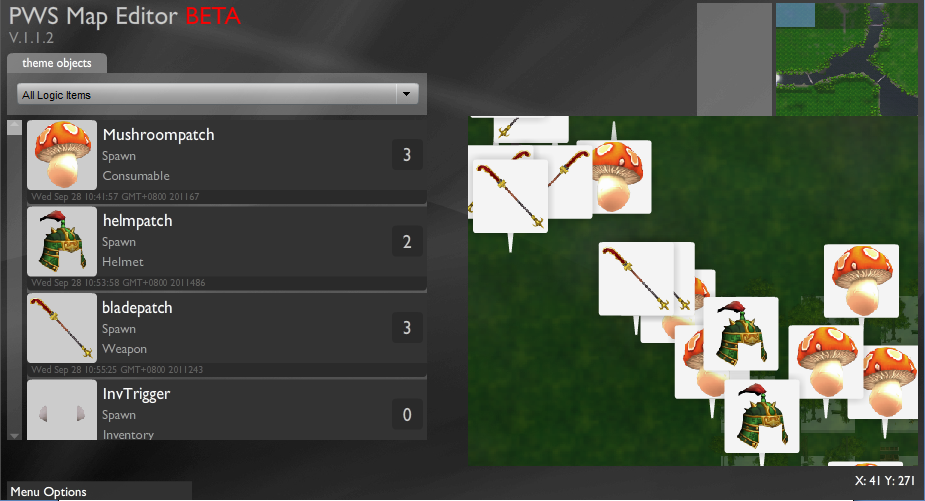
20) Move the scrollbar located on the left completely to view all the triggers.
21) Left click on the trigger. Next to the minimap, you should be able to see your trigger in the selection pane.
22) Now you need to place your trigger on the main map. Select a location on the main map by moving the view port to your desired location.
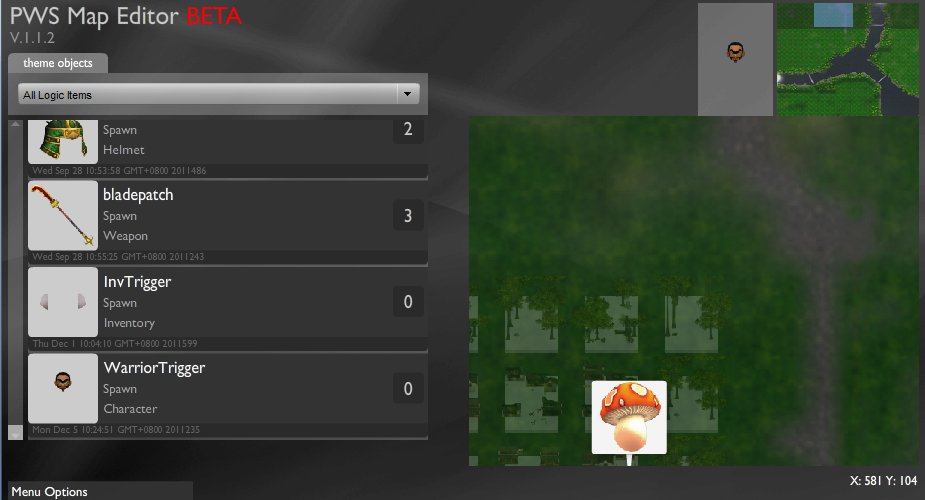
23) Left click on the main map to place your trigger.

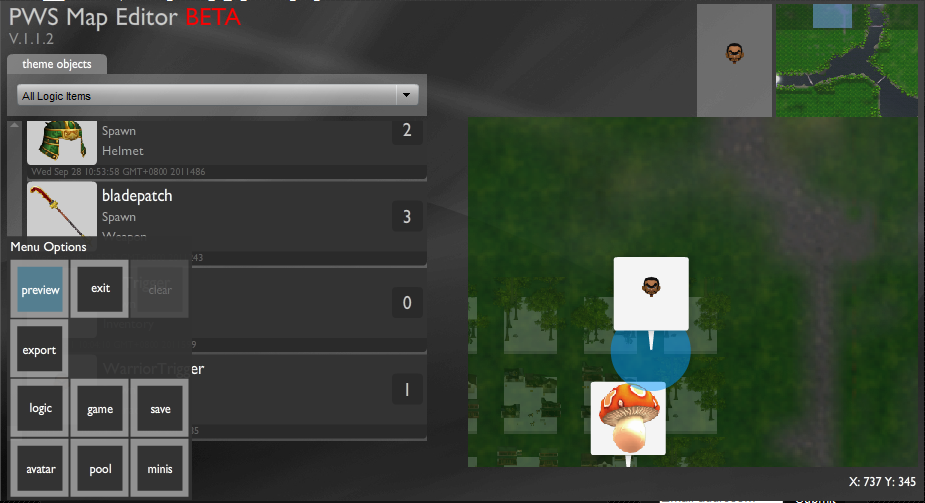
24)Your NPC will be created in the 3-d world, exactly where you placed your trigger on the map. The NPC will have the mini game attached to it, and the avatar will be able to see the mini game as soon as it comes close to the NPC.
Go to “Menu Options” at the left bottom of your screen, and click on “preview” to view you’re your game in the 3D world with the NPC on the map.
Mini games are a group of question answer sets that an avatar has to answer to obtain an inventory item.
The mini games are attached to NPC’s. As the avatar approaches the NPC, the NPC asks the avatar a set of questions, and depending on the number of questions that the avatar answers correctly, the avatar may be given the inventory item.
The following tutorial illustrates the process of creating a mini game, attaching it to an NPC, and placing the NPC on the map.
Creating a mini game: -
1) In the main window of the editor: Move the mouse over “menu options” placed on the left bottom of the screen and click on “minis”.
2) The “Mini Games Setup” screen opens up, on the left side is a panel titled “Create New Mini Game” and on the right side is a panel named “Edit Existing Mini Game”.
3) In order to create a new mini game, we start with the “Create New Mini Game” panel. Enter the name that you want to give your mini name in the text-box below “Mini Game Name”.
I have named my game as “General Knowledge Game”.
4) Move the drop down menu below “Mini Game Type” and select “Multiple Choice Questions.
5) Click on “Create Mini game” to start the mini game creation.
6) The following screen opens up.
7) The “Multiple Choice Question Edit Screen” has a choice of five question answer sets. You need to completely fill in at least one question answer set to create the mini game.
Start by filling in “Question Set 1”. Go to the textbox below “QUESTION” and fill in the first question that you want to ask your avatar.
I have asked the question “What is the capital of France?”
8) Once you have filled the questions, you need to fill in the options from which the avatar can choose the answer.
Go to the textbox below “ANSWER 1” and fill in the first option.
9) Similarly fill in all the options you want to give the avatar to choose an answer from.
10) Once you have filled in all the options, you now need to choose the correct answer.
Go the checkbox located on the immediate left of the correct answer, and below “CORRECT” and click on it.
For instance, if the correct answer to the question is “Paris”, go to the checkbox located on the left of “Paris” and click on it.
11) The option you chose will be considered as the correct answer for this question, and the checkbox next to it will be highlighted.
In our case, the textbox next to Paris will be highlighted.
12) Now you need to fill in the other question answer sets in your mini game.
To select another question set go to the left corner of the screen and move your mouse over the question set buttons located there.
As you move your mouse over the buttons, they get highlighted.
I have moved my mouse over “Que. 2”.
13) Click on the question set button to choose the corresponding question set.
The chosen question set moves to the left half of the screen.
14) Fill up the question set as described in the steps above.
15) You may either fill up the question sets sequentially or you may fill them up in random order.
For eg. You may choose to fill up question set 4 before filling up question set 3.
16) You may fill up to 5 question sets.
Once you have filled up the question sets for all the questions that you want to ask the avatar, go to “Menu Options” located on the bottom of the left hand corner of the screen and click on “exit”.
Using the steps described above, we have created the “General Knowledge Game” mini game. We will now attach it to a NPC and place it on the map.
Attaching a mini game to a NPC and placing it on the map: -
1) Follow the steps described in the “Creating a NPC” section of the “Creating a NPC in Esoteric Editor and placing them on the map” tutorial to create a NPC.
2) Click on the “add +” button located on the top left of your screen, and click on “trigger”.
3) You can now see a trigger called “NewTrigger” in the trigger library. Click on the “NewTrigger”.
4) After clicking on the NewTrigger , a new window opens up in the Logic Properties Panel.
5) Enter the trigger name and choose the trigger type as spawn.
6) On specifying the trigger type as spawn, another drop down menu titled “Select Spawn Type” appears in the logic properties panel.
As you have just created a character item, select the spawn type as “Character”.
7) On selecting the spawn type as character, another sub-panel titled “Select Linked Item” appears below it. The drop down menu below it contains all the characters that you have created.
From the drop down menu, select the NPC that you have just created. We will select the NPC Warrior that we had created in the last section of this tutorial.
8) Move the scrollbar on the right hand corner of the screen in the downward direction until you come across the “Add Media to Slots” section.
9) Click on the “Add Mini” button in the first media slot.
10) The following screen opens up.
11) This screen has the following entries: -
Select a Mini Game to attach: - This selection allows you to choose and attach one mini game among the multiple mini games that you have created.
Go to the drop down menu below this entry and choose the mini game that you want to attach to your NPC.
Setup rewards to be given based on score: - This entry is used to reward an avatar if it has answered either less than or more than a fixed percentage of questions.
This entry has two drop down menus and a numbered textbox.
The numbered textbox denotes the percentage of questions in the mini game that have to be answered correctly.
The left hand side menu shows the inventory item rewarded to the avatar if it answers less than the percentage written in the numbered textbox, and the right hand side menu shows the inventory item rewarded to the avatar if it answers more than the percentage written in the numbered textbox.
For instance, in the figures above, the inventory item “Invent” is awarded to the avatar if it answers less than 50% of the questions in the “General Knowledge Game” correctly.
Use the menus to decide the condition for rewarding the avatar.
Create a winning message: - This entry allows you to type a message which is displayed when the avatar is able to satisfy the conditions provided in the “Setup rewards to be given based on score” entry.
In other words, this is the message displayed if the avatar wins the mini game.
The default message provided in the editor is “Congratulations on winning. Well done.”
You may either use the default message or type a message of your choice.
We will keep the default message.
Create a losing message: - This entry allows you to type a message which is displayed when the avatar is not able to satisfy the conditions provided in the “Setup rewards to be given based on score” entry.
In other words, this is the message displayed if the avatar loses the mini game.
The default message provided in the editor is “I'm sorry, you lost. Please try again.”
You may either use the default message or type a message of your choice.
We will keep the default message.
12) Now that you have completed all the entries, you should attach your mini game. To do so, click on the “Attach Mini Game” button located on the left bottom of the screen.
13) Now you return back to the trigger creation screen.
14) Now you have attached the mini game to your NPC. Now you need to save your trigger.
In order to do so, you need to go to the top of the Logic Properties Panel , enter a trigger name and click on “Save Changes”.
15) The trigger now appears in the Trigger Library with its new name.
16) Now your trigger is ready to be placed on the map. Click on exit to return to the map creation screen.
17) You return back to the map creation screen.
18) In order to create the NPC on the map, you will have to place the trigger on the map.
To view the trigger in the palette, first select “All Themed Tiles” and then “all logic items” from the drop down menu located on the palette.
19) You will now see the triggers listed in the palette.
20) Move the scrollbar located on the left completely to view all the triggers.
21) Left click on the trigger. Next to the minimap, you should be able to see your trigger in the selection pane.
22) Now you need to place your trigger on the main map. Select a location on the main map by moving the view port to your desired location.
23) Left click on the main map to place your trigger.
24)Your NPC will be created in the 3-d world, exactly where you placed your trigger on the map. The NPC will have the mini game attached to it, and the avatar will be able to see the mini game as soon as it comes close to the NPC.
Go to “Menu Options” at the left bottom of your screen, and click on “preview” to view you’re your game in the 3D world with the NPC on the map.
No comments:
Post a Comment