This Tutorial demonstrates the process of creating a Map using the Esoteric Editor. Maps are the worlds in which the games takes place.
1) Open the esoteric editor.
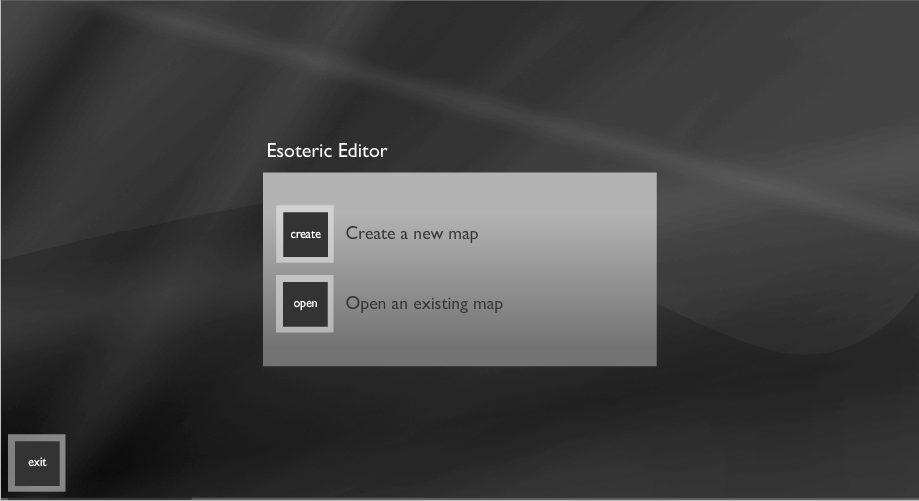
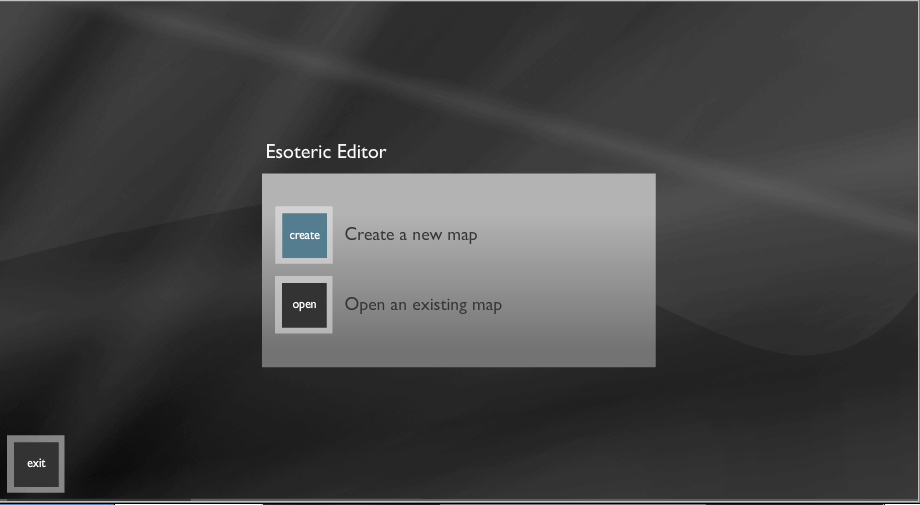
2) Click on “create a new map”.
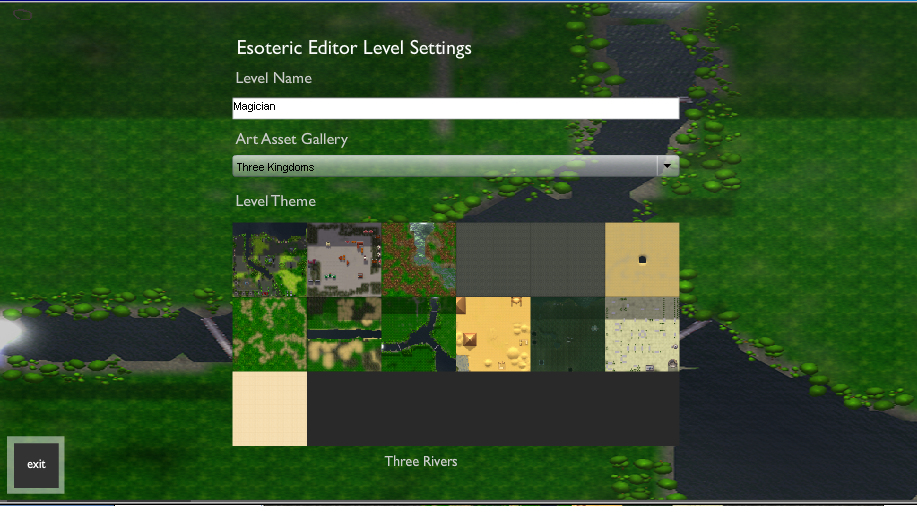
3) Enter the level name for your new map.
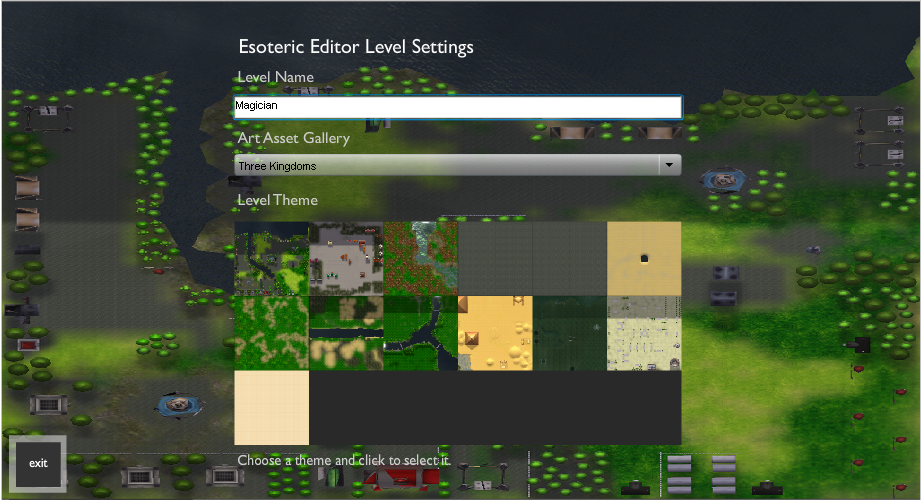
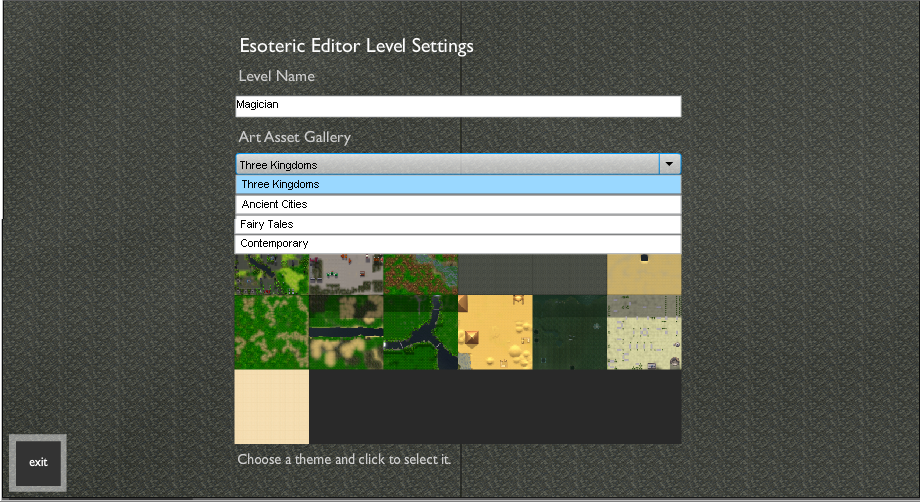
4) Select the “Art Asset Gallery” for your map, move the mouse over the drop down menu for the art asset gallery, there are many art asset galleries for e.g. Three Kingdoms, Fairy Tales, Contemporary and ancient cities.
Select the Three Kingdoms art asset gallery.
5) Select the theme for your map, on the bottom of the screen is a palette of themes. When you move the mouse over the theme, the theme’s name appears on the bottom of your screen and the theme’s map opens up on your screen.
Left click on the theme to select it, and select the 3 rivers map.
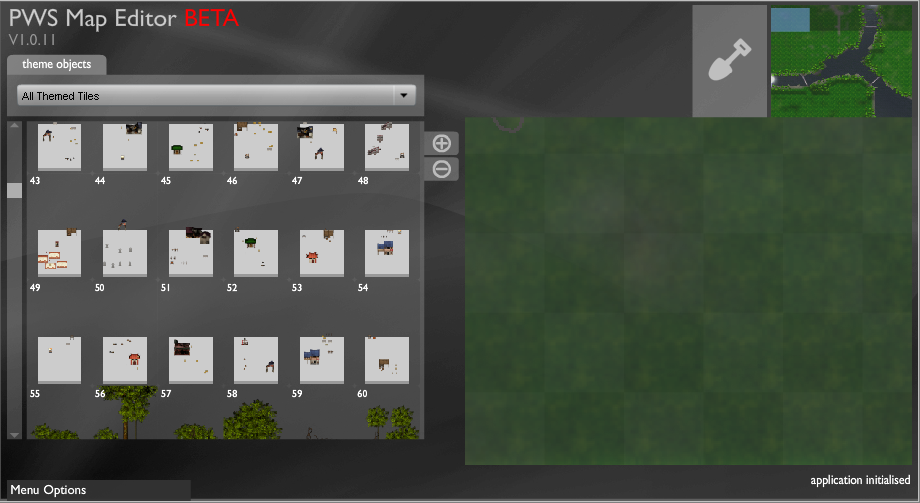
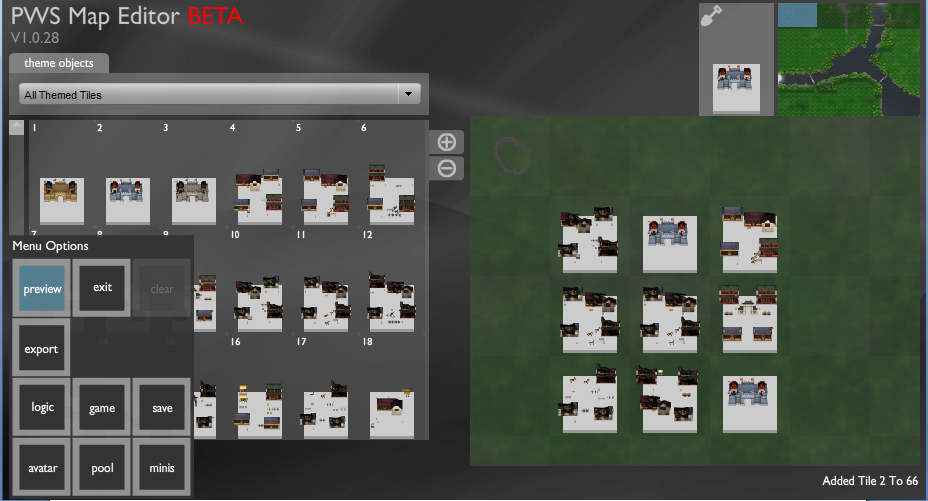
6) After selecting your theme, the main screen appears. The screen has a palette on the left hand side where all the tiles are located.
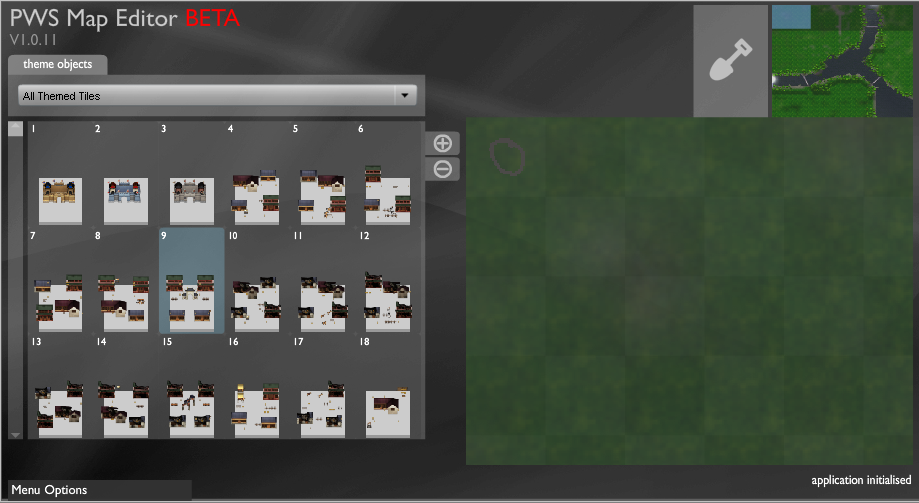
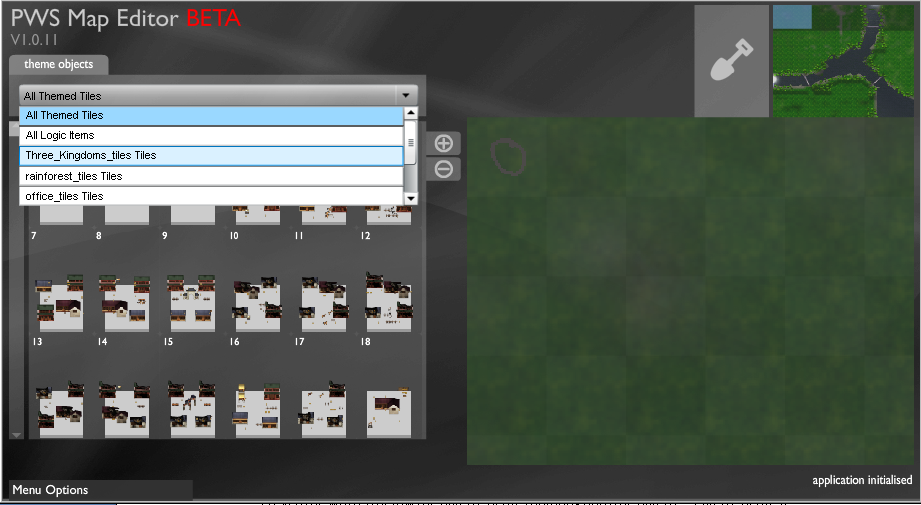
7) From the drop down menu located above the palette, you can select theme specific tiles and even look at all the tiles.
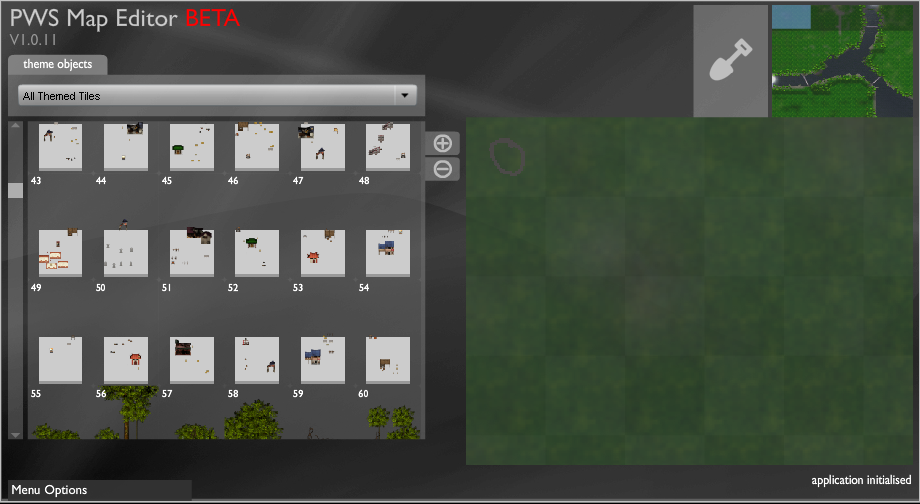
8) Move the scroll bar located on the left of the palette to scroll up and down on the palette and view a wider selection of tiles.

9) On top right hand corner of the screen, there is a mini-map.

10) Below the mini map, lies the main map.
11) On the mini-map, lies a viewport that highlights the portion of the map that is visible on the main map.
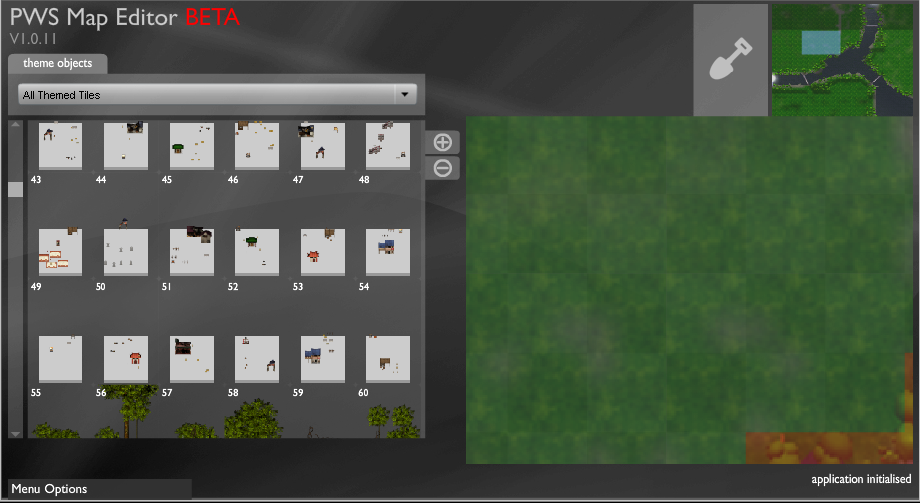
12) Left click on the viewport to move the viewport on different areas of the map
13) Double click on the viewport, to zoom-out and see the entire map on the main map window.
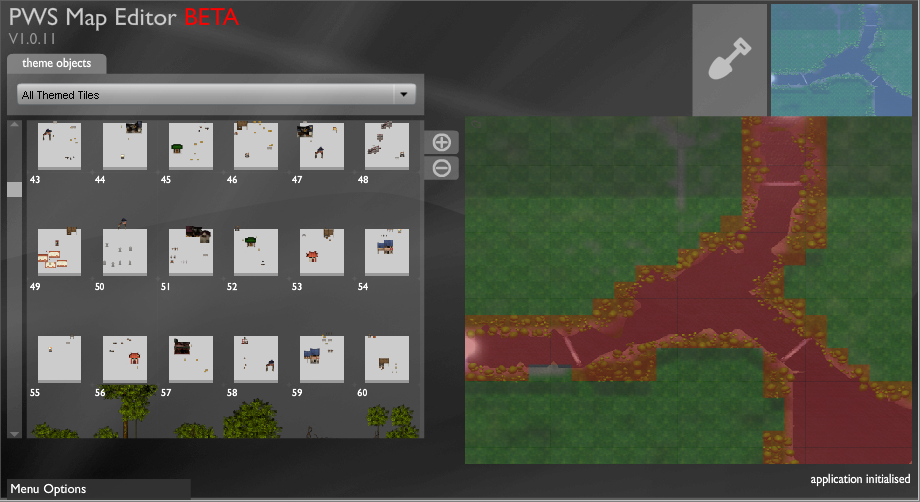
14) In the zoomed out position, double click again on the mini map to zoom-in
[Hint :- When you’re zoomed-in, you can see the viewport]
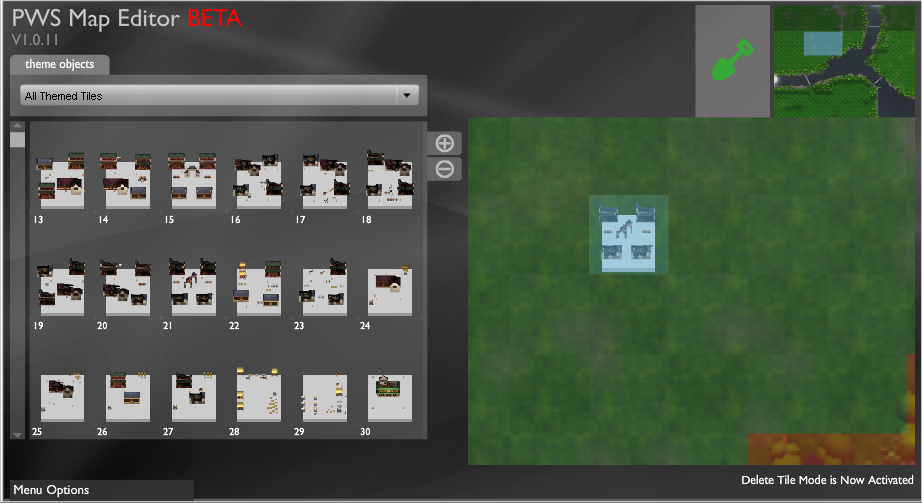
15) Move your cursor on the main map, and see that a light blue box follows the cursor. This box automatically snaps to the grid and prevents overlapping or misplacement of tiles.
16) Left click onto a tile on the palette. Next to the mini-map in the tile selection, you should be able to see the tile that you have selected.
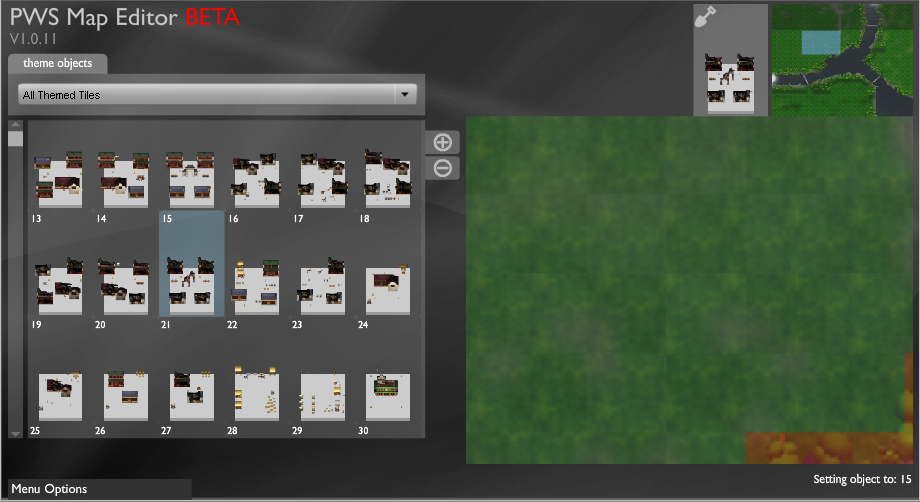
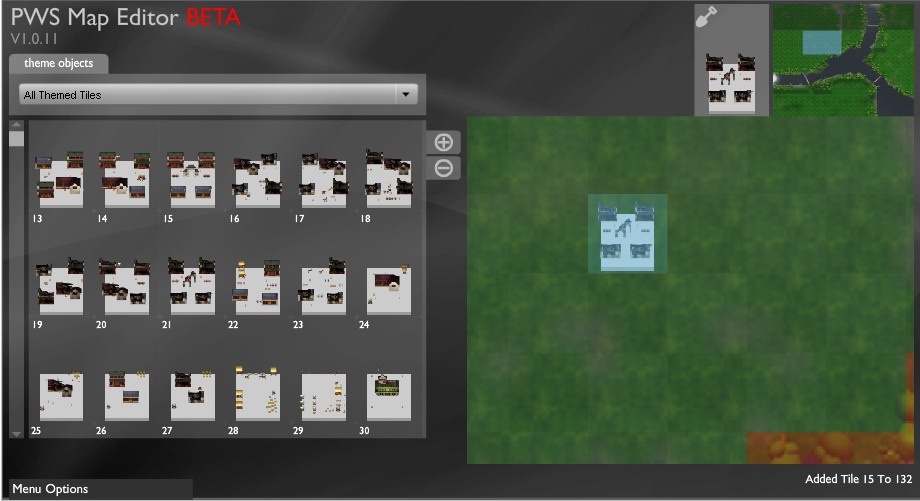
17) With the tile selected, left click on the main map to place the tile.
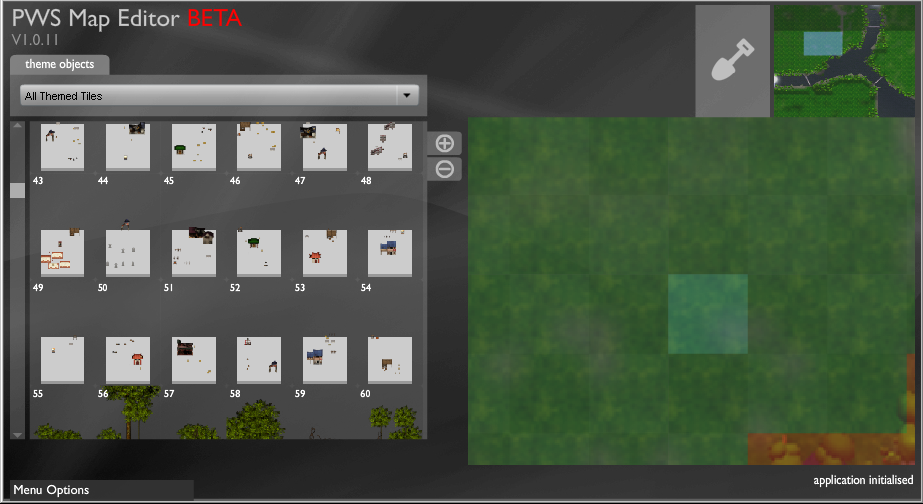
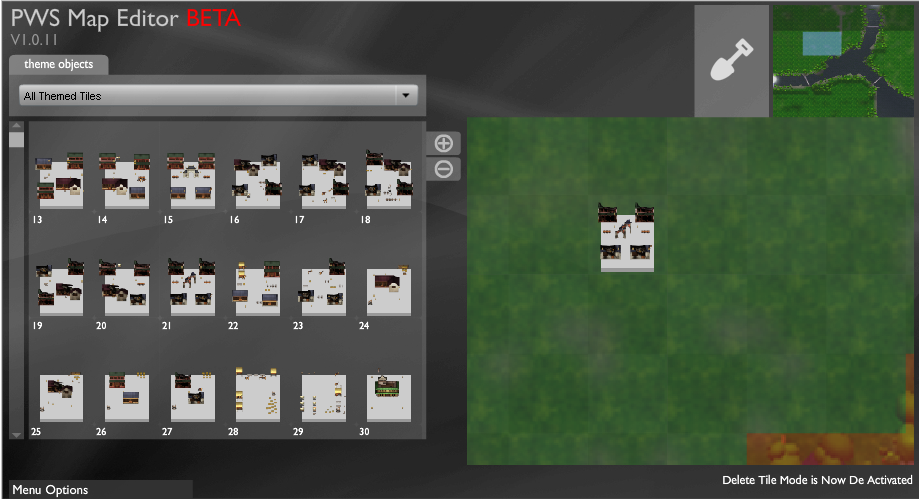
18) Click on the small shovel icon placed directly ,above the tile, and to the left of the mini-map to clear the tile selection.
19) Click on the shovel again, and you will see the shovel go green.
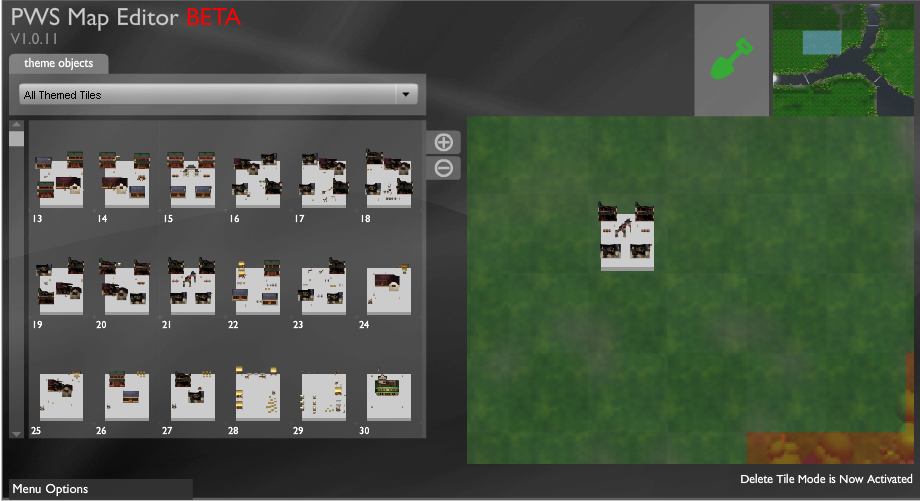
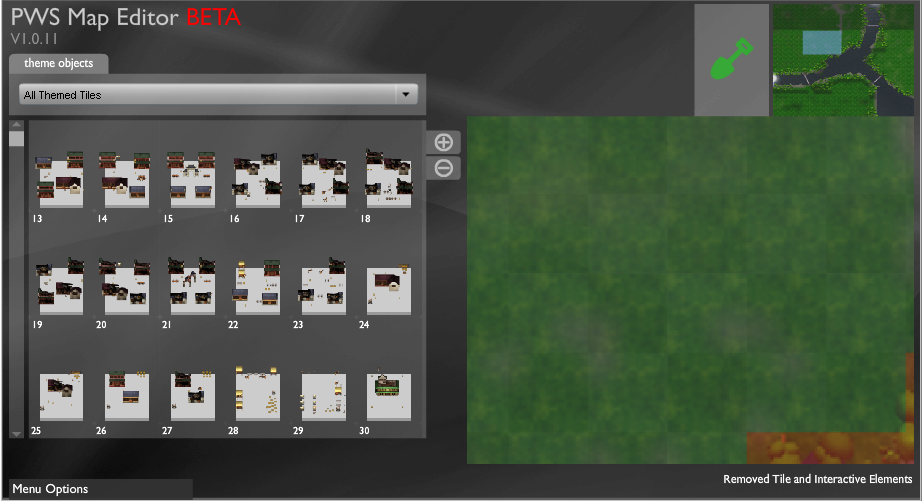
20) Click on the tile that you have placed on the map, with the shovel icon in its green state, to remove that tile.
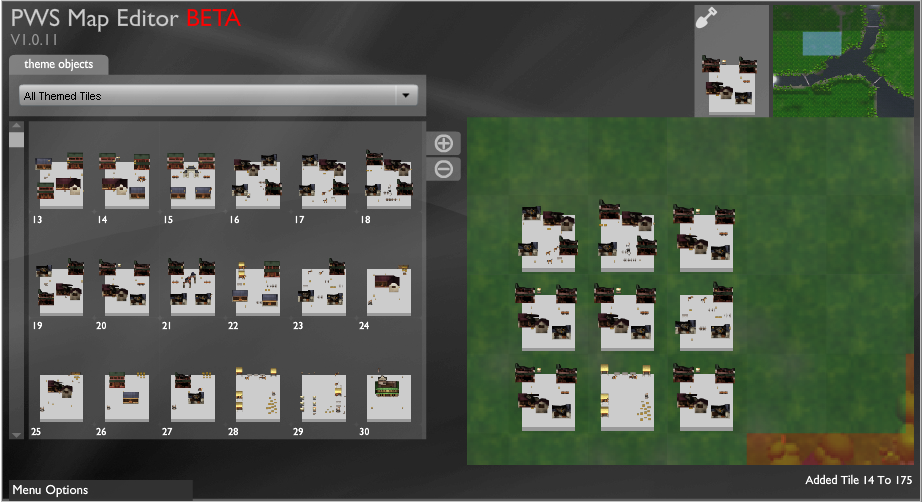
21) Place some more tiles on the map, as explained in steps 16 and 17.
22) Double click on the tile placed on the map to zoom-in on the tile contents.
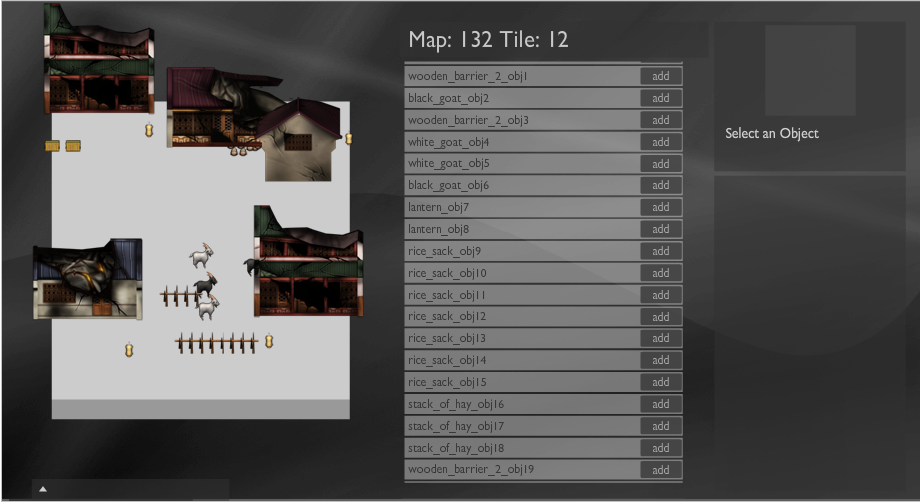
23) Mouse over the contents of the screen, the left hand side map shows visually the contents of the tile, the list in the middle shows the contents of the tile
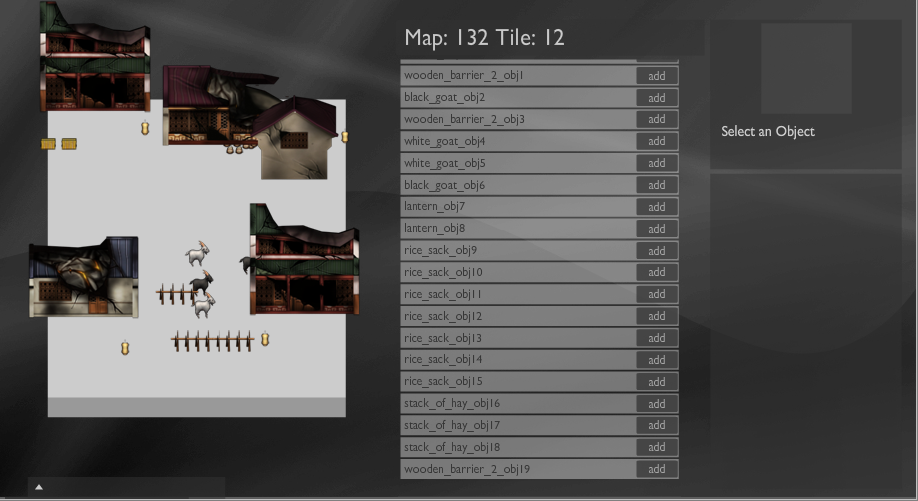
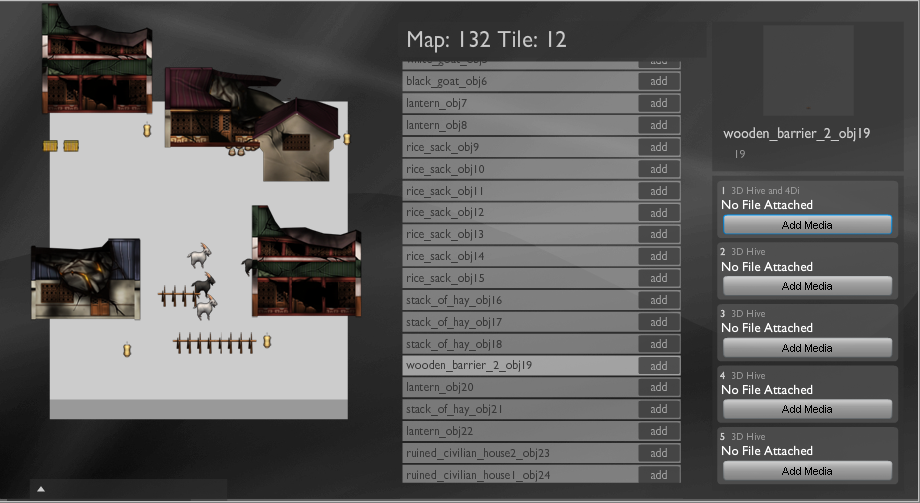
24) The “add” button located on the right of the objects on the list, allows media to be added to the objects.
To add media, click on “add”.

25) The panel that opens up on the bottom right hand corner of the screen allows you to add media, click on “add media” to attach media onto the objects.
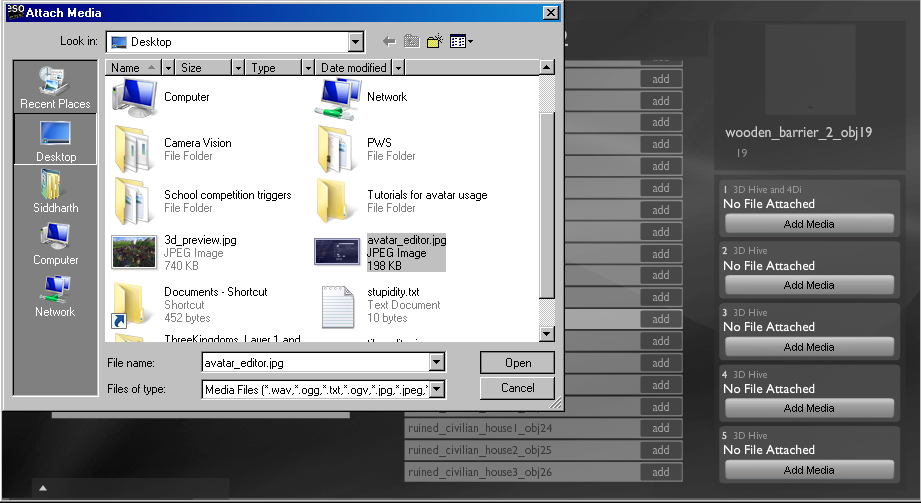
26) Browse to the file of the media that you want to add and select it.
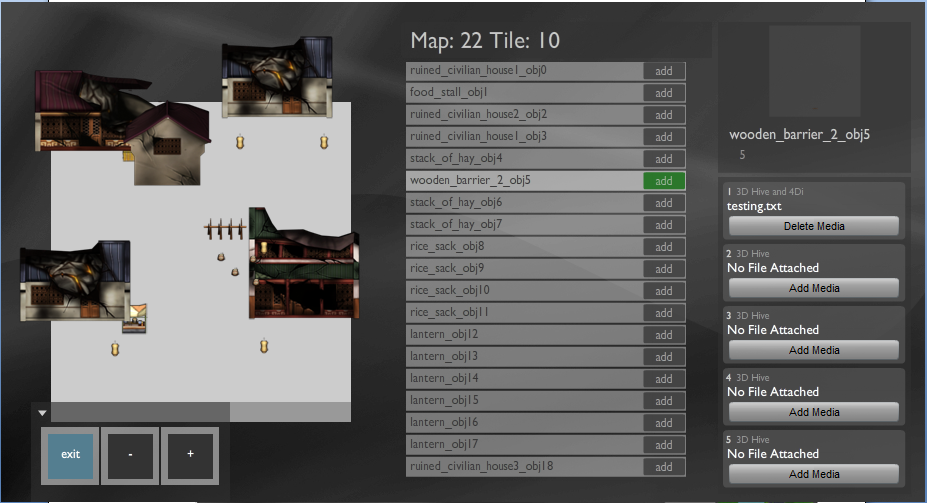
27) Now the add button becomes green. This signifies that the media object has been added.
Now you can click on “exit”.
27) After returning to the main map, mouse over menu options and click on preview to see your placed tiles in the 3-d world.
1) Open the esoteric editor.
2) Click on “create a new map”.
3) Enter the level name for your new map.
4) Select the “Art Asset Gallery” for your map, move the mouse over the drop down menu for the art asset gallery, there are many art asset galleries for e.g. Three Kingdoms, Fairy Tales, Contemporary and ancient cities.
Select the Three Kingdoms art asset gallery.
5) Select the theme for your map, on the bottom of the screen is a palette of themes. When you move the mouse over the theme, the theme’s name appears on the bottom of your screen and the theme’s map opens up on your screen.
Left click on the theme to select it, and select the 3 rivers map.
6) After selecting your theme, the main screen appears. The screen has a palette on the left hand side where all the tiles are located.
7) From the drop down menu located above the palette, you can select theme specific tiles and even look at all the tiles.
8) Move the scroll bar located on the left of the palette to scroll up and down on the palette and view a wider selection of tiles.
9) On top right hand corner of the screen, there is a mini-map.
10) Below the mini map, lies the main map.
11) On the mini-map, lies a viewport that highlights the portion of the map that is visible on the main map.
12) Left click on the viewport to move the viewport on different areas of the map
13) Double click on the viewport, to zoom-out and see the entire map on the main map window.
14) In the zoomed out position, double click again on the mini map to zoom-in
[Hint :- When you’re zoomed-in, you can see the viewport]
15) Move your cursor on the main map, and see that a light blue box follows the cursor. This box automatically snaps to the grid and prevents overlapping or misplacement of tiles.
16) Left click onto a tile on the palette. Next to the mini-map in the tile selection, you should be able to see the tile that you have selected.
17) With the tile selected, left click on the main map to place the tile.
18) Click on the small shovel icon placed directly ,above the tile, and to the left of the mini-map to clear the tile selection.
19) Click on the shovel again, and you will see the shovel go green.
20) Click on the tile that you have placed on the map, with the shovel icon in its green state, to remove that tile.
21) Place some more tiles on the map, as explained in steps 16 and 17.
22) Double click on the tile placed on the map to zoom-in on the tile contents.
23) Mouse over the contents of the screen, the left hand side map shows visually the contents of the tile, the list in the middle shows the contents of the tile
24) The “add” button located on the right of the objects on the list, allows media to be added to the objects.
To add media, click on “add”.
25) The panel that opens up on the bottom right hand corner of the screen allows you to add media, click on “add media” to attach media onto the objects.
26) Browse to the file of the media that you want to add and select it.
27) Now the add button becomes green. This signifies that the media object has been added.
Now you can click on “exit”.
27) After returning to the main map, mouse over menu options and click on preview to see your placed tiles in the 3-d world.
No comments:
Post a Comment