In any adventure game there will be props that the players and other characters can use, carry or consume. These props are called items.
In Esoteric any item of that the player consumes is called a consumable item. These items may modify the abilities or properties of the player’s avatar throughout the game or may even be simple tokens or markers in the game.
This tutorial explains the process of creating a consumable item in esoteric.
Creating a consumable item:-
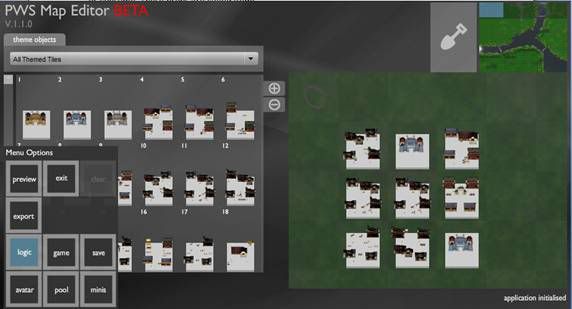
1) In the main window of the editor, move the mouse over “menu options” placed on the left bottom of the screen and click on “logic”.
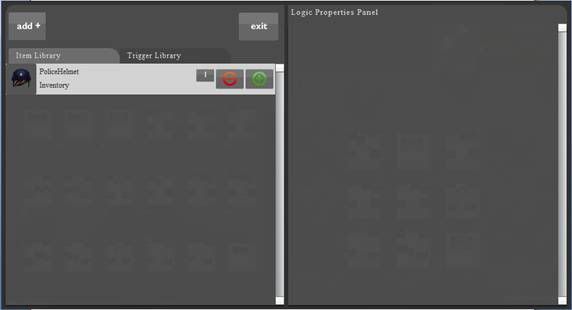
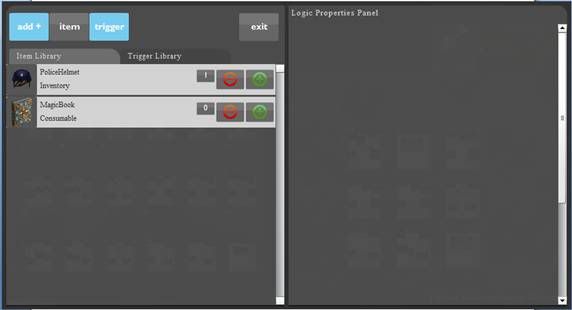
2) The logic editor opens up, on the left hand side is the “item library” and the “trigger library”, above these is the “add+” button, click on the “add+” button.
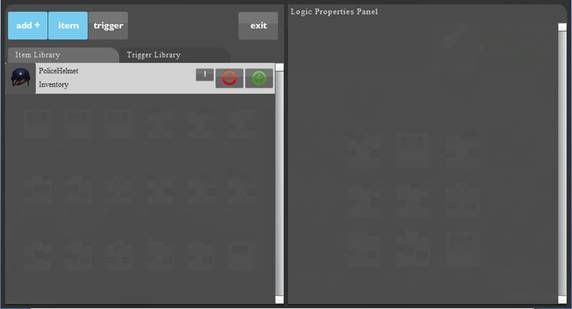
3) On clicking the “add+” button, two buttons named “item” and “trigger” open up. To start the item creation, click on the “item” button.
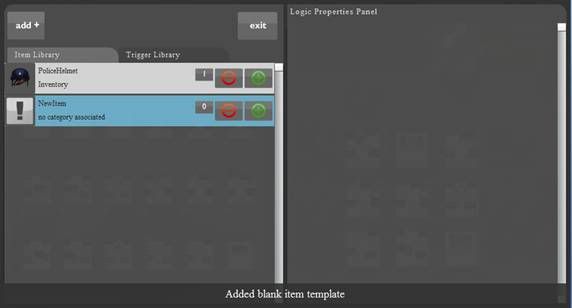
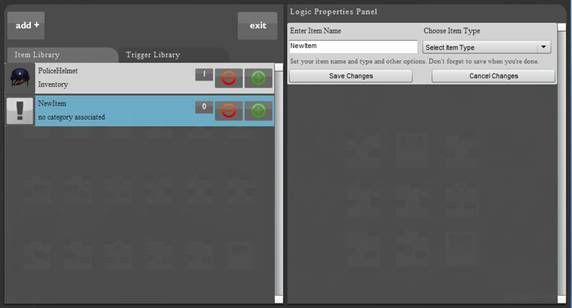
4) On clicking on the item button, an empty new item is added onto the item library, click on the “NewItem”.
5) After clicking on the “NewItem” , a new window opens up in the Logic Properties Panel.
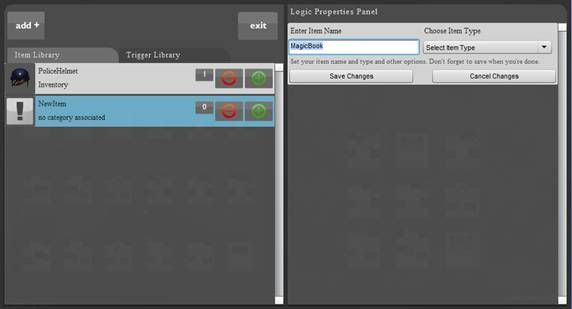
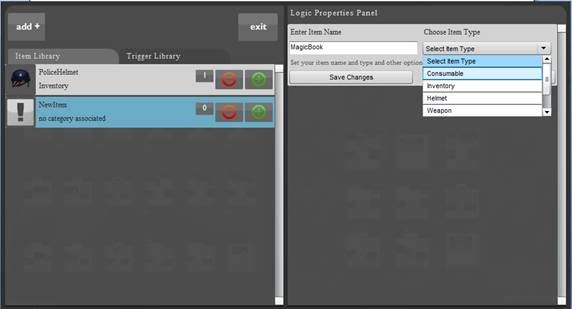
6) Enter the item name, and move the mouse over the drop down menu below “Choose Item Type” and select the item type as “Consumable”.
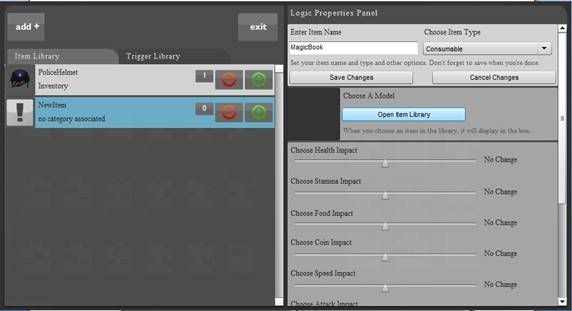
7) On selecting the item type as inventory, the logic properties panel fills up. Now we must decide what our Items should look like. Esoteric has a library of 3D models for you to choose from. Press “Open Item Library”.
8) A library containing various 3-d models opens; you can move the mouse over the 3-d models to view them. As you move the cursor over the 3-d models, a light blue box follows the cursor. This box can be used to select the 3-d model you wish to use.
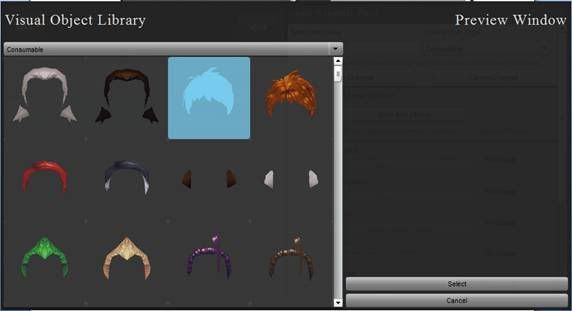
9) Move the scroll bar located on the right of the library to view more 3-d models.
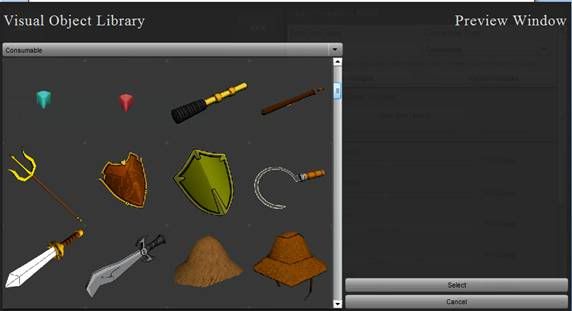
10) Left-click on the model to select it. The selected model will appear on the right of the visual library.
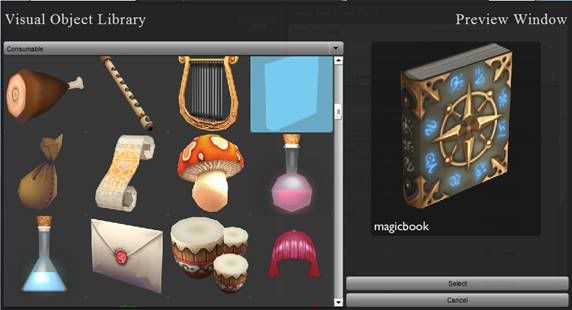
11) Click on the “Select” button situated at the bottom of the screen to confirm the selection.

12) The logic properties panel reappears. A scrollbar is located on the extreme right of the panel. Move it down to completely view the options you have for creating your item.
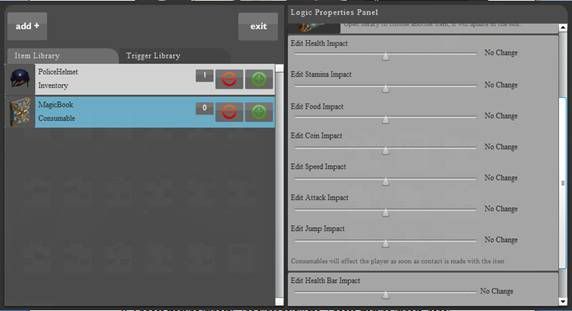
13) In the window below the 3-d library are seven sliders. These seven sliders are used to affect the properties of the avatar, as soon as it comes in contact with the consumable item. Their functions are listed below : -
1) Edit health impact: -
The slider below the “Edit health impact” panel chooses the impact that the inventory item has on the avatar’s speed.
Moving this slider to the right increases the health of the avatar whereas moving the slider to the left decreases the health of the avatar.
For instance, if the avatar picks up a health pack, his health may increase.
2) Edit stamina impact: - The slider below the “Edit stamina impact” panel, chooses the impact, the inventory item has on the avatar’s stamina.
Moving this slider to the right increases the stamina of the avatar whereas moving the slider to the left decreases the stamina of the avatar.
For instance, if the avatar picks up a magic potion, his stamina may increase.
Similarly, the other sliders can be used to change the number of food items and coins that the avatar possesses, and to edit the speed, attacking damage and the jump height of the avatar.
Move the three sliders, depending on how much you want your avatar’s properties to be changed on consuming the item.
14) The last section on the logic properties panel has two sliders, one to alter the health of the avatar, and the second one to alter the stamina of the avatar, or receiving the inventory item.
Their functions are listed below: -
1) Choose Health Bar Impact: -
The slider below the “Choose Health Bar impact” panel chooses the impact that the inventory item has on the avatar’s health, or the avatar’s ability to withstand attacks before dying.
For instance, if the avatar picks up a health pack, his health bar should increase.
2) Choose Stamina Bar impact: -
The slider below the “Choose Stamina Bar impact” panel chooses the impact that the inventory item has on avatar’s stamina or on avatar’s fatigue levels.
For instance, if the avatar picks up a magic potion, his stamina should increase.
Move the sliders to the left or to the right depending on the changes that you want to reflect on the avatar's health and stamina bar on recieving the consumable item.
15) Once you have updated the “Health Bar Impact” and the “Stamina Bar Impact”, all the settings of your inventory item have been updated, now you should go to the top of the Logic Properties Panel and click on “Save Changes” to save your inventory item.
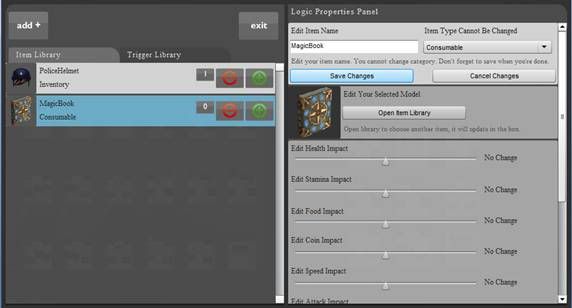
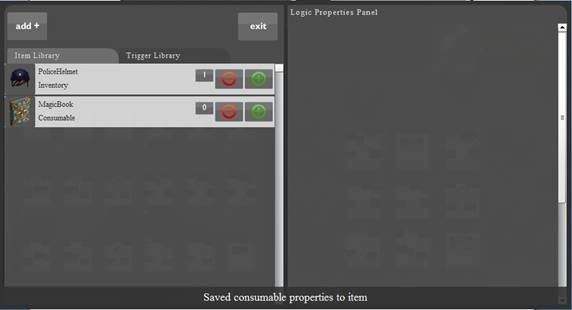
16) Thus we have created a consumable item. I named my item MagicBook, and gave it properties to increase the health bar of the avatar.
Now we must create a trigger which lets us place the item into the 3D world.
Creating a trigger for your inventory item and placing it on the map: -
1) Click on the “add +” button located on the top left of your screen, and click on “trigger”.
2) You can now see a trigger called “NewTrigger” in the trigger library. Click on the “NewTrigger”.
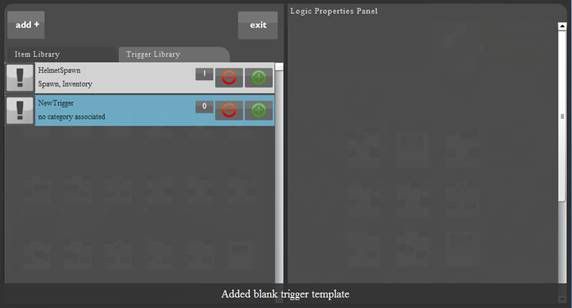
3) After clicking on the NewTrigger , a new window opens up in the Logic Properties Panel.
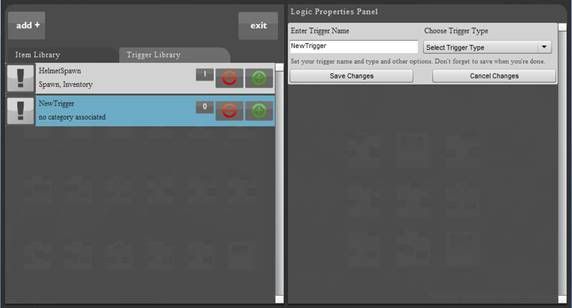
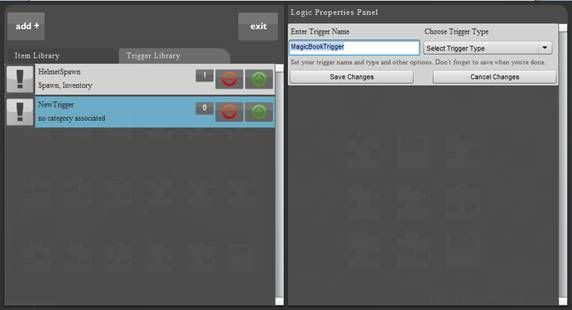
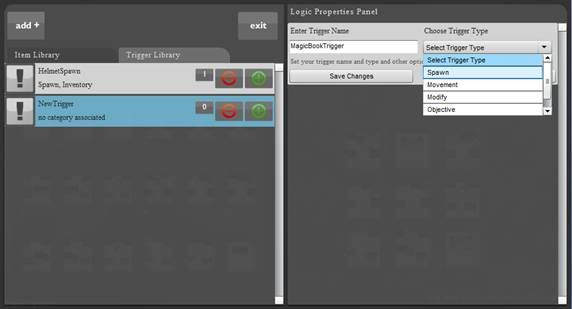
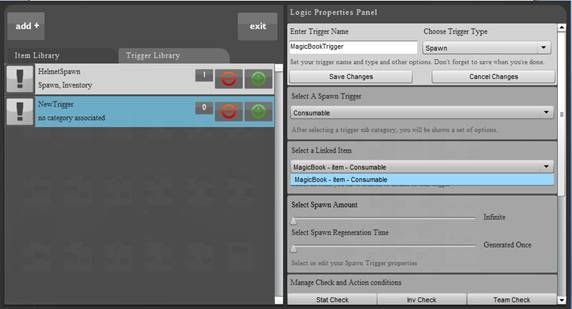
4) Enter the trigger name and choose the trigger type as spawn.
5) On specifying the trigger type as spawn, another drop down menu titled “Select Spawn Type” appears in the logic properties panel. As you have just created a consumable item, select the spawn type as “Consumable”.
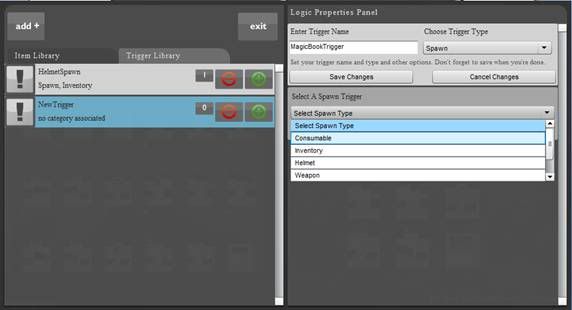
6) On selecting the spawn type as consumable, another sub-panel titled “Select Linked Item” appears below it. The drop down menu below it contains all the consumable items that you have created.
From the drop down menu, select the consumable item that you have just created. We will select the MagicBook consumable item that we had created in the last section of this tutorial.
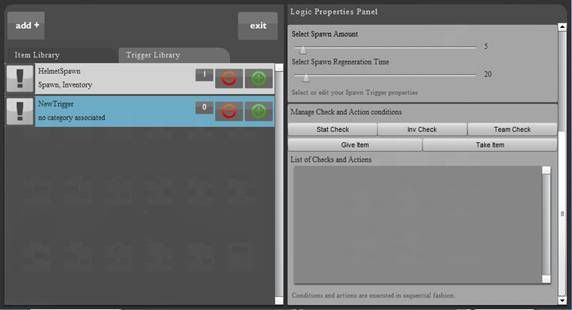
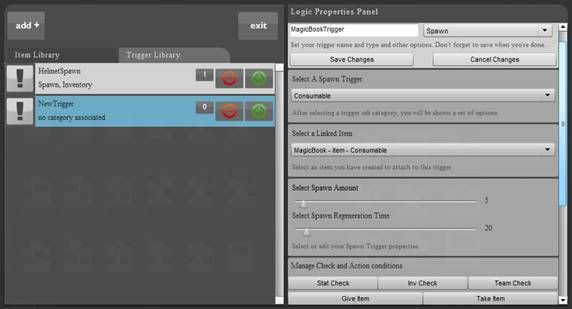
7) Move the scroll bar down and you come across another sub panel with two sliders, titled, “Select Spawn Amount” and “Select Spawn Regeneration Time”.
Select Spawn Amount: - This indicates the total no. of times the consumable item is generated. This decides how many times an avatar can pick up the item. So, if the spawn amount is set to a value of 5, the consumable item is generated 5 times in the 3-d world.
The default value of the spawn amount is set to infinite. Moving the slider once to the right sets the spawn amount to 1, and each movement of the slider to the right increases the spawn amount by 1 till it reaches a maximum of 100.
Select Spawn Regeneration Time:- This indicates the time interval between the picking up of the consumable item and its regeneration. So, if the spawn regeneration time is 5, the consumable item is regenerated 5 seconds after an avatar picks it up.
By default, the consumable item is regenerated as soon as it is picked up, but each movement of the slider to the right increases the time interval between picking up the item and its regeneration by 10 seconds.
In our example, we will choose the spawn amount as 5 and spawn regeneration time as 20.
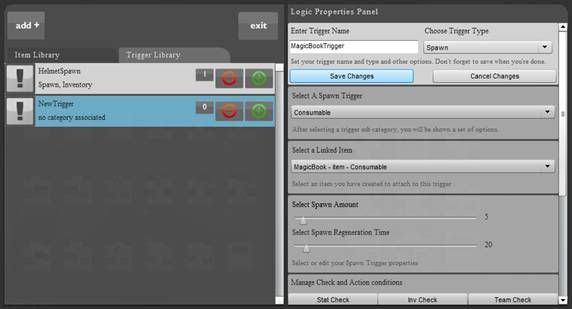
8) Once you have specified the Spawn Amount and the Spawn Regeneration Time, you should now name your trigger and save it. To do so, you need to go to the top of the Logic Properties Panel.
Use the scroll bar on the right to reach the top of the Logic Properties Panel.
9) Click on “Save Changes” to save your trigger.
10) The trigger now appears in the Trigger Library with its new name.
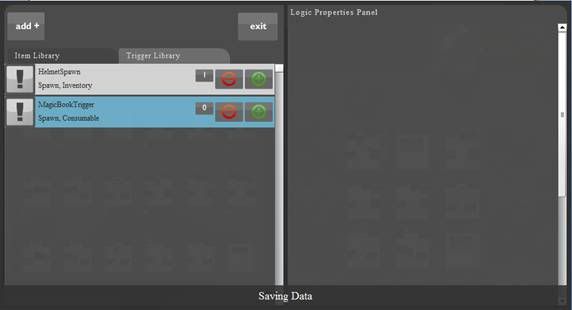
11) Now your trigger is ready to be placed on the map. Click on exit to return to the map creation screen.
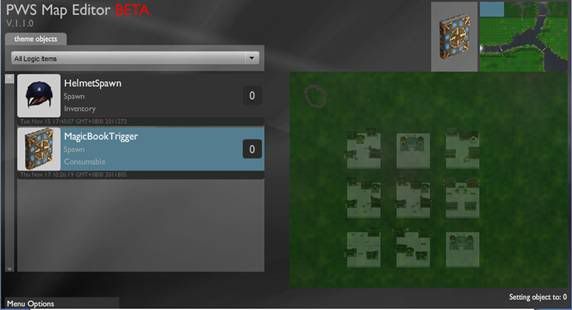
12) In order to create the consumable item on the map, you will have to place the trigger on the map. To do that, select “all logic items” from the drop down menu located on the palette.
13) Your trigger now appears in the palette.
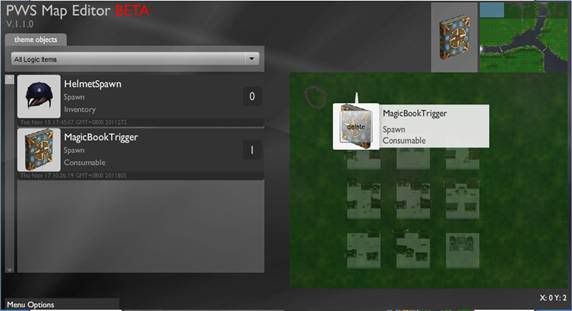
14) Left click on the trigger. Next to the minimap, you should be able to see your trigger in the selection pane.
15) With the trigger selected, left click on the main map to place your trigger.
16) Your consumable item will be created in the 3-d world, exactly where you placed your trigger on the map.
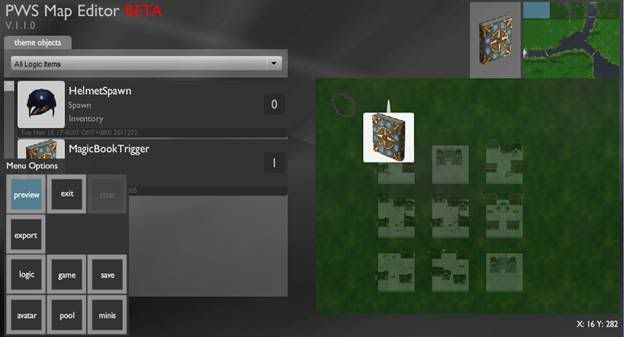
17) Now you can view the consumable item in the 3-d world. In order to do that, go to “Menu Options” on the left bottom of the screen and click on “preview”.
In Esoteric any item of that the player consumes is called a consumable item. These items may modify the abilities or properties of the player’s avatar throughout the game or may even be simple tokens or markers in the game.
This tutorial explains the process of creating a consumable item in esoteric.
Creating a consumable item:-
1) In the main window of the editor, move the mouse over “menu options” placed on the left bottom of the screen and click on “logic”.
2) The logic editor opens up, on the left hand side is the “item library” and the “trigger library”, above these is the “add+” button, click on the “add+” button.
3) On clicking the “add+” button, two buttons named “item” and “trigger” open up. To start the item creation, click on the “item” button.
4) On clicking on the item button, an empty new item is added onto the item library, click on the “NewItem”.
5) After clicking on the “NewItem” , a new window opens up in the Logic Properties Panel.
6) Enter the item name, and move the mouse over the drop down menu below “Choose Item Type” and select the item type as “Consumable”.
7) On selecting the item type as inventory, the logic properties panel fills up. Now we must decide what our Items should look like. Esoteric has a library of 3D models for you to choose from. Press “Open Item Library”.
8) A library containing various 3-d models opens; you can move the mouse over the 3-d models to view them. As you move the cursor over the 3-d models, a light blue box follows the cursor. This box can be used to select the 3-d model you wish to use.
9) Move the scroll bar located on the right of the library to view more 3-d models.
10) Left-click on the model to select it. The selected model will appear on the right of the visual library.
11) Click on the “Select” button situated at the bottom of the screen to confirm the selection.
12) The logic properties panel reappears. A scrollbar is located on the extreme right of the panel. Move it down to completely view the options you have for creating your item.
13) In the window below the 3-d library are seven sliders. These seven sliders are used to affect the properties of the avatar, as soon as it comes in contact with the consumable item. Their functions are listed below : -
1) Edit health impact: -
The slider below the “Edit health impact” panel chooses the impact that the inventory item has on the avatar’s speed.
Moving this slider to the right increases the health of the avatar whereas moving the slider to the left decreases the health of the avatar.
For instance, if the avatar picks up a health pack, his health may increase.
2) Edit stamina impact: - The slider below the “Edit stamina impact” panel, chooses the impact, the inventory item has on the avatar’s stamina.
Moving this slider to the right increases the stamina of the avatar whereas moving the slider to the left decreases the stamina of the avatar.
For instance, if the avatar picks up a magic potion, his stamina may increase.
Similarly, the other sliders can be used to change the number of food items and coins that the avatar possesses, and to edit the speed, attacking damage and the jump height of the avatar.
Move the three sliders, depending on how much you want your avatar’s properties to be changed on consuming the item.
14) The last section on the logic properties panel has two sliders, one to alter the health of the avatar, and the second one to alter the stamina of the avatar, or receiving the inventory item.
Their functions are listed below: -
1) Choose Health Bar Impact: -
The slider below the “Choose Health Bar impact” panel chooses the impact that the inventory item has on the avatar’s health, or the avatar’s ability to withstand attacks before dying.
For instance, if the avatar picks up a health pack, his health bar should increase.
2) Choose Stamina Bar impact: -
The slider below the “Choose Stamina Bar impact” panel chooses the impact that the inventory item has on avatar’s stamina or on avatar’s fatigue levels.
For instance, if the avatar picks up a magic potion, his stamina should increase.
Move the sliders to the left or to the right depending on the changes that you want to reflect on the avatar's health and stamina bar on recieving the consumable item.
15) Once you have updated the “Health Bar Impact” and the “Stamina Bar Impact”, all the settings of your inventory item have been updated, now you should go to the top of the Logic Properties Panel and click on “Save Changes” to save your inventory item.
16) Thus we have created a consumable item. I named my item MagicBook, and gave it properties to increase the health bar of the avatar.
Now we must create a trigger which lets us place the item into the 3D world.
Creating a trigger for your inventory item and placing it on the map: -
1) Click on the “add +” button located on the top left of your screen, and click on “trigger”.
2) You can now see a trigger called “NewTrigger” in the trigger library. Click on the “NewTrigger”.
3) After clicking on the NewTrigger , a new window opens up in the Logic Properties Panel.
4) Enter the trigger name and choose the trigger type as spawn.
5) On specifying the trigger type as spawn, another drop down menu titled “Select Spawn Type” appears in the logic properties panel. As you have just created a consumable item, select the spawn type as “Consumable”.
6) On selecting the spawn type as consumable, another sub-panel titled “Select Linked Item” appears below it. The drop down menu below it contains all the consumable items that you have created.
From the drop down menu, select the consumable item that you have just created. We will select the MagicBook consumable item that we had created in the last section of this tutorial.
7) Move the scroll bar down and you come across another sub panel with two sliders, titled, “Select Spawn Amount” and “Select Spawn Regeneration Time”.
Select Spawn Amount: - This indicates the total no. of times the consumable item is generated. This decides how many times an avatar can pick up the item. So, if the spawn amount is set to a value of 5, the consumable item is generated 5 times in the 3-d world.
The default value of the spawn amount is set to infinite. Moving the slider once to the right sets the spawn amount to 1, and each movement of the slider to the right increases the spawn amount by 1 till it reaches a maximum of 100.
Select Spawn Regeneration Time:- This indicates the time interval between the picking up of the consumable item and its regeneration. So, if the spawn regeneration time is 5, the consumable item is regenerated 5 seconds after an avatar picks it up.
By default, the consumable item is regenerated as soon as it is picked up, but each movement of the slider to the right increases the time interval between picking up the item and its regeneration by 10 seconds.
In our example, we will choose the spawn amount as 5 and spawn regeneration time as 20.
8) Once you have specified the Spawn Amount and the Spawn Regeneration Time, you should now name your trigger and save it. To do so, you need to go to the top of the Logic Properties Panel.
Use the scroll bar on the right to reach the top of the Logic Properties Panel.
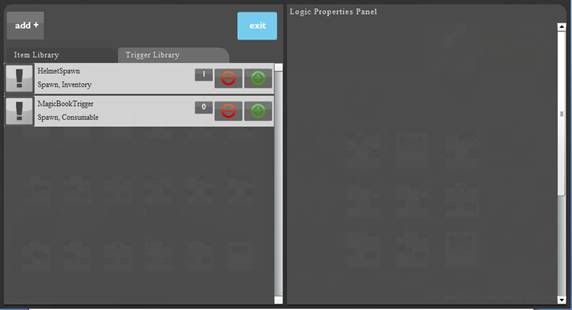
9) Click on “Save Changes” to save your trigger.
10) The trigger now appears in the Trigger Library with its new name.
11) Now your trigger is ready to be placed on the map. Click on exit to return to the map creation screen.
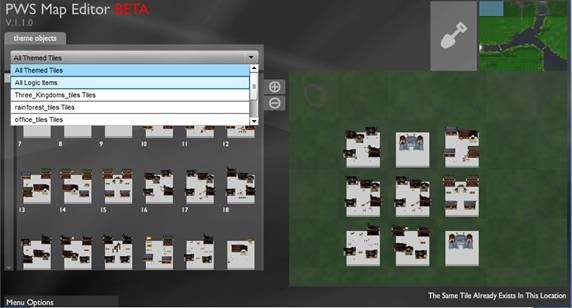
12) In order to create the consumable item on the map, you will have to place the trigger on the map. To do that, select “all logic items” from the drop down menu located on the palette.
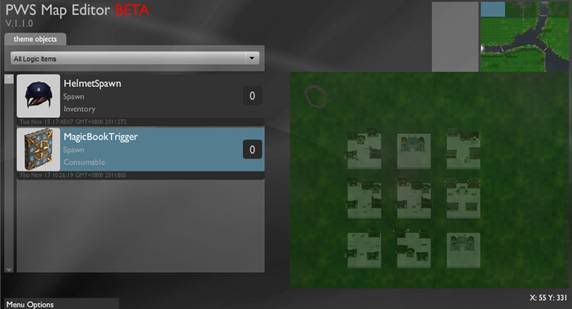
13) Your trigger now appears in the palette.
14) Left click on the trigger. Next to the minimap, you should be able to see your trigger in the selection pane.
15) With the trigger selected, left click on the main map to place your trigger.
16) Your consumable item will be created in the 3-d world, exactly where you placed your trigger on the map.
17) Now you can view the consumable item in the 3-d world. In order to do that, go to “Menu Options” on the left bottom of the screen and click on “preview”.
No comments:
Post a Comment